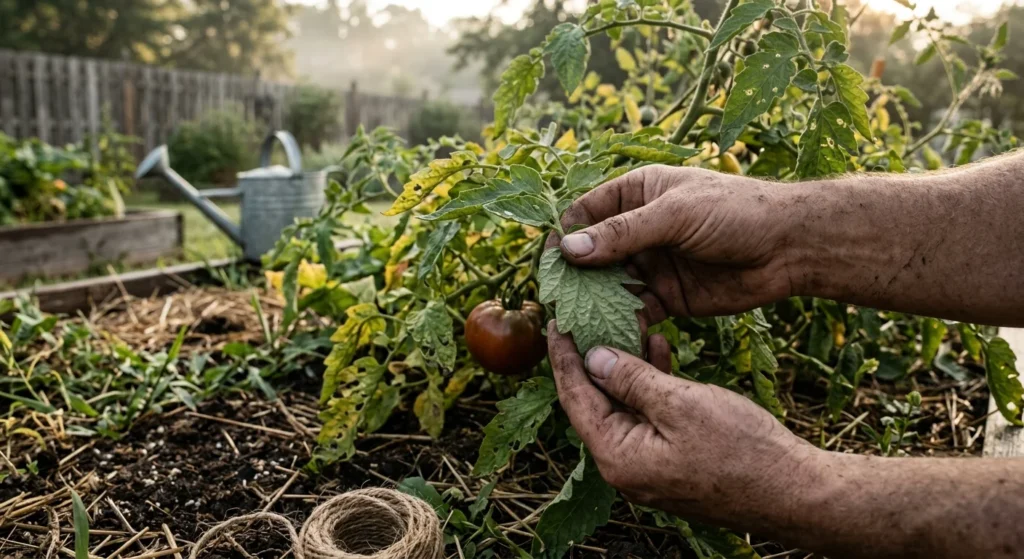
Transforming your windowsill into a thriving indoor garden requires surprisingly little money when you master the art of leaf propagation. You can clone dozens of robust houseplants that grow from leaf cuttings using just a sharp pair of shears, standard soil mix, and a single healthy leaf. This rewarding technique allows you to multiply your favorite leaf propagation houseplants, rescue damaged foliage, and share beautiful gifts with fellow plant enthusiasts. Whether you want to expand your collection or practice basic plant care, mastering these seven resilient species guarantees success. You will enjoy watching tiny roots sprout and transform individual leaves into full, healthy plants.
Tip #1: Snake Plant (Sansevieria)
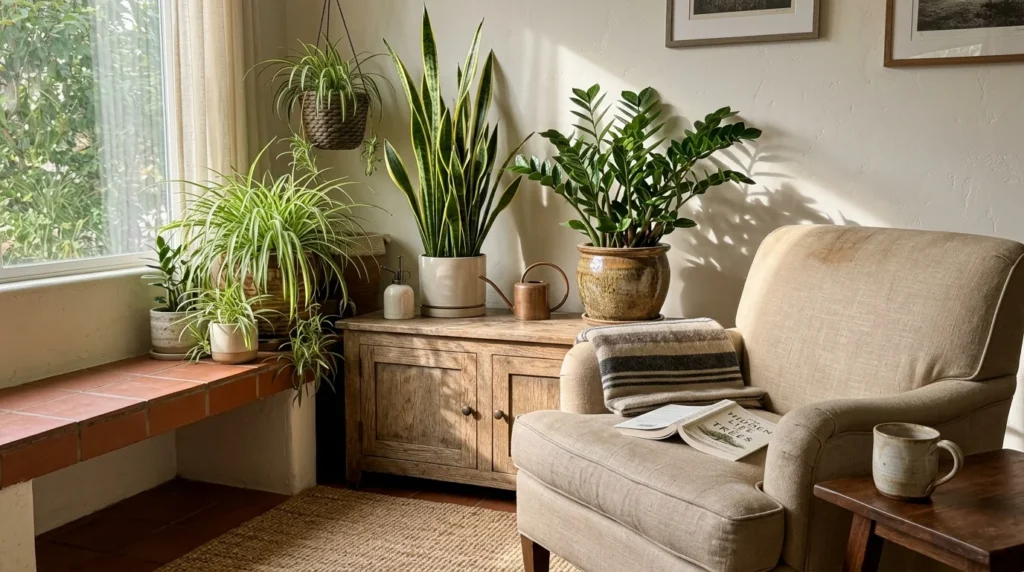
The snake plant (*Sansevieria trifasciata*) stands out as one of the most forgiving houseplants that grow from leaf cuttings. Known for its upright, sword-like foliage, this resilient succulent adapts to indoor light levels ranging from dim corners to bright windowsills. Propagating snake plants from a single leaf lets you expand your indoor garden rapidly without spending extra money at local plant nurseries.
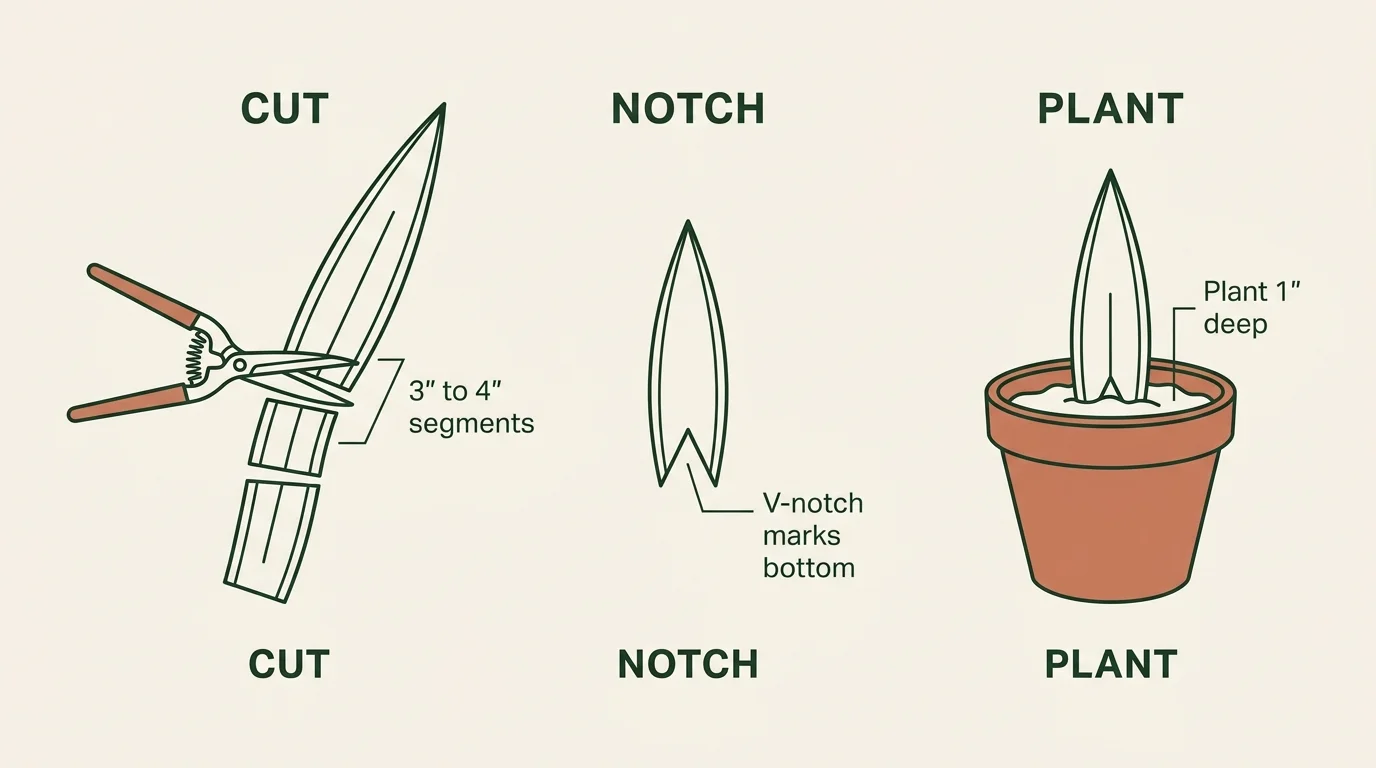
To start, select a mature, healthy leaf from your parent plant. Use a sterile knife or sharp garden shears to slice the leaf horizontally into segments measuring three to four inches long. Always pay close attention to orientation; planting a leaf segment upside down stops root development completely. Cut a small V-notch into the bottom edge of each segment to mark the direction and increase the root-producing surface area. Allow your sliced cuttings to sit on a clean paper towel for twenty-four hours so the raw cut forms a protective callus. This crucial step prevents soil-borne bacteria and moisture from causing fungal rot.
Once callused, push the bottom edge of each segment one inch deep into a light, well-draining succulent soil mix. Water the soil lightly, keeping it barely moist while avoiding waterlogged conditions. Place the container in bright, indirect light where temperatures remain between 65°F and 80°F. Within four to eight weeks, tiny roots emerge from the base, followed by new underground shoots called rhizomes. These rhizomes eventually push up tiny new plantlets alongside the original leaf segment. Note that variegated snake plant varieties with yellow borders revert to solid green when grown from leaf cuttings; you must use root division to keep yellow striping intact.
Tip #2: African Violet (Saintpaulia)
African violets remain a windowsill favorite because they produce vibrant blooms under standard indoor conditions. While many growers buy mature flowering specimens, collecting single leaves offers an easy plants to propagate from leaves path toward growing dozens of brand-new plants for your home.
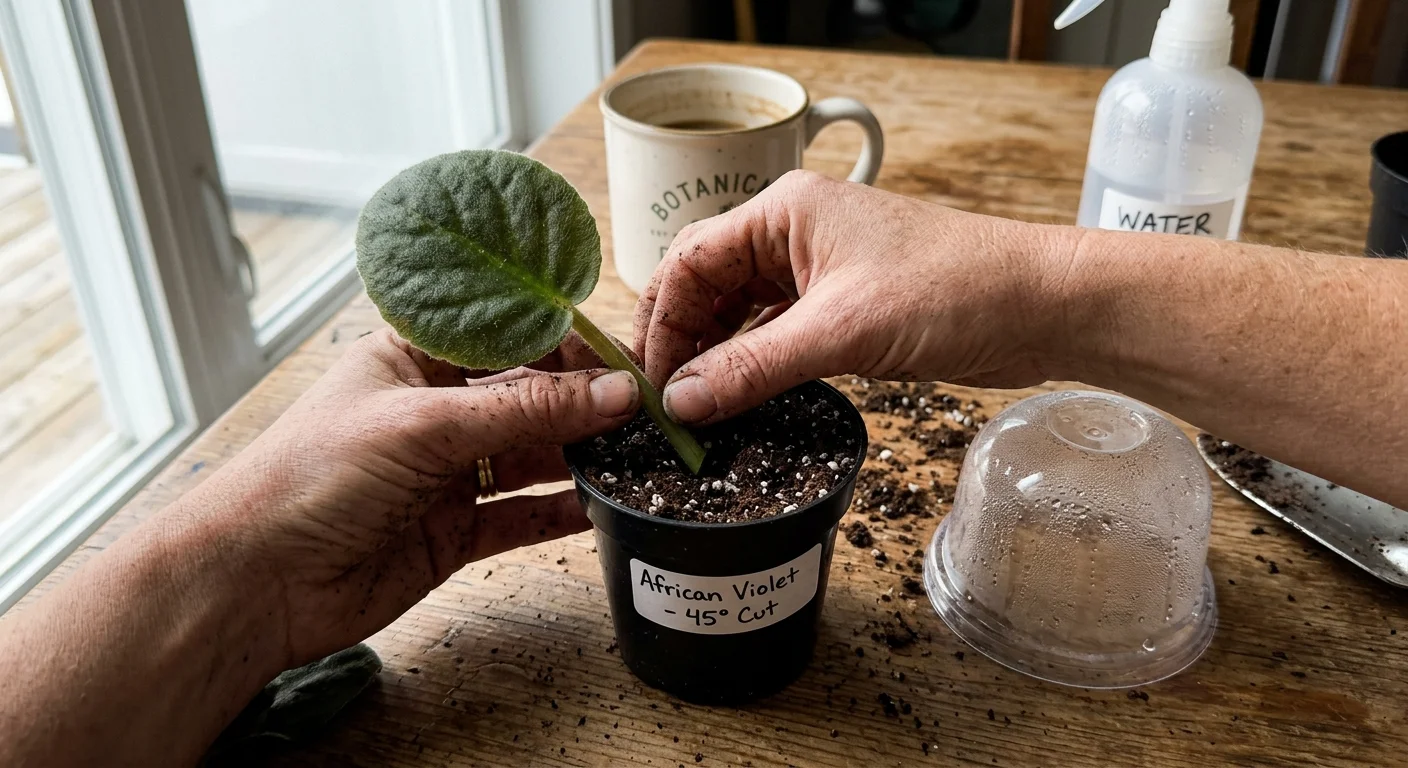
Choose a firm, healthy leaf from the middle ring of your plant. Avoid older yellowing leaves at the base and tiny tender leaves at the center crown. Snip the leaf stem—known as the petiole—at a 45-degree angle, leaving about one to one-and-a-half inches attached to the leaf blade. The angled cut provides extra surface area for root formation and encourages baby plantlets to emerge in front of the leaf where they receive maximum light. Let the petiole air-dry for fifteen minutes before potting.
Fill a small plastic pot with a fluffy seed-starting mixture composed of equal parts peat moss and perlite. Insert the angled stem into the damp mix until the base of the leaf blade rests just above the soil surface. To retain essential humidity, enclose the pot inside a clear plastic bag or cover it with a plastic propagation dome. Position the pot under bright fluorescent lights or on an eastern windowsill away from direct midday sun.
Moisture control makes or breaks African violet propagation. The soil mix should feel like a wrung-out sponge; soggy soil causes stem rot within days. After three to four weeks, the cutting anchors itself into the media as delicate white roots take hold. By week six or eight, tiny green leaf clusters poke above the soil surface. Wait until these baby plantlets develop four leaves each before gently separating them from the mother leaf and potting them individually.
Tip #3: Jade Plant (Crassula ovata)
Jade plants (*Crassula ovata*) represent classic succulents prized for their thick stems and glossy, oval leaves. These resilient plants store generous water reserves inside their fleshy leaves; this characteristic makes a single leaf plant propagation guide exceptionally simple to follow. If a jade leaf drops onto moist soil, it frequently sprouts roots without any human intervention.
For intentional leaf propagation, choose plump, fully grown leaves with rich green color. Avoid thin or shriveled leaves, as they lack the energy reserves needed to generate roots. Grasp the leaf firmly near the main stem, then gently wiggle it back and forth until it snaps off cleanly. Ensuring you harvest the entire intact leaf base is critical; if tissue tears or remains attached to the stem, the leaf dries up instead of sprouting.
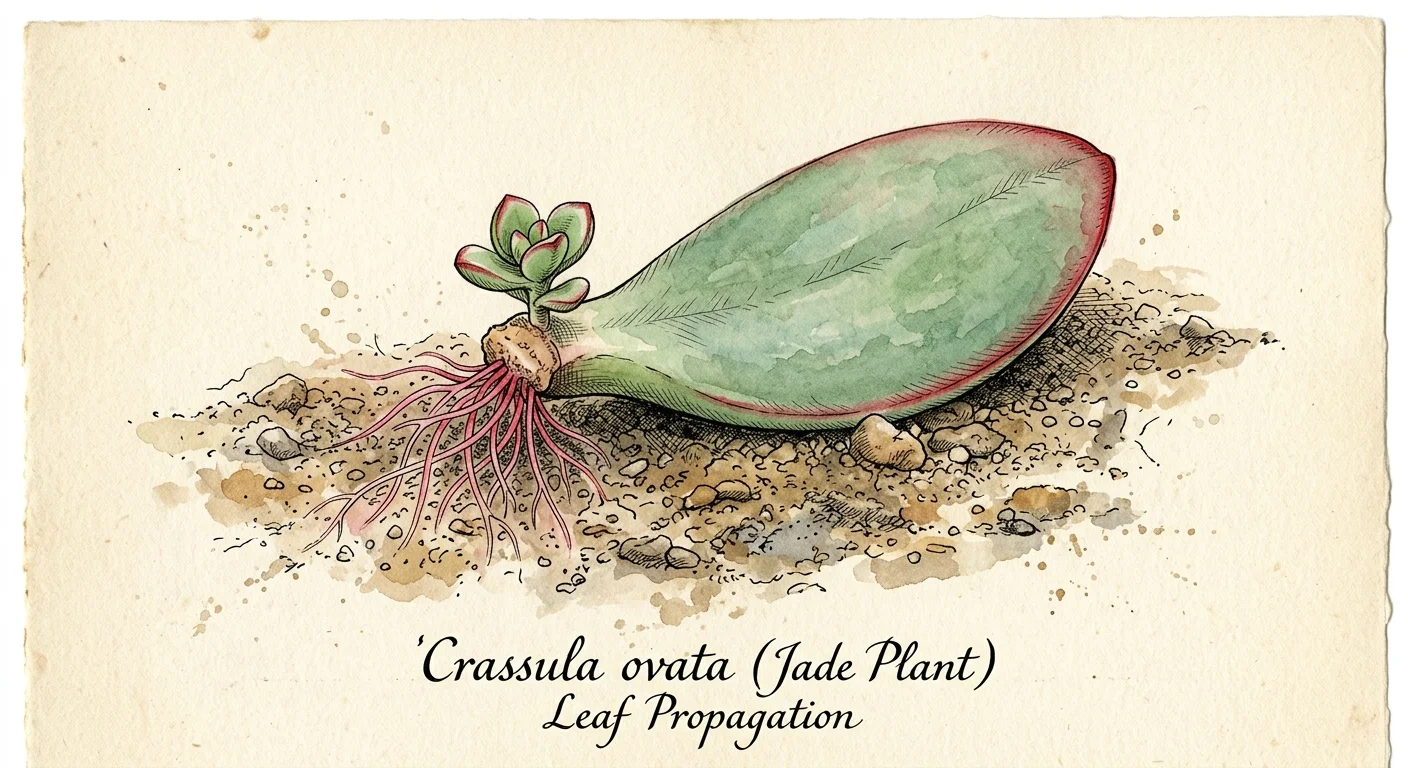
Place your harvested leaves on a clean, dry tray in bright indirect light for three to five days. During this callusing phase, the exposed tissue dries out and seals against pathogens. Once callused, lay the leaves flat on top of a well-draining cactus and succulent potting mix. Do not bury the leaf base under the soil surface; resting the leaf on top of the substrate prevents decay while encouraging roots to stretch downward toward moisture.
Resist the urge to water the leaves for the first two weeks. The leaf relies on internal water reserves to generate roots and a miniature rosette at its base. Once you spot pink roots reaching for the soil, mist the surface every few days. Over two to three months, the mother leaf shrinks as it transfers nutrients into the young plant. When the mother leaf dries completely, detach it gently and pot your new jade plant into a small container.
Tip #4: ZZ Plant (Zamioculcas zamiifolia)
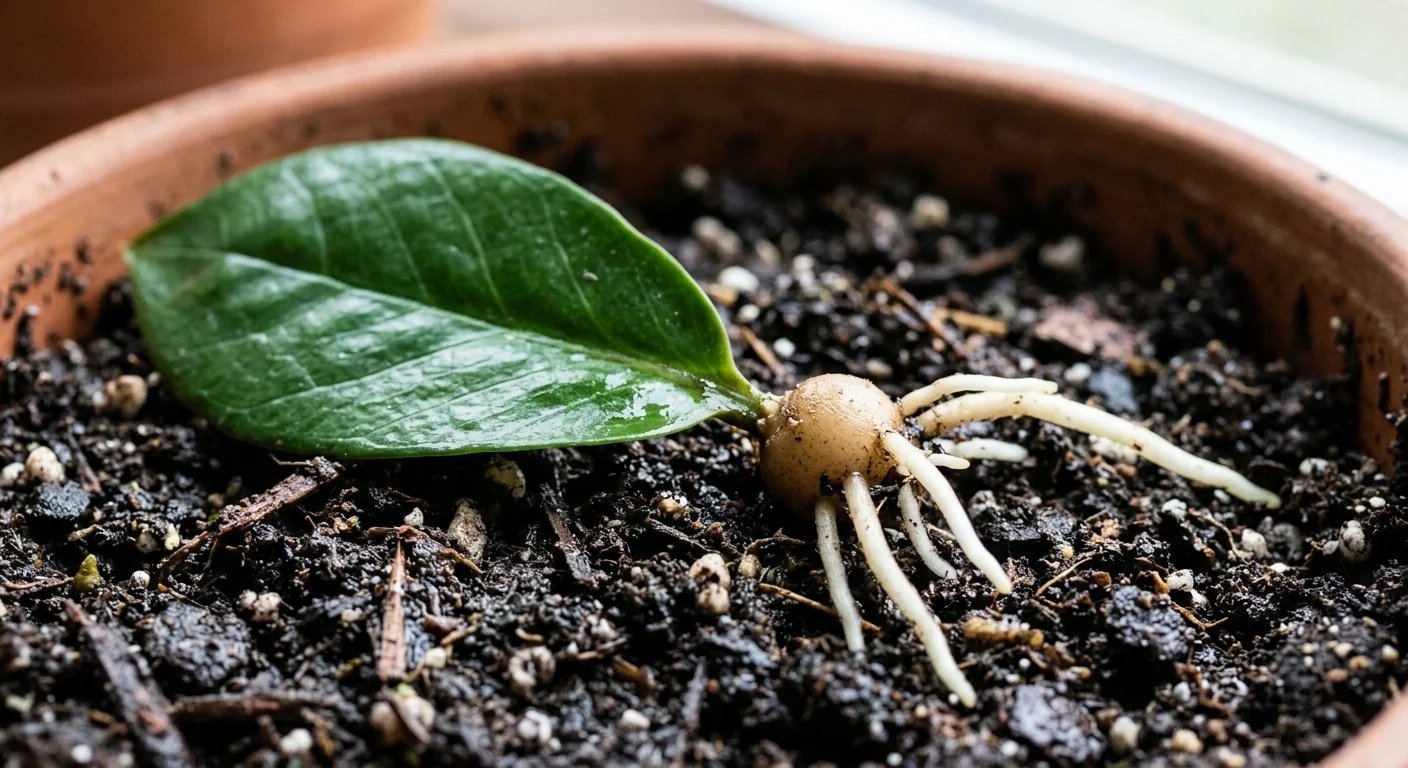
The ZZ plant (*Zamioculcas zamiifolia*) earns praise for surviving neglect, making it a staple in low-light homes and office spaces. What many plant owners do not realize is that individual ZZ leaflets possess the remarkable ability to regenerate complete new plants, including underground storage tubers called rhizomes.
To begin propagating, slice individual oval leaflets from the main leaf stalk using a clean utility knife. Leave a tiny sliver of the small stem attached to the leaflet base. Allow the leaflets to sit on a paper towel for two hours so fresh cuts dry out completely.
Prepare a gritty propagation substrate using two parts coarse perlite and one part potting soil. Insert the bottom third of each leaflet directly into the soil mix, firming the substrate gently around the base so the leaf stands upright. Alternatively, you can rest the lower edge of the leaflet in a shallow glass of clean water. Place the container in a warm room receiving bright, indirect light.
Patience remains mandatory when attempting leaf propagation houseplants of this species. ZZ leaf cuttings progress far slower than most tropical foliage plants. Over three to six months, the leaflet base swells and transforms into a round, tuberous rhizome equipped with thick white roots. Once this underground bulb forms, it pushes out new upright stems. Even if the original leaflet turns yellow after several months, keep the pot intact if the underground rhizome remains firm; new shoots will eventually emerge.
Tip #5: Watermelon Peperomia (Peperomia argyreia)
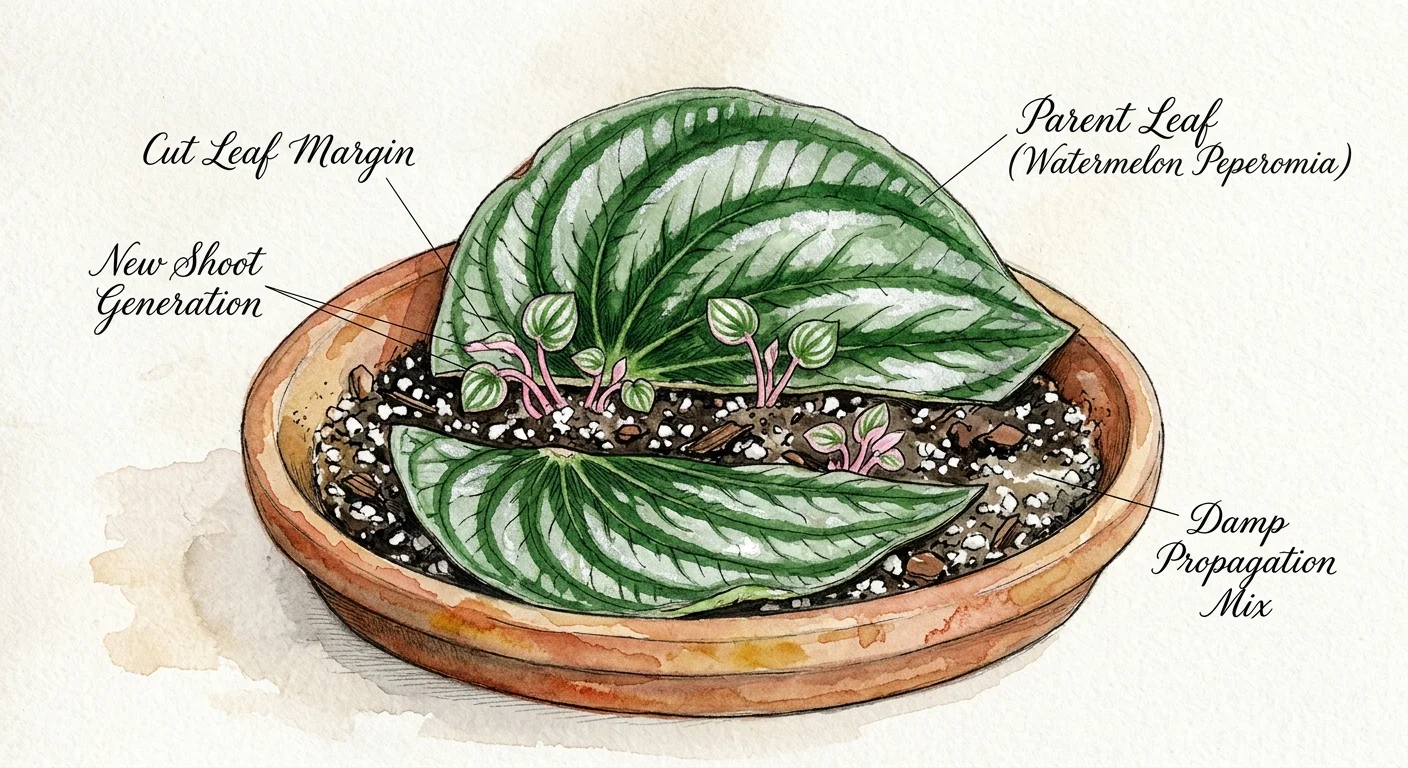
Watermelon Peperomia (*Peperomia argyreia*) captures attention with its striking silver-and-green striped leaves that resemble watermelon rinds. While you can propagate peperomias using whole leaves with intact petioles, you can also multiply them by slicing a single leaf blade in half. This half-leaf cutting technique doubles your plant yield from every leaf harvested.
Select a mature, undamaged leaf displaying vivid silver patterns. Lay the leaf face down on a clean cutting board. Using a sterile razor blade, slice the leaf cleanly in half horizontally across its prominent central veins. You can use both the upper blade half and lower stem half to create separate plants.
Prepare a shallow tray filled with moist coconut coir or fine vermiculite. Press the cut edge of the leaf half directly into the damp medium, inserting it roughly a quarter-inch deep so it stands upright. The severed plant veins come into direct contact with moisture, triggering cellular growth along the raw cut edge.
Cover the tray with a clear plastic dome or place it inside a sealed terrarium to maintain relative humidity near 80 percent. Position the setup under bright, diffused light while maintaining ambient temperatures around 70°F to 75°F. Within four to six weeks, clusters of baby plantlets sprout directly out of the cut leaf edge. As these plantlets grow, they form independent root systems. Once the new shoots reach two inches in height, separate them carefully from the mother leaf piece and pot them into small containers filled with porous soil.
Tip #6: Rex Begonia (Begonia rex-cultorum)
Famous for their swirling colors and rich foliage textures, Rex begonias (*Begonia rex-cultorum*) rank among the most rewarding plants that propagate from a single leaf. Their thick, fleshy veins store concentrated growth hormones, allowing a single leaf to generate dozens of independent plantlets through leaf vein incision.
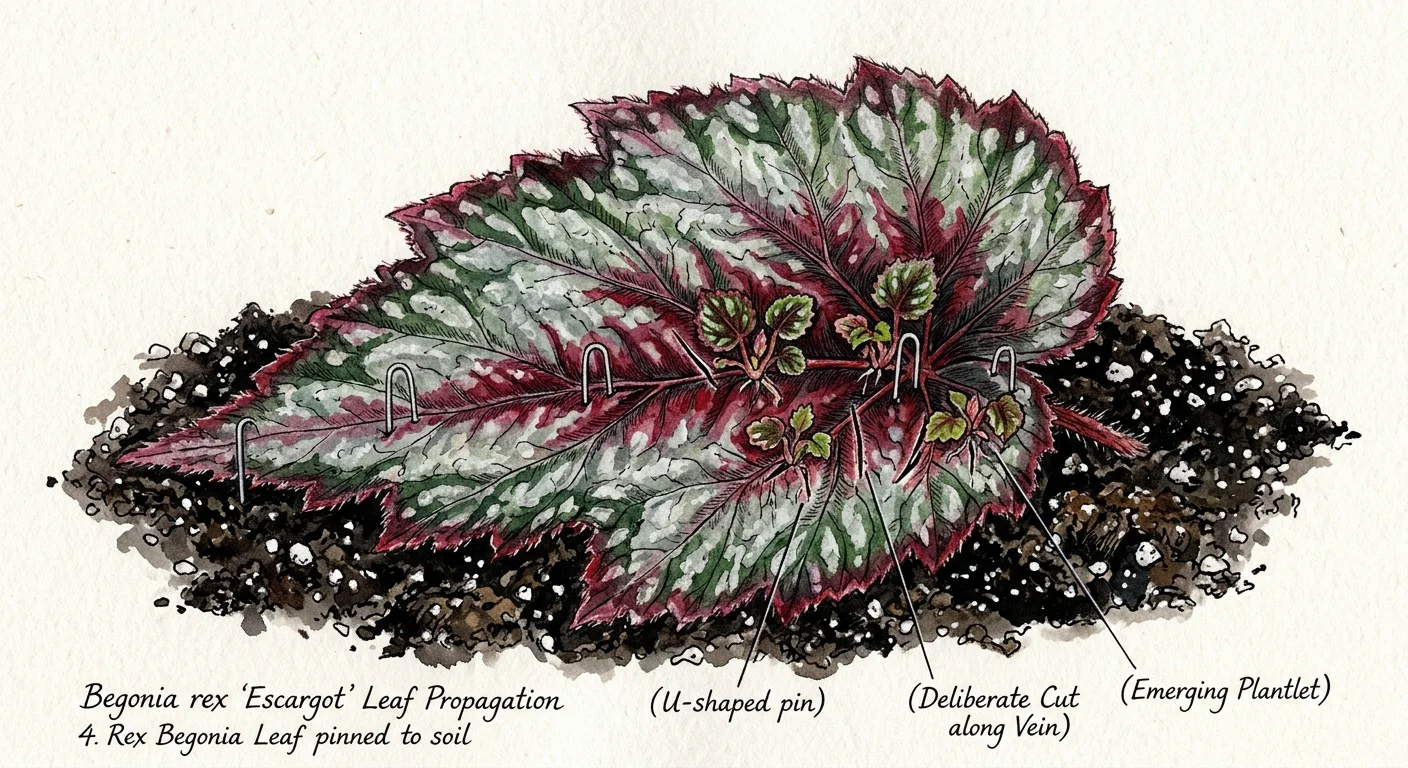
Choose a large, fully expanded leaf from a healthy Rex begonia plant. Flip the leaf over so the underside of the thick primary veins faces upward. Using a sterile razor blade, make small cuts across the major veins spaced about one inch apart. You do not need to slice entirely through the leaf; simply nick through the raised veins on the bottom surface.
Fill a shallow seed tray with damp potting mix composed of peat moss and coarse perlite. Lay the leaf flat on top of the moist soil, ensuring the scored underside rests firmly against the growing medium. Secure the leaf in place using bent paperclips or small pebbles scattered across its upper surface. Continuous soil contact ensures that severed veins absorb moisture and sprout roots quickly.
Keep air humidity high by covering the entire tray with clear plastic wrap. Place the tray in a warm spot receiving indirect light. Within three to five weeks, tiny white roots emerge from every vein slice, followed shortly by colorful begonia leaves. Once the new plantlets establish independent root systems, cut around each plantlet with a sharp knife and transfer them into individual pots to mature.
Tip #7: Echeveria Succulents
Echeveria species form elegant rosettes that bring geometric beauty to sunny windowsills and outdoor succulent gardens. These popular plants propagate with exceptional ease from single leaves, making them perfect candidates for beginners who want quick success with minimal equipment.
Harvesting the leaf correctly determines your success rate. Select plump, mature leaves from the lower or middle sections of the rosette. Gently grasp the leaf near its base on the main stem. Wiggle the leaf side to side while pulling lightly until it snaps off cleanly. The leaf base must come away whole, complete with its original attachment tissue intact. Damaged or torn leaves will rot rather than generate roots.
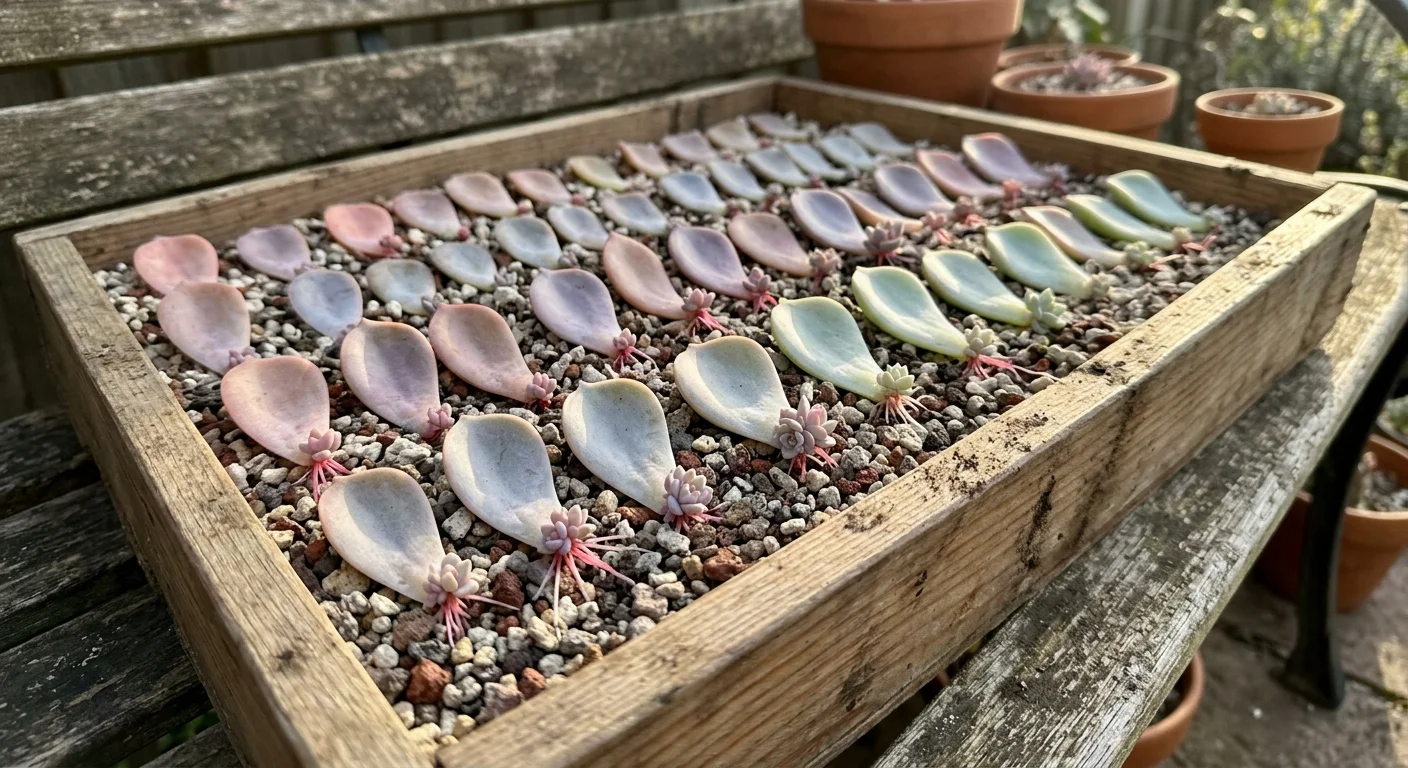
Set your harvested leaves on a clean, dry paper towel in a warm room out of direct sunlight for three days to callus over. Next, fill a shallow tray with gritty succulent soil containing ample pumice or coarse sand. Lay the callused leaves flat on top of the dry soil mix.
Do not apply water until you see tiny pink roots emerging from the callused leaf base. Once roots appear, mist the top of the soil lightly every two or three days near the root zone. A tiny rosette will sprout alongside the roots, drawing nourishment from the parent leaf. Over several weeks, the parent leaf turns yellow and dries into a papery shell. Allow it to fall off naturally so the young plant absorbs all remaining nutrients before you transplant it into a sunny succulent pot.
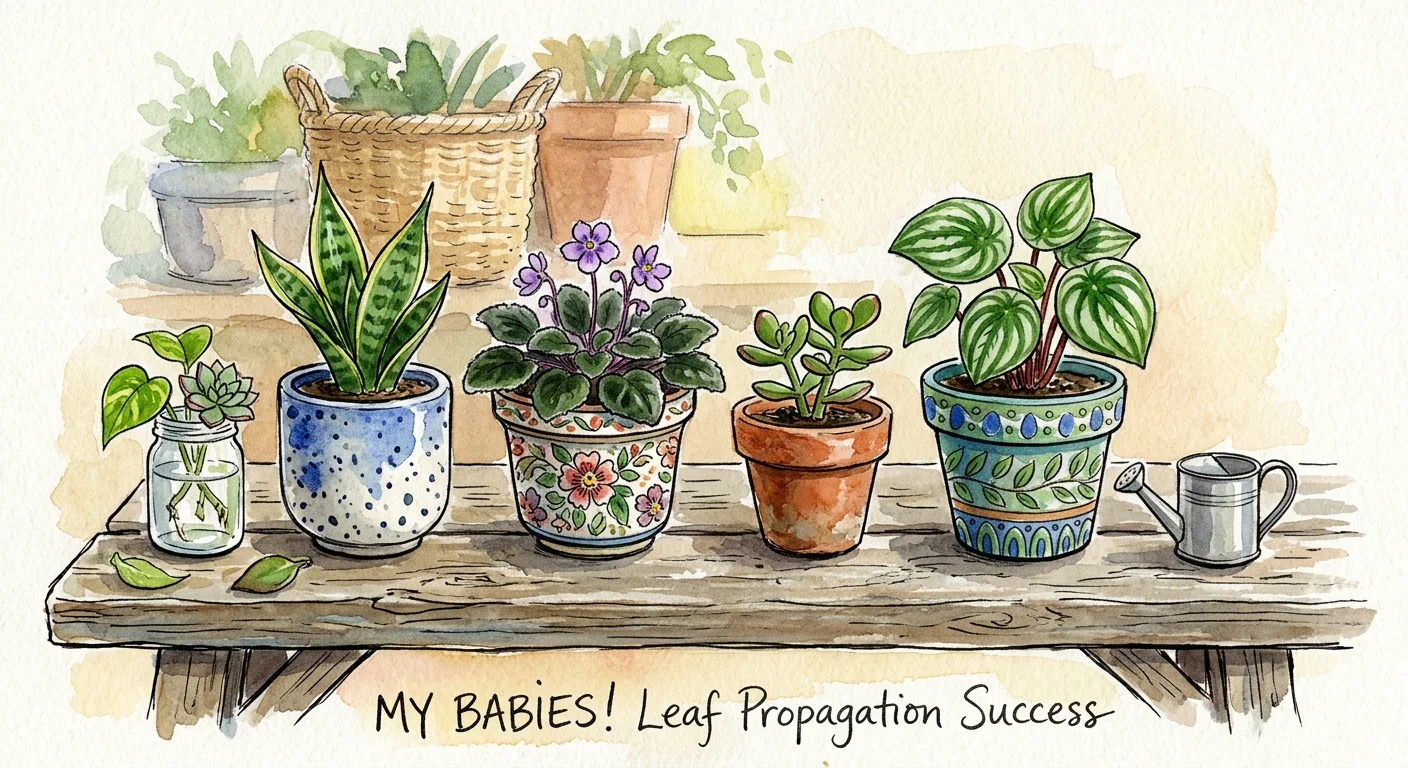
Putting It All Together: Enjoy Your Beautiful Garden
Propagating houseplants from a single leaf turns basic plant care into an exciting, hands-on project right inside your home. By taking advantage of natural growth hormones stored within foliage, you can multiply resilient succulents like Echeveria and Jade, textured foliage plants like Watermelon Peperomia and Rex Begonia, and architectural choices like the Snake Plant and ZZ Plant. The key elements for consistent propagation success involve sterile tools, well-draining soil mixes, high humidity, and patient light management. Avoid placing unrooted leaf cuttings under harsh direct sunlight, as excessive heat dries out delicate tissue before roots develop.
As your cuttings develop root systems and push up new leaves, monitor soil moisture carefully to prevent fungal issues. Transitioning your young plantlets into individual pots allows them to build strong roots and fill out into mature specimens. Share your propagated bounty with friends, trade cuttings with neighbors, or expand your indoor space without spending extra money.
For region-specific advice, consult your local University Extension program (find yours via the USDA directory). For plant databases and inspiration, visit the Missouri Botanical Garden or the Royal Horticultural Society.
Disclaimer: This article provides general gardening advice. Always consider your specific climate, soil conditions, and local pests. Follow safety guidelines when using gardening tools and products.
Frequently Asked Questions
How long does leaf propagation take for most houseplants?
Leaf propagation timelines vary depending on plant species, temperature, humidity, and available light. Fast-rooting species like Echeveria, African Violets, and Watermelon Peperomia typically produce roots within three to four weeks and visible new shoots within six to eight weeks. Slow-growing plants like the ZZ Plant and Snake Plant require more patience; they can take anywhere from two to six months to establish root systems and push up new shoots. Maintaining warm room temperatures between 70°F and 75°F accelerates rooting across all species.
Can you propagate plants in water instead of soil?
Yes, many houseplants—including Snake Plants, African Violets, and Watermelon Peperomias—root successfully in clean water. Place the stem base or lower leaf edge into a shallow vessel filled with filtered water, keeping most of the foliage above the water line to prevent rot. Change the water every five to seven days to replenish oxygen and remove algae. Once water roots reach one to two inches in length, carefully pot the cutting into soil medium to help it adapt to land growth.
Why are my leaf cuttings rotting before they grow roots?
Rot occurs when excess soil moisture combines with stagnant air or bacterial contamination. To prevent rotting, always use sterile cutting blades and clean pots. Allow succulent leaves and snake plant cuttings to callus in ambient air for twenty-four to forty-eight hours before introducing them to soil or water. Additionally, ensure your potting mix contains high proportions of coarse materials like perlite or sand, and avoid overwatering during the initial unrooted phase.
Will leaf cuttings produce plants identical to the parent plant?
Most leaf cuttings yield genetic clones identical to the parent plant, but exceptions exist with variegated cultivars. For instance, variegated Snake Plants (*Sansevieria trifasciata ‘Laurentii’*) usually revert to solid green when propagated from leaf cuttings because the cell layer responsible for the yellow edge margin does not reproduce through leaf tissue. To retain variegated traits in those specific plants, division of underground rhizomes is necessary. However, variegated African Violets and Peperomias usually maintain their patterns when propagated properly from leaf cuttings.