Planting hardy bulbs in autumn guarantees an exhilarating explosion of early color as winter thaws. You create the living foundation today for vibrant blooms that awaken your landscape with effortless spring beauty.
A thoughtful fall planting guide helps you choose dependable varieties that flourish through cold winters and multiply for years. Timing your planting properly ensures strong root systems form before hard frost locks the soil.
Discover the best fall bulbs to plant now to turn dormant flowerbeds, walkway borders, and patio containers into dazzling floral showcases.
Tip #1: Daffodils (Narcissus)
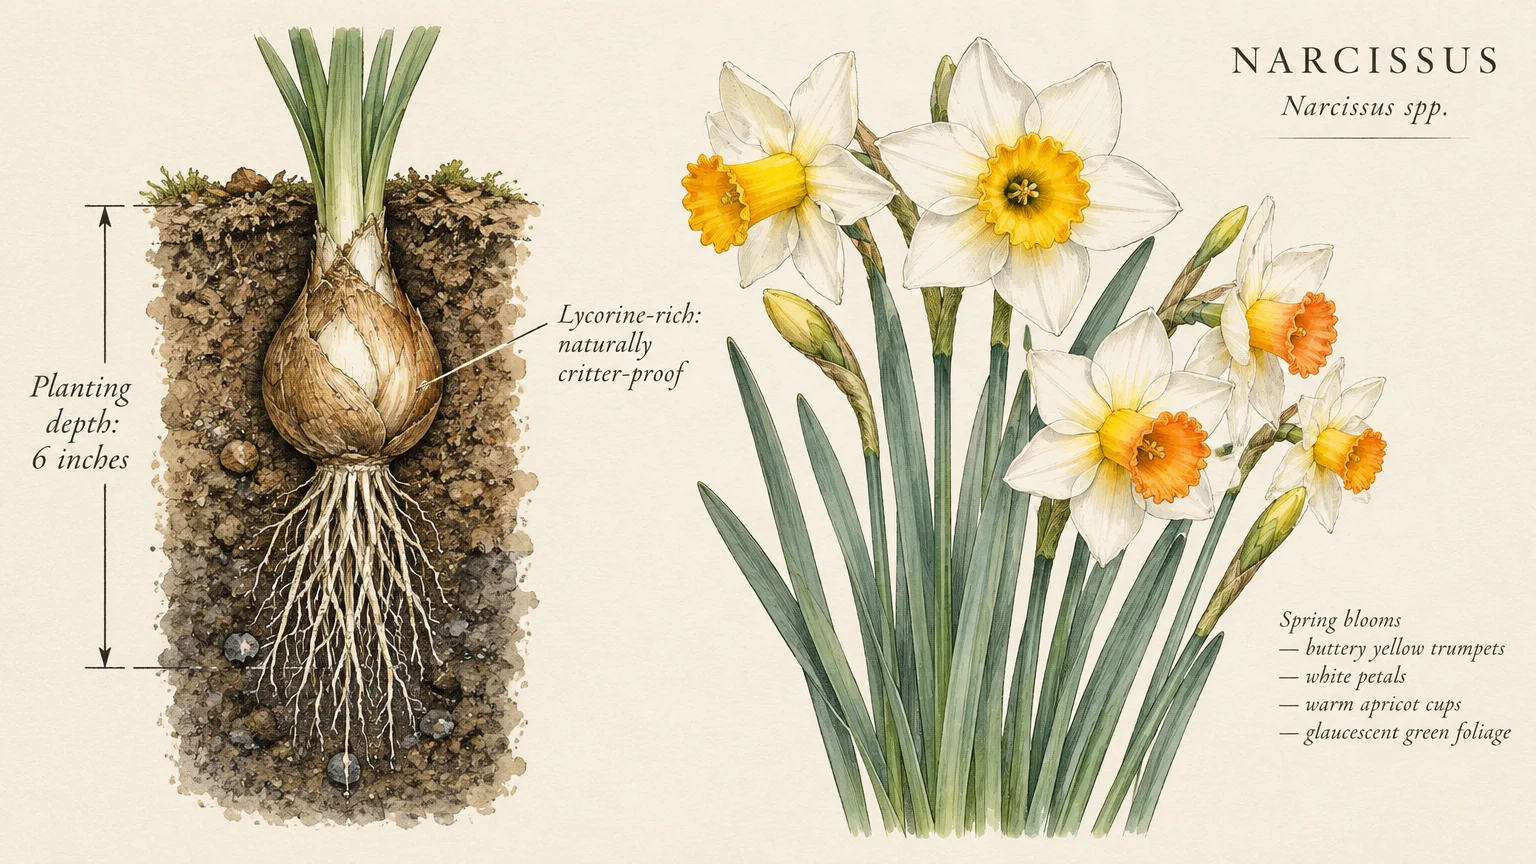
Daffodils remain beloved spring flowering bulbs because they deliver cheerful, foolproof color with almost no maintenance. Their sunny yellow, white, and peach cups signal the official arrival of warmer days across your yard.
Why Daffodils Are Truly Critter-Proof
Hungry deer, rabbits, squirrels, and voles avoid daffodils entirely because every part of the plant contains poisonous lycorine. This natural chemical defense guarantees that rodents will not devour your investments during lean winter months.
Unlike delicate modern hybrids that fade over time, daffodils naturalize eagerly and return with greater floral vigor each passing season.
How to Plant Daffodils for Lasting Impact
Select large, firm bulbs free of soft spots, blemishes, or mildew. Plant them pointed-end up roughly six inches deep, or three times the height of the bulb itself.
Space individual bulbs four to six inches apart in well-draining soil that receives full sun or bright dappled shade.
Water the planting area thoroughly to settle the soil and eliminate air pockets around the roots before winter freezes arrive.
Allow the green foliage to die back completely in late spring before trimming it away, which allows the bulb to store energy for next year.
Tip #2: Tulips (Tulipa)
Tulips deliver the most intense, saturated colors of any vernal bloomer. Their classic goblet shapes and magnificent color range transform ordinary spring borders into works of living art.
Selecting Resilient Varieties
Darwin Hybrid tulips offer supreme weather resistance, boasting muscular stems that easily withstand pelting spring rain and gusty winds. For long-term perennial performance in rockeries, choose wild species tulips like Tulipa bakeri or Tulipa clusiana.
Stagger early, mid, and late-flowering tulip cultivars across identical garden beds to extend your blooming display across many weeks.
Planting Tulips for Peak Performance
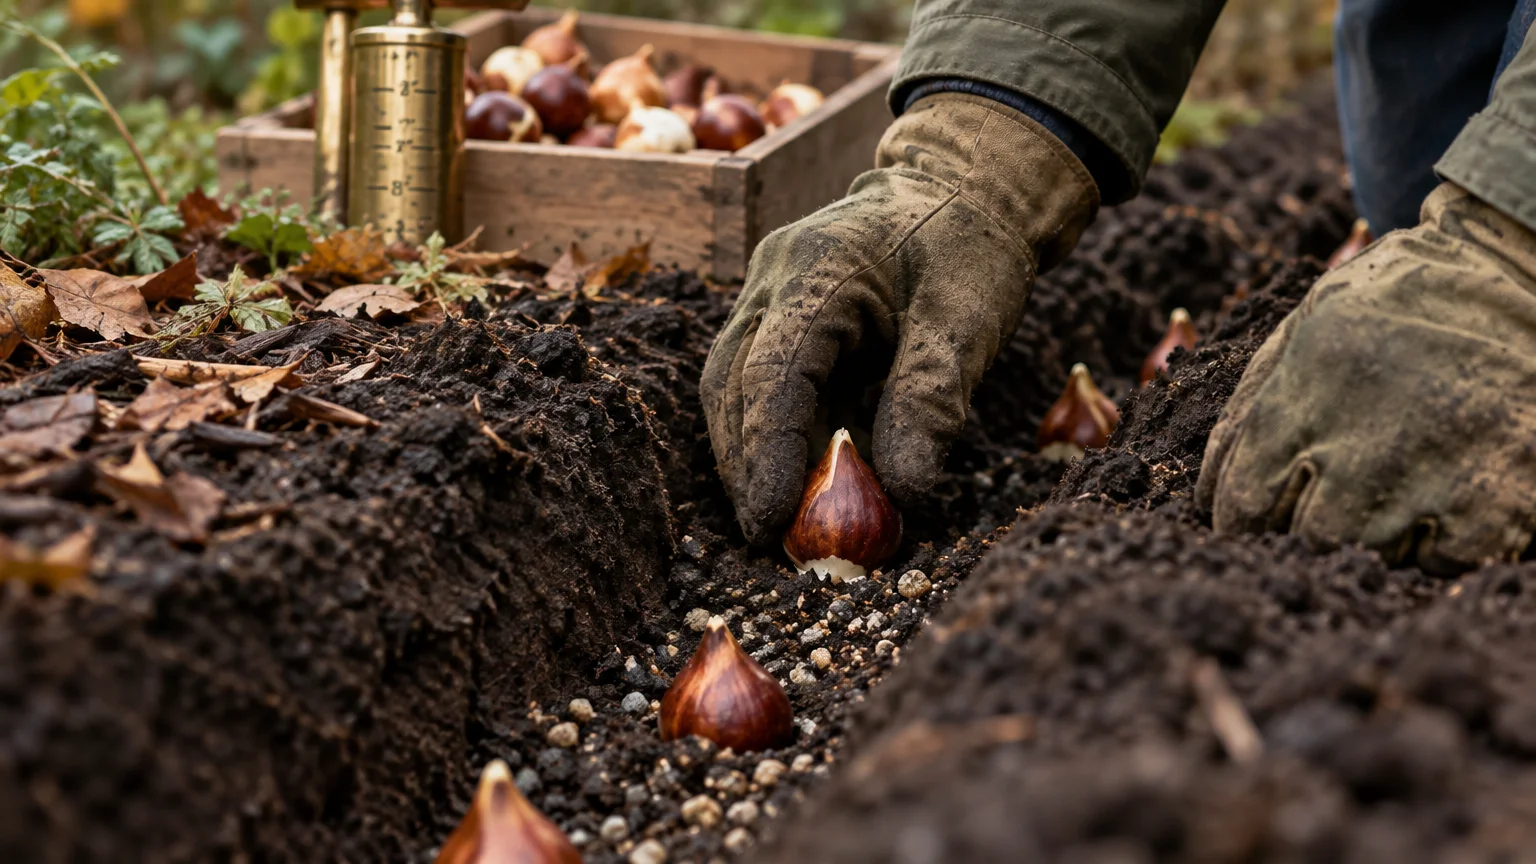
Bury tulip bulbs pointed-end up roughly six to eight inches deep in loose, fertile soil. Deep planting insulates bulbs against rapid temperature spikes and deters foraging squirrels from digging them back up.
Incorporate coarse horticultural grit into heavy clay soils to keep resting bulbs dry throughout soggy winter spells.
Treat modern hybrid cultivars as breathtaking seasonal annuals by replanting fresh bulbs each autumn for dense, flawless spring displays.
Pair deep purple tulips with soft pastel pansies to create striking color contrast throughout your garden borders.
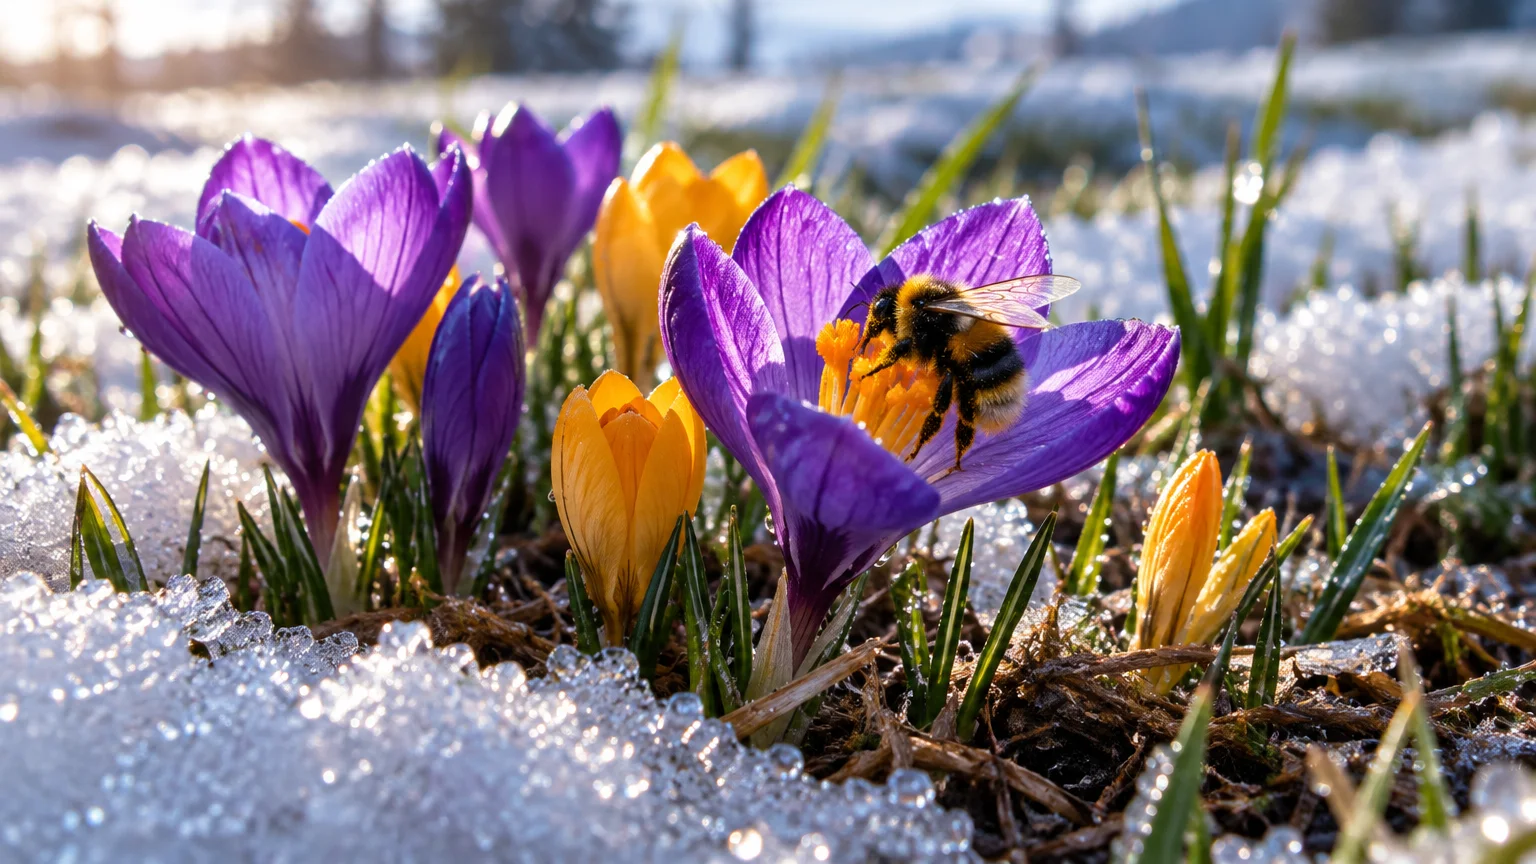
Tip #3: Crocuses (Crocus)
Crocuses are the fearless pioneers of the early spring garden, frequently pushing vibrant petals right through melting snow. They offer an instant cure for winter cabin fever.
Essential Early Food for Pollinators
These low-growing blossoms provide critical early forage for native bees and newly awakened bumblebee queens. Their rich golden pollen supplies immediate sustenance when few other outdoor flowers are open.
Because their grass-like foliage matures and withers rapidly, you can safely mow over lawn-planted crocuses by late spring.
How to Plant Crocus Corms
Plant small corms three inches deep and three inches apart in sweeping, naturalistic drifts rather than straight lines. Toss handfuls onto the lawn and plant each corm where it lands for an authentic wildflower look.
Make sure the planting site provides fast drainage, as waterlogged winter soil will quickly rot dormant corms.
Mix purple, white, and striped varieties together along stone pathways and border edges for striking visual contrast.
Plant them in sunny exposures where morning light encourages the blossoms to open wide during cool spring days.
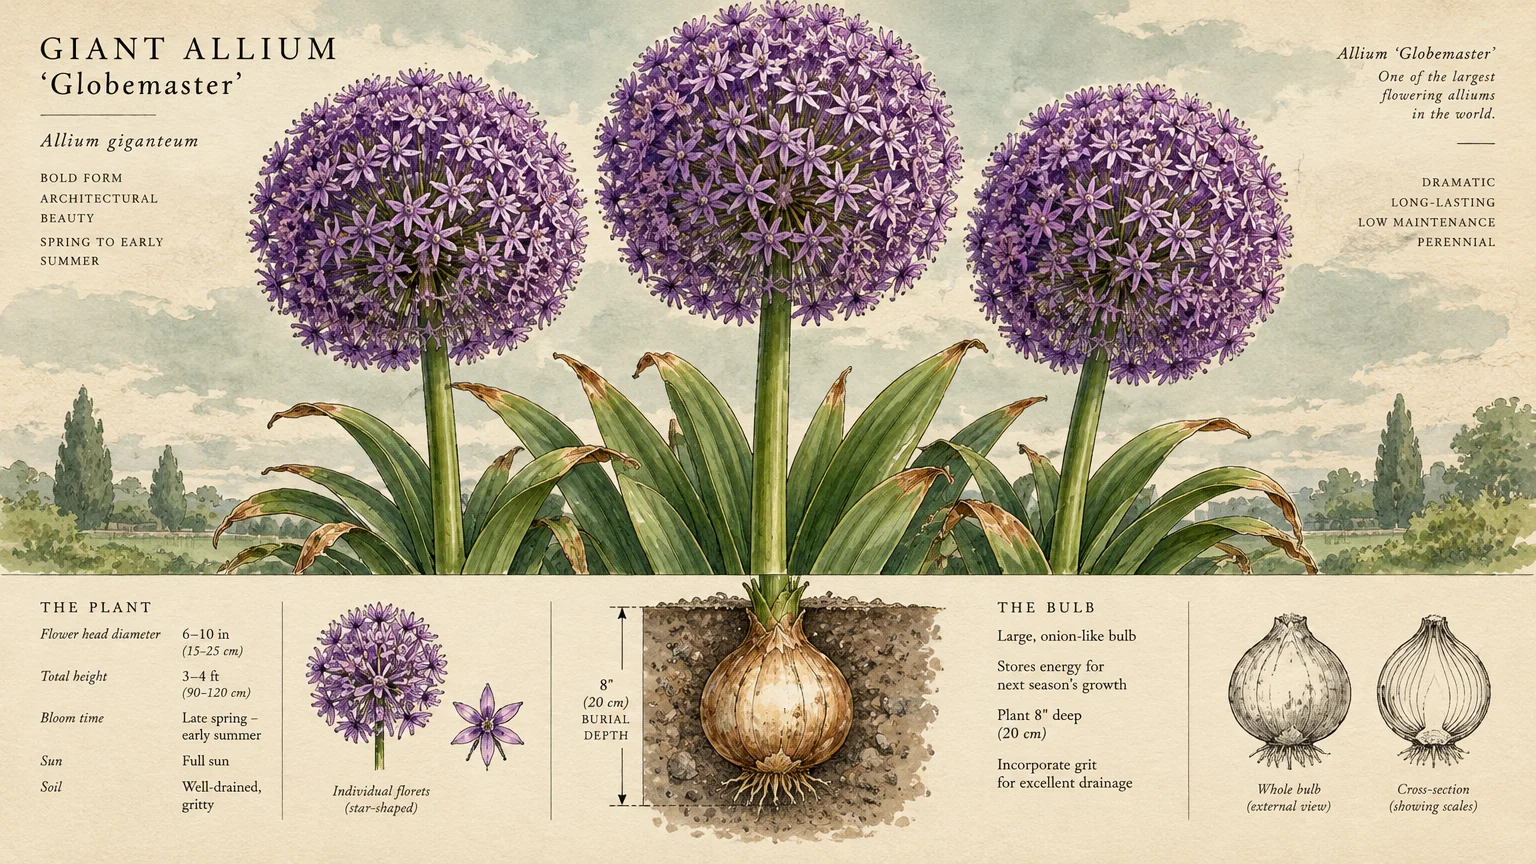
Tip #4: Giant Alliums (Allium)
Giant alliums bring commanding architectural drama to gardens, displaying enormous spherical flower heads on stout, leafless stems. They create an unforgettable focal point during the bridge between late spring and early summer.
Natural Defense and Structural Elegance
Because alliums belong to the wild onion family, deer, rabbits, and rodents instinctively steer clear of their pungent bulbs. Their rigid stems stay proudly upright without staking, even when battered by unpredictable spring gusts.
Once the flowers dry on the plant, the spherical seed heads add architectural beauty to borders through late summer.
Planting Alliums for Garden Drama
Plant large allium bulbs seven to eight inches deep in sunny borders with rich, well-draining soil. Provide at least six hours of direct sunlight each day to encourage strong, stocky stems.
Tuck bulbs behind bushy perennials like hostas, catmint, or peonies; these companions will conceal the allium foliage as it withers during flowering.
Group bulbs in tight clusters of three or five to generate dramatic purple focal points across the landscape.
Leave the dried flower heads in place to add textural interest to your autumn and winter garden beds.
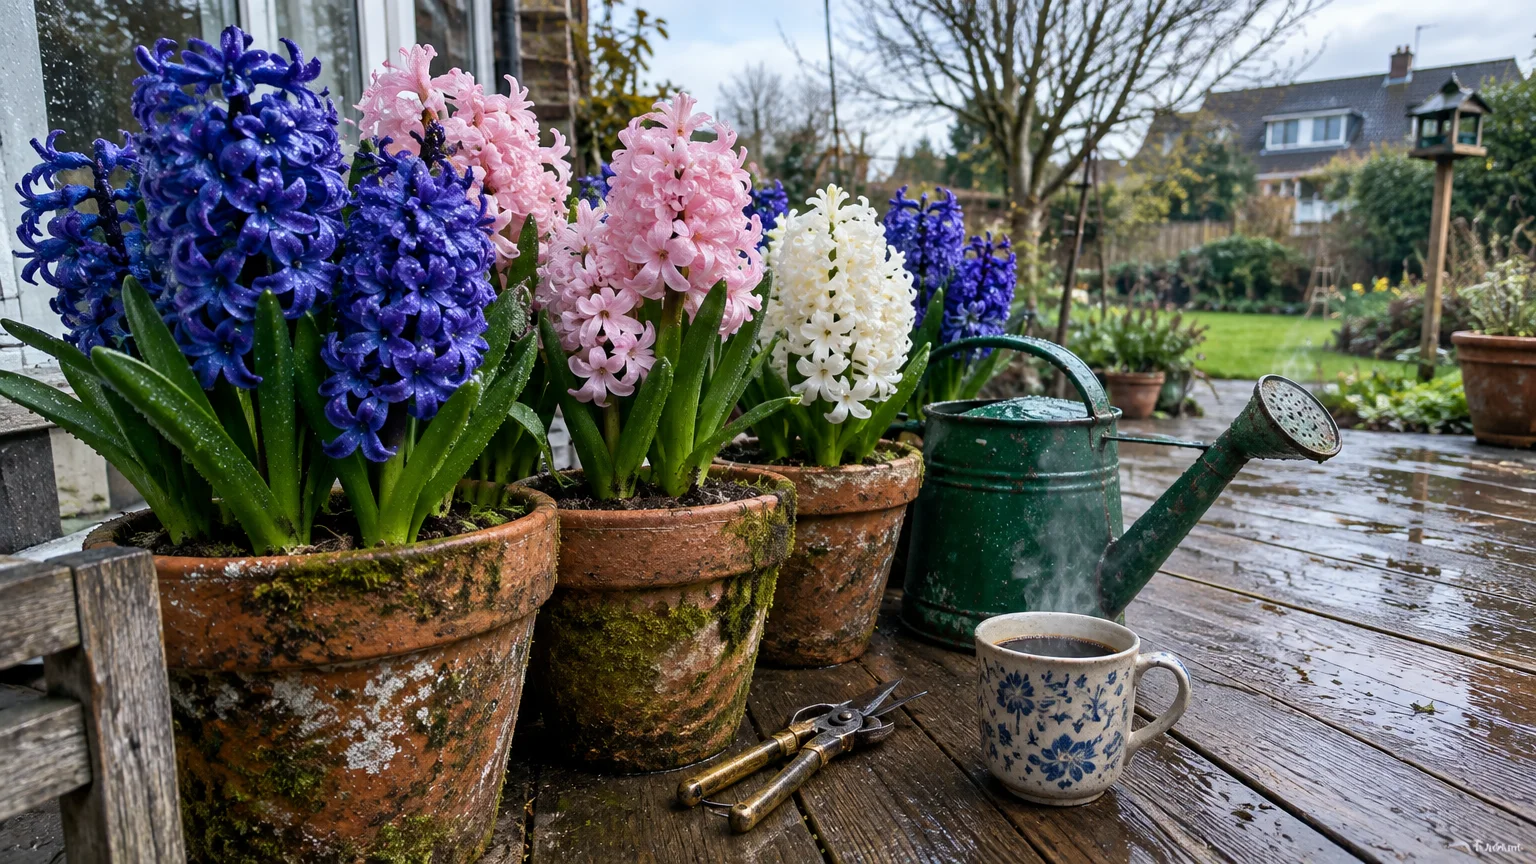
Tip #5: Hyacinths (Hyacinthus orientalis)
Hyacinths offer dense columns of star-shaped florets and one of the most intoxicating fragrances in the plant kingdom. A modest cluster can easily perfume your entire garden patio or front walkway.
A Kaleidoscope of Color and Scent
You can choose from an exceptional array of shades, including electric cobalt, gentle lilac, porcelain white, soft peach, and deep rose. They rank among the best bulbs for spring flowers in outdoor decorative planters.
Position them near entry doors, outdoor seating areas, and low patio containers where their powerful aroma greets passing visitors.
How to Plant Hyacinth Bulbs
Wear gardening gloves when handling hyacinth bulbs to protect your skin from oxalic acid crystals that cause mild itching. Plant each bulb pointed-end up four to six inches deep in fertile, loose soil.
Ensure container drainage holes remain unobstructed, as excess water trapped in winter pots leads to bulb rot.
Mulch the surface with pine bark chips to retain steady soil moisture and keep early blooms clean from splashed mud.
Cut a few fragrant stems just as the lower bells open to bring sweet spring fragrance directly into your home.
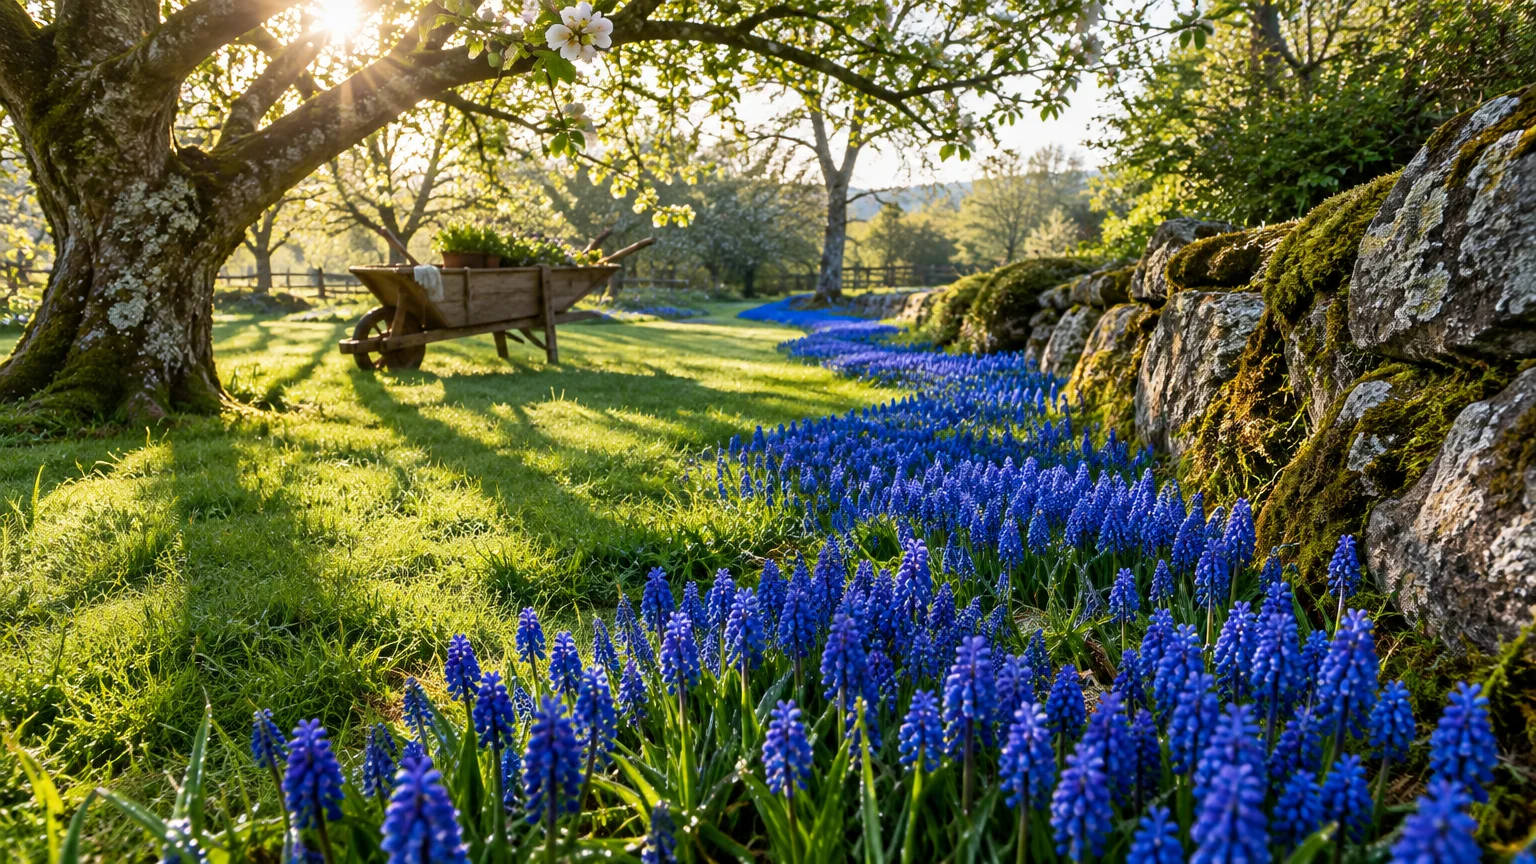
Tip #6: Grape Hyacinths (Muscari)
Grape hyacinths produce charming spikes of tiny, urn-shaped florets that resemble miniature clusters of inverted grapes. They provide intense cobalt-blue ribbons of color when planted along borders and pathways.
Vigorous Spreaders for Easy Groundcover
Muscari multiply quickly underground and self-seed generously, creating lush carpets of color with zero fuss over time. They thrive in rocky garden slopes, woodland edges, and mixed containers without demanding ongoing attention.
Their petite blue spikes contrast gorgeously against bright yellow daffodils, creating a classic cottage garden pairing.
Planting Grape Hyacinths with Ease
Dig a broad, shallow trench three inches deep and spread dozens of bulbs casually along the base. Cover them with loose, compost-amended soil and water deeply to stimulate prompt autumn root growth.
Do not trim the thin foliage that appears in late autumn; this greenery absorbs crucial sunlight throughout the winter months.
Divide congested clumps every three to four years in early autumn to propagate new patches throughout your yard.
Plant them generously around stone steps to soften hard masonry lines with cheerful blue tones each spring.
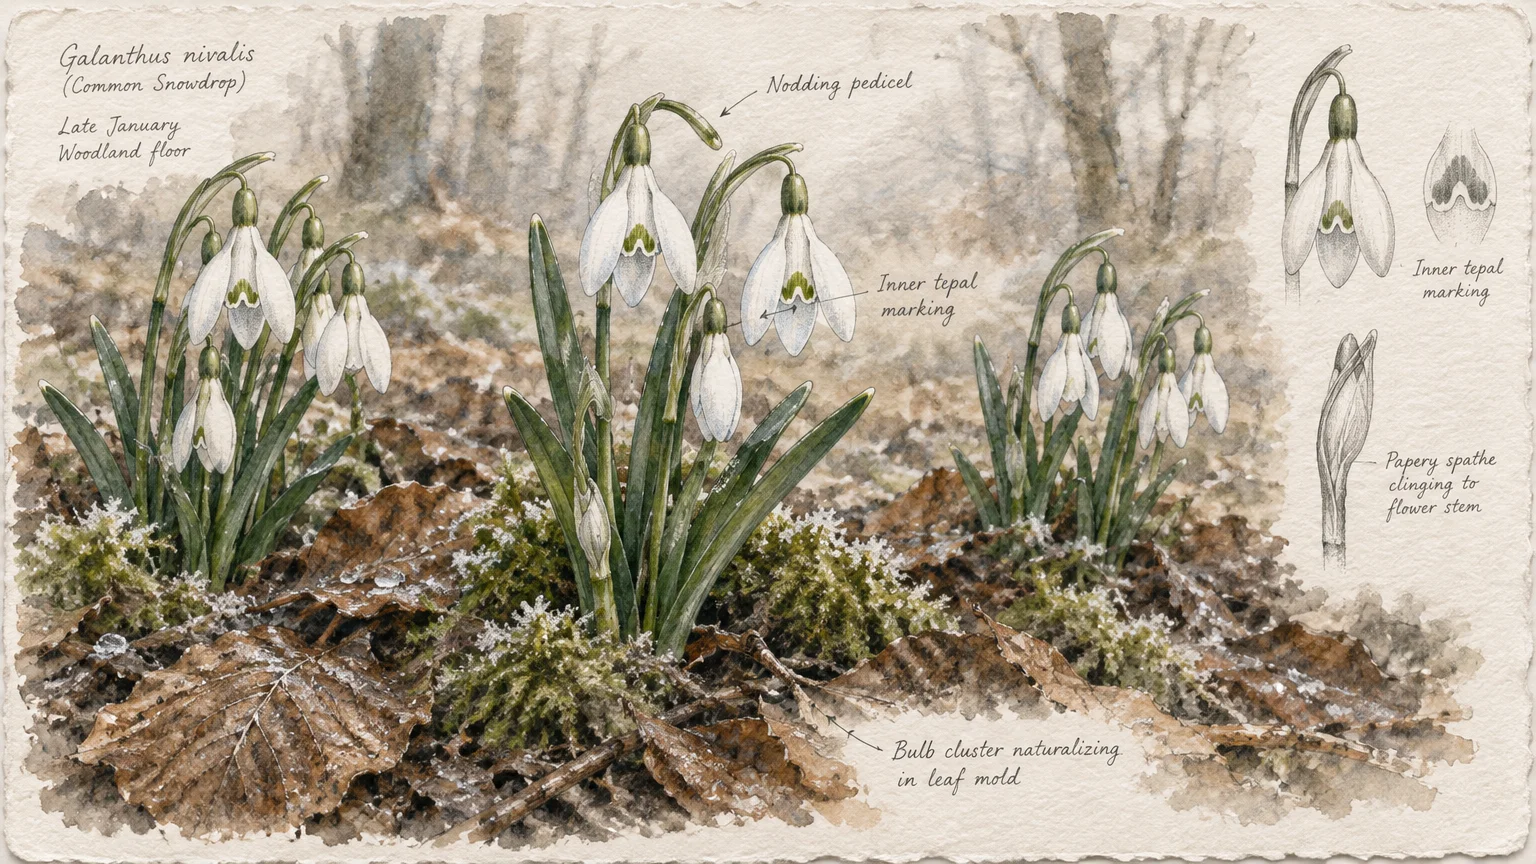
Tip #7: Snowdrops (Galanthus)
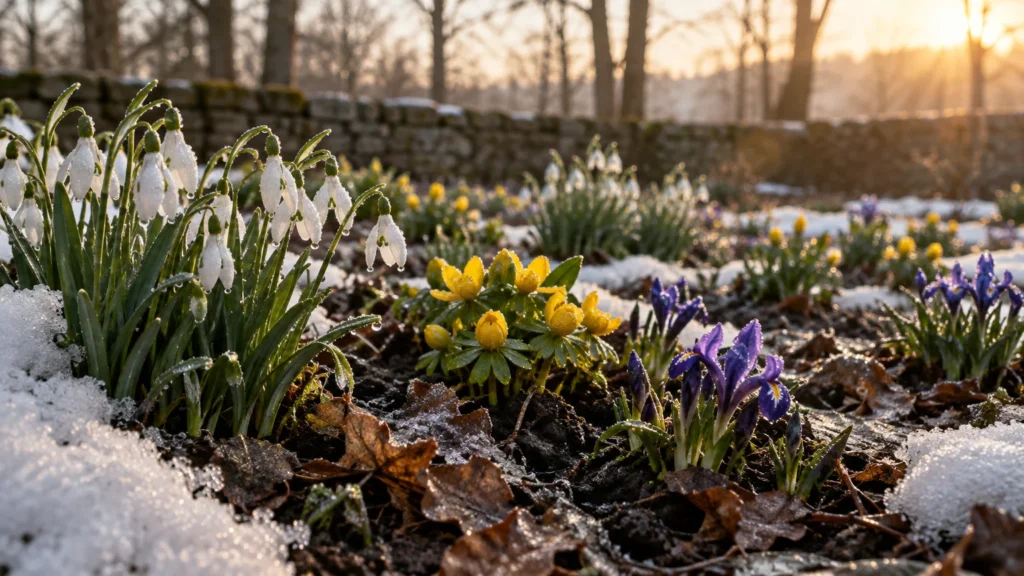
Snowdrops offer nodding, milk-white bells with subtle emerald markings that brave freezing winter conditions. They emerge when the rest of the garden remains dormant and locked in cold sleep.
Unmatched Winter Cold Hardiness
These tough perennials shrug off sub-zero temperatures, harsh ice storms, and heavy blankets of snow without sustaining petal damage. They thrive in the moist, cool shade cast beneath deciduous trees and dormant woody shrubs.
Burrowing rodents and deer avoid snowdrops entirely due to their bitter, protective alkaloids.
Best Planting Practices for Snowdrops
Set small snowdrop bulbs pointed-end up two to three inches deep in rich, humus-packed soil that stays lightly moist year-round. Add generous handfuls of leaf mold or finished compost to replicate their native woodland floor environment.
Plant them in concentrated drifts of fifteen to twenty bulbs so their delicate white blooms create an impactful visual display.
Avoid dry, baking summer spots, as snowdrops prefer consistent, cool underground moisture even while dormant.
Divide clumps in the green immediately after blooming if you wish to spread them into new shaded locations.
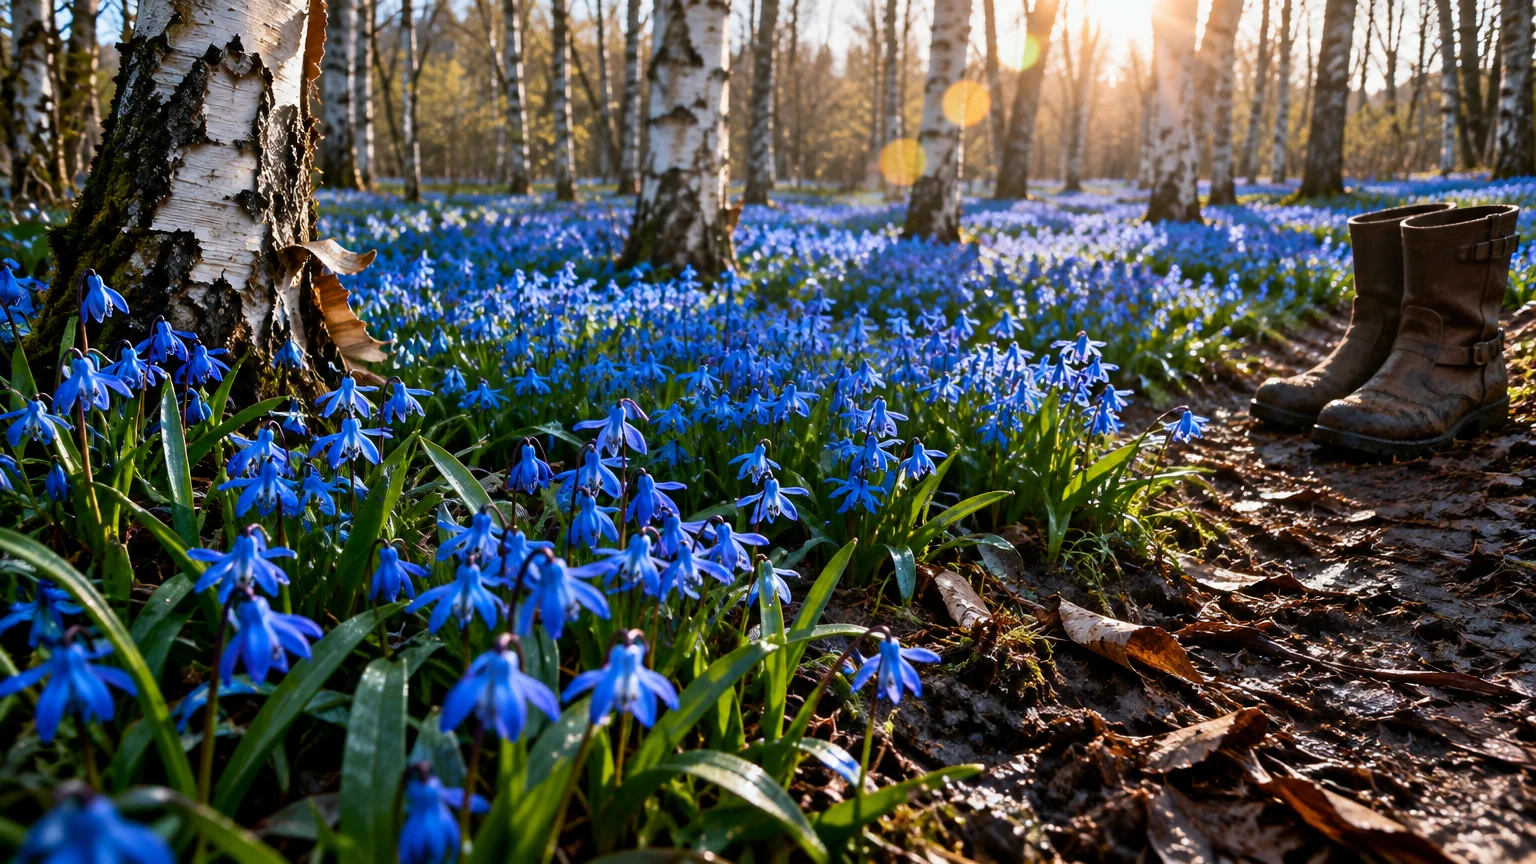
Tip #8: Siberian Squill (Scilla siberica)
Siberian squill blankets the early spring landscape in an electrifying sheet of brilliant sky-blue flowers. It is one of the most rugged and cold-tolerant fall bulbs to plant in northern gardens.
Effortless Lawn and Woodland Naturalizing
Scilla spreads readily through self-seeding and bulb division, turning shaded lawns and bare orchard floors into vivid sapphire carpets. Its intense blue petals contrast spectacularly against early yellow forsythia blossoms and golden primroses.
Pests and foraging wildlife leave scilla untouched, letting your blue drifts expand undisturbed for decades.
How to Plant Siberian Squill
Plant these small bulbs three inches deep and two to three inches apart across generous sections of turf or shrub borders. They adapt cheerfully to full sunlight, partial shade, and almost any soil type that drains reasonably well.
Allow the slender foliage to turn yellow and dry naturally in late spring before mowing your lawn.
Scatter bulbs generously across lawn edges for an enchanting, river-like ribbon of vivid spring color.
Combine scilla with white snowdrops for a crisp, breathtaking two-tone carpet beneath bare garden trees.
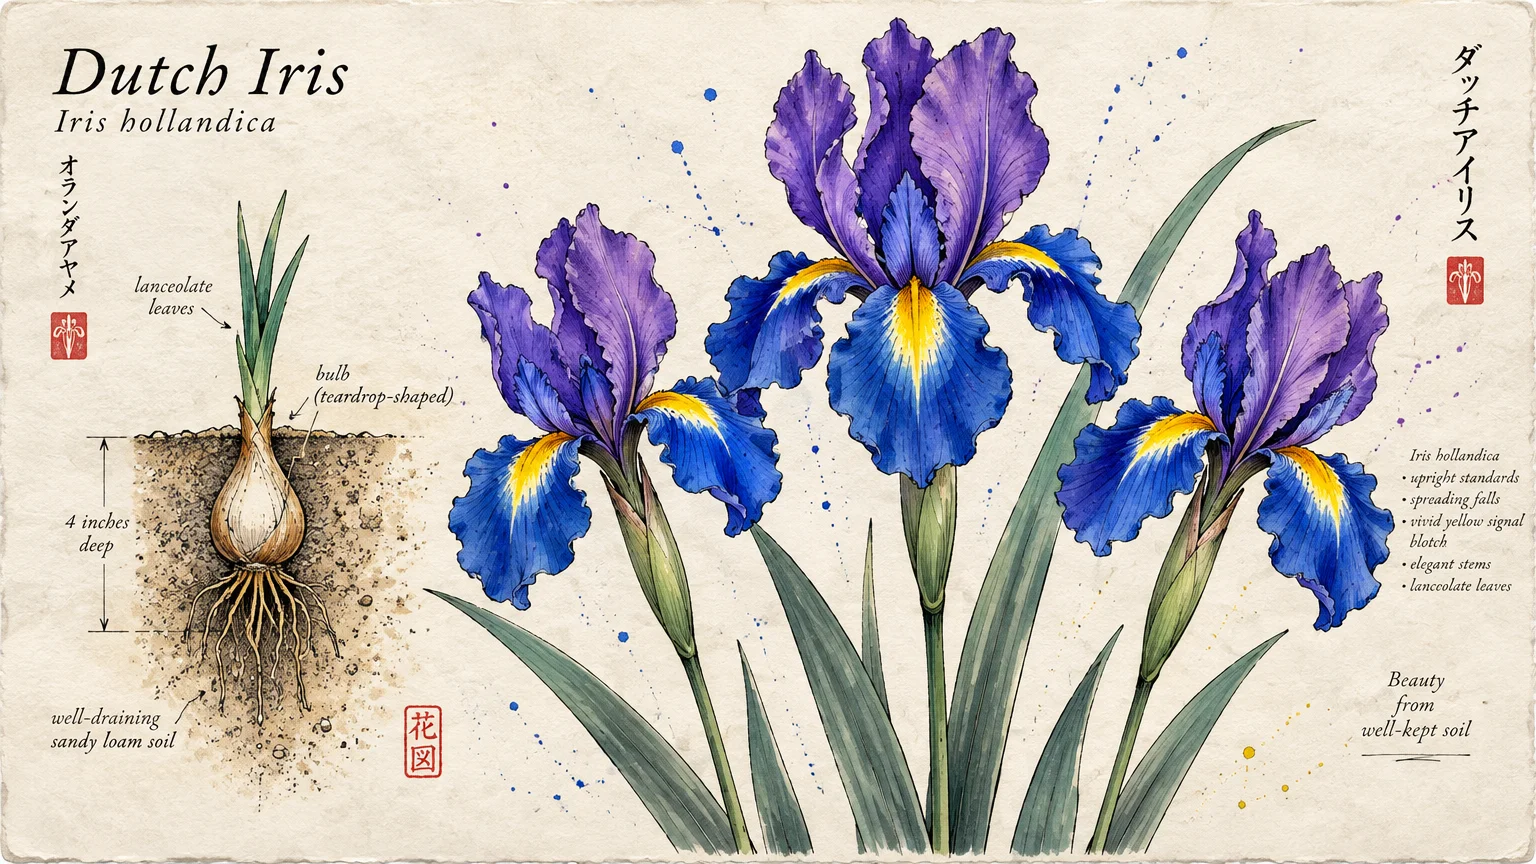
Tip #9: Dutch Iris (Iris hollandica)
Dutch irises produce exquisite, sculptural flowers with intricate petals that resemble hand-painted silk. They serve as an elegant bridge connecting mid-spring bulbs with early summer perennial borders.
A Premier Cutting Garden Perennial
These elegant blooms sit on tall, wiry stems that make them world-class additions to fresh cut-flower bouquets. Harvest the stems when the buds show color but have not yet unfolded for maximum indoor vase life.
Their deep blues, royal purples, rich bronzes, and bright yellows create striking vertical accents among bedding plants.
Planting Dutch Iris for Reliable Blooms
Bury Dutch iris bulbs four inches deep in porous, warm soil that receives full, baking sunshine throughout the day. Avoid wet or soggy spots, as stagnant winter moisture causes the bulbs to decay rapidly.
Layer shredded leaves or straw over the bed in late autumn to cushion bulbs against fluctuating winter soil temperatures.
Stake taller stems if you plant them in exposed, windy areas to keep the heavy flowers upright.
Feed emerging shoots with organic liquid seaweed in early spring to encourage saturated, vibrant petal pigmentation.
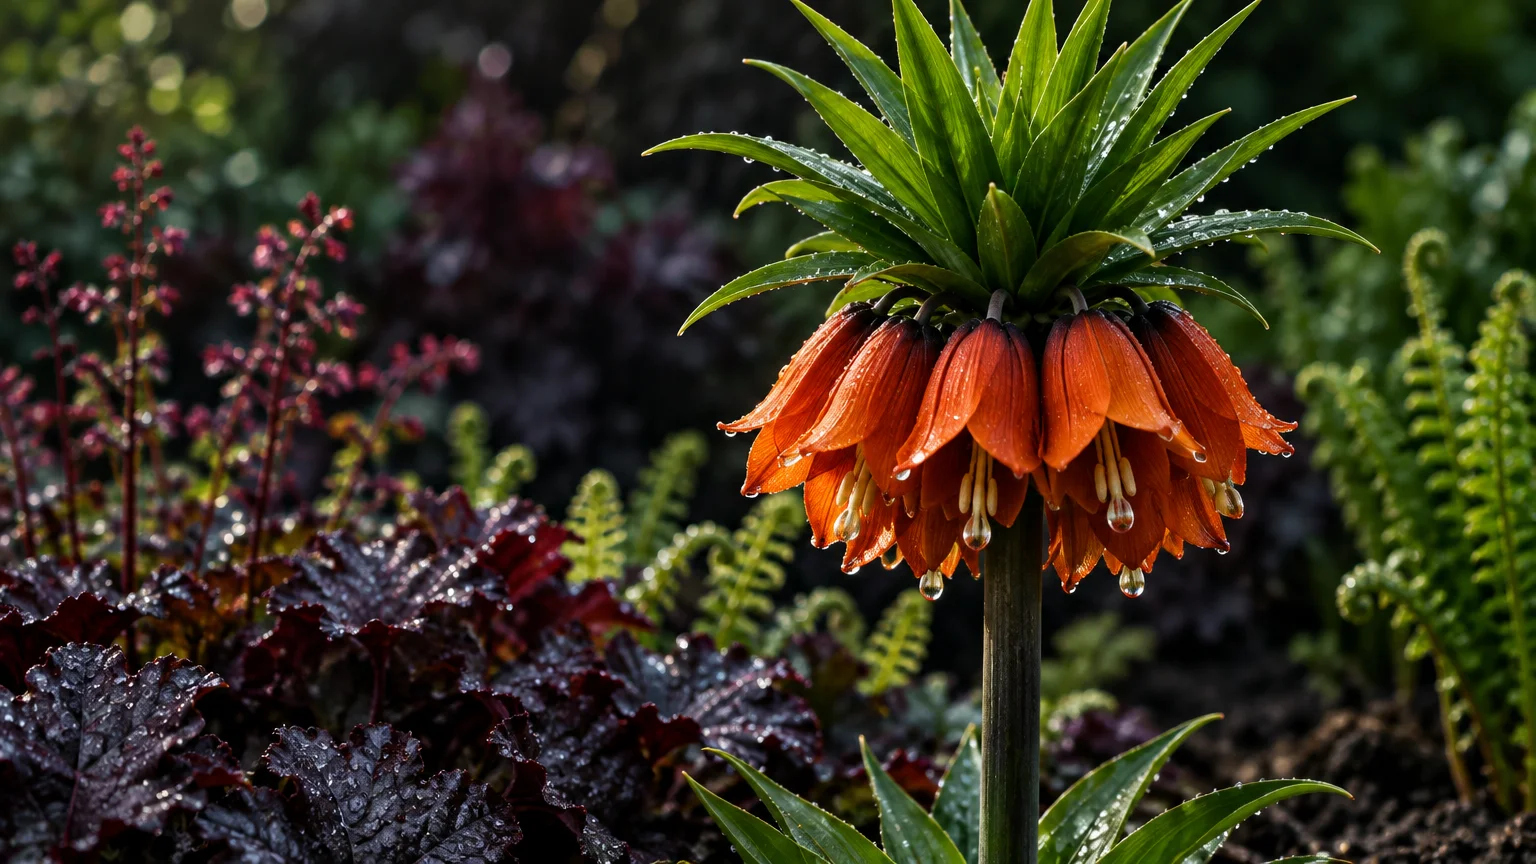
Tip #10: Crown Imperial (Fritillaria imperialis)
Crown imperials deliver show-stopping majesty with towering three-foot stems bearing crowns of pendant, bell-like blossoms. A dramatic tuft of glossy green leaves caps each cluster like an ornate royal crown.
A Natural Pest Barrier for Your Garden
Fritillaria bulbs emit a distinct, musky scent that naturally repels burrowing moles, voles, and field mice. Placing them across your garden beds protects more vulnerable neighboring bulbs from hungry winter pests.
Their brilliant orange, ruby, and golden hues create breathtaking focal points that turn heads from across the street.
How to Plant Crown Imperial Bulbs
Handle these large, hollow-topped bulbs with care and plant them six to eight inches deep in fertile, sandy loam. Angle each bulb slightly on its side to keep moisture from pooling in the central indentation and causing rot.
Add a bed of coarse gravel or sand beneath each bulb to ensure sharp drainage during damp winter months.
Provide ample space around each bulb so its robust stem and foliage can expand without crowding neighbor plants.
Plant them in sheltered borders where sturdy structures protect their tall floral crowns from fierce spring gales.
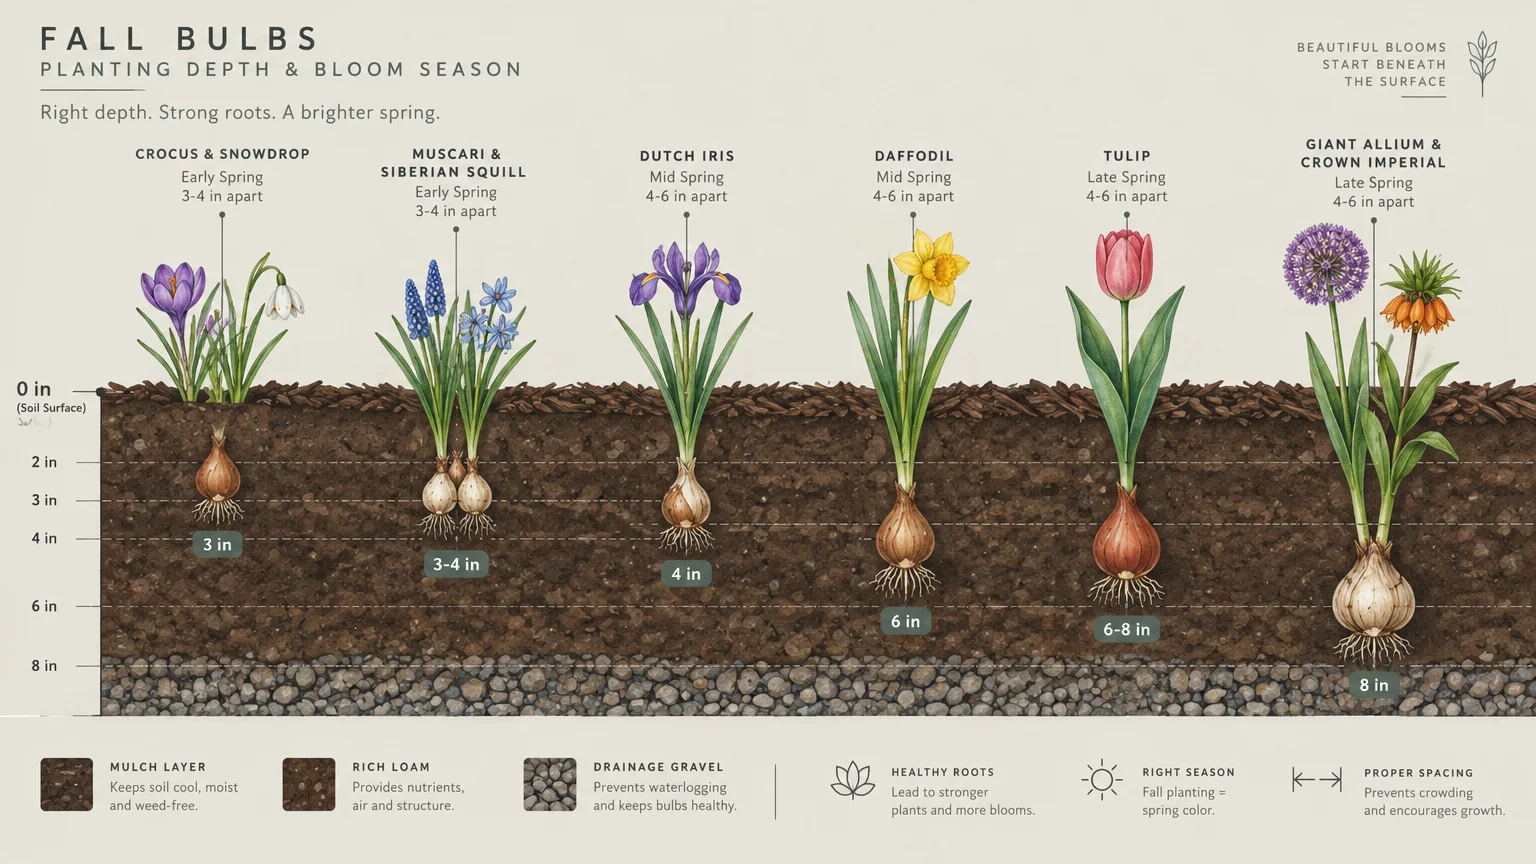
Putting It All Together: Enjoy Your Beautiful Garden
Creating an awe-inspiring spring garden begins with the decisive steps you take while autumn air turns brisk and crisp. Studying a thorough fall planting guide gives you absolute confidence in bulb selection, depth, and placement.
To ensure months of non-stop color, combine cultivars that bloom across early, mid, and late spring. Intertwine early snowdrops with mid-season daffodils and late alliums to orchestrate an unbroken wave of vibrant blooms.
Always plant your bulbs in generous drifts and clusters rather than scattered, lonely single stems. Clustered plantings mirror natural landscapes, creating a lush, professional finish that elevates your curb appeal.
Remember to test your soil drainage, enrich planting holes with compost, and settle bulbs with a generous initial watering. The time and care you invest beneath the soil today will reward you with an unforgettable spring awakening.
Step outside this weekend, dig into the cool soil, and plant your spring dreams with excitement and confidence.
Frequently Asked Questions
When to plant bulbs for spring blooms?
The optimal window opens when night temperatures consistently range between forty and fifty degrees Fahrenheit. This timing keeps bulbs from sending up early green sprouts while allowing roots to establish before winter freezes lock the soil.
In most regions, this ideal planting window occurs between late September and November, depending on your local climate zone.
Which side of the bulb goes up when planting?
Place the pointed end facing upward toward the sky, and ensure the wider, flat basal plate rests on the soil. If a bulb has no obvious tip, lay it sideways; stems naturally grow upward toward warmth and light.
Do spring flowering bulbs need fertilizer at planting?
Most spring flowering bulbs already hold the stored energy and embryo flowers needed for their first season of blooms. However, blending slow-release bulb food or bone meal into the soil helps them recharge for future years.
Avoid placing concentrated synthetic fertilizer directly against bare bulb flesh to prevent accidental root burn.
How do you protect freshly planted bulbs from squirrels?
Lay wire mesh or chicken wire over your planting bed before covering it with soil and mulch. Planting naturally pest-resistant varieties like daffodils, snowdrops, and alliums also stops hungry critters from ruining your display.
Spray animal repellent containing garlic or hot pepper around garden beds to further discourage curious digging pests.
For region-specific advice, consult your local University Extension program (find yours via the USDA directory). For plant databases and inspiration, visit the Missouri Botanical Garden or the Royal Horticultural Society.
Disclaimer: This article provides general gardening advice. Always consider your specific climate, soil conditions, and local pests. Follow safety guidelines when using gardening tools and products.