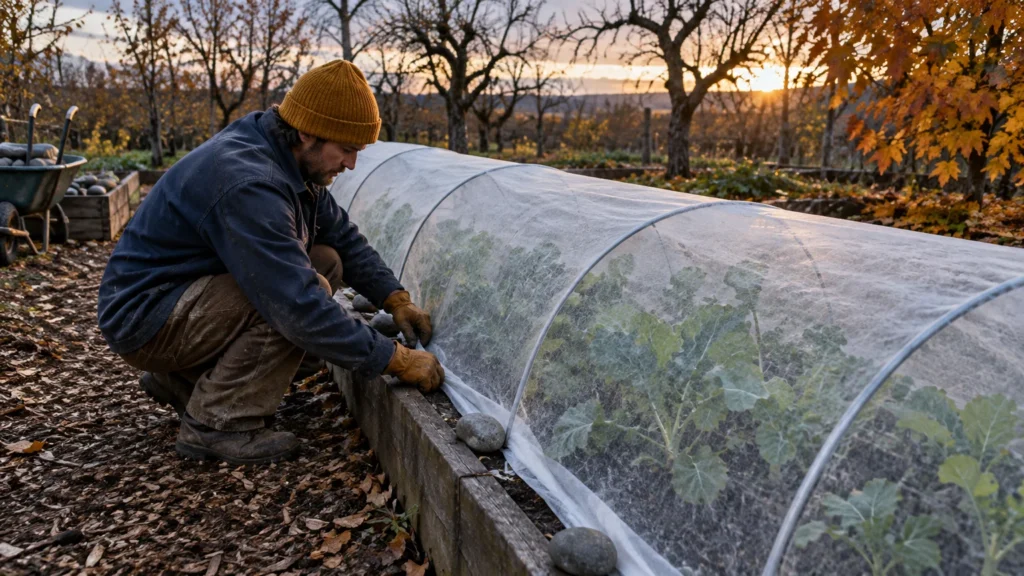
Autumn frosts will quickly destroy your prized summer-blooming plants if you leave them in freezing soil. You can easily safeguard these tender perennials by lifting them before winter arrives.
Digging up tender bulbs and tubers protects your gardening investment and ensures vibrant blooms year after year. A few hours of work now rewards you with healthier plants next spring.
Grab your garden fork and prepare your storage boxes before the first hard freeze locks the ground. Here are seven essential bulbs and tubers you must lift this autumn.
Tip #1: Dahlia Tubers
Dahlias produce spectacular late-summer blossoms, but their tender tubers cannot endure freezing soil conditions. Leaving them underground in regions with freezing winters causes the moist root systems to turn into blackened mush.
Wait until the first light autumn frost turns the lush foliage brown or black. This frost nip signals the plant to enter dormancy and channel lingering carbohydrates down into the root crown.
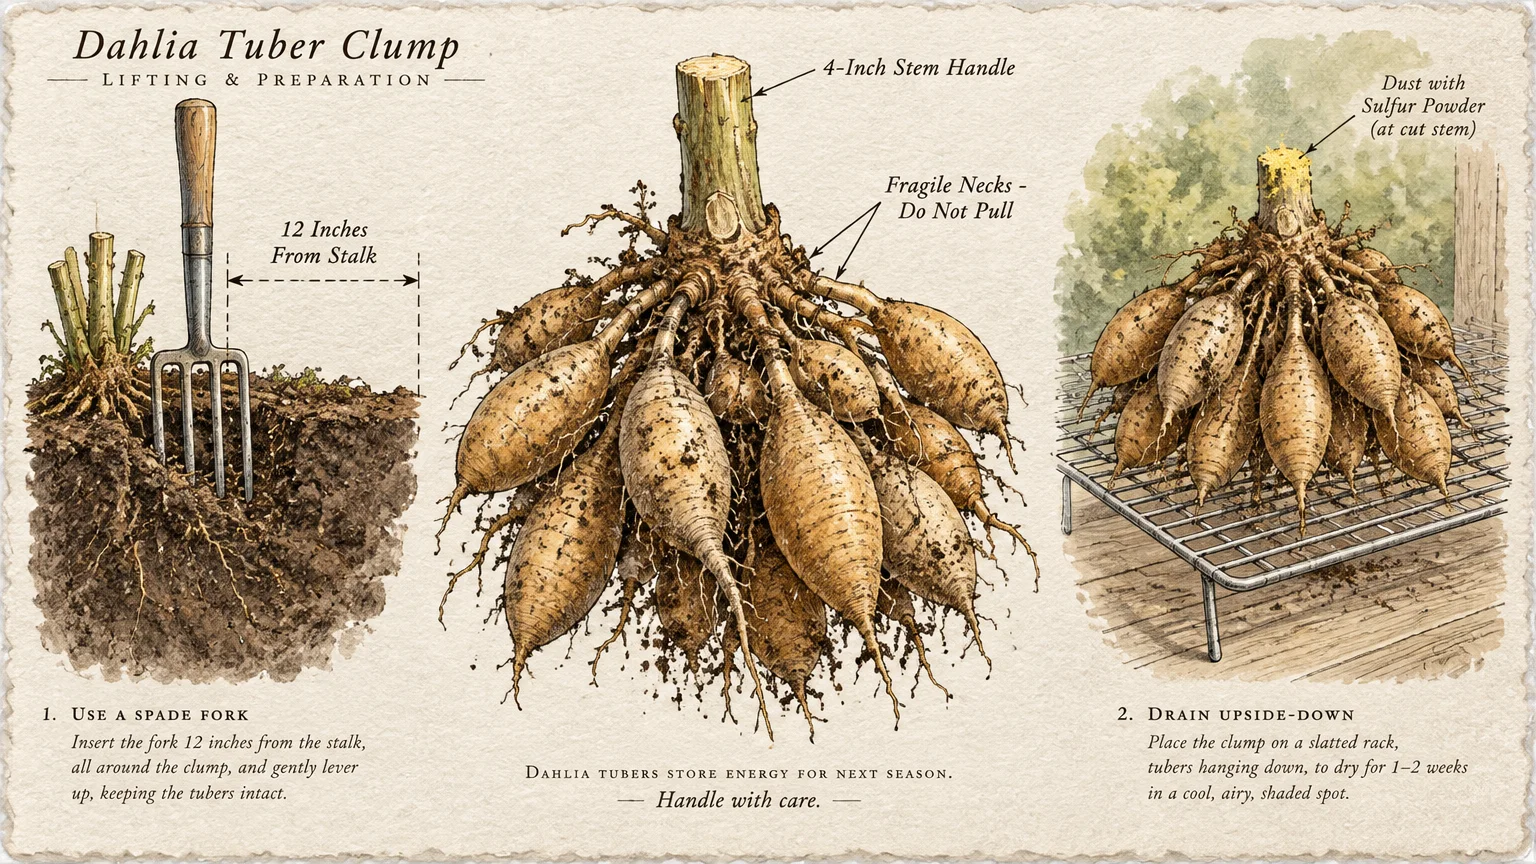
Use sharp, sanitized loppers to cut the thick main stems down to about four inches above the soil line. Leaving a short stem stub provides a convenient handle and marks the central growth crown.
Insert your spading fork into the ground at least twelve inches away from the stalk to prevent slicing through peripheral tubers. Gently loosen the surrounding soil in a full circle around the root mass.
Pry upward carefully from beneath the cluster until the entire clump releases from the ground. Avoid pulling directly on the hollow stalks, as snapping the fragile tuber necks ruins next year’s growth points.
Rinse away heavy soil clumps using a gentle stream from your garden hose. Inspect every tuber carefully for signs of rot, physical puncture wounds, or hungry insect larvae.
Turn the washed clumps upside down on newspaper or wire mesh in a frost-free, ventilated shed. Allow them to dry and cure for three to five days so excess stem moisture drains completely.
Dust any severed edges or open cuts with sulfur powder or ground cinnamon to suppress fungal spores. Label each root clump with waterproof ink or a durable tag before packing them away.
Place the dry tubers in sturdy cardboard boxes or ventilated plastic crates lined with dry peat moss, coarse vermiculite, or pine shavings. Ensure the packing material surrounds each tuber clump to regulate ambient humidity.
Store the containers in a dark, cool space held between forty and fifty degrees Fahrenheit throughout the winter. Inspect your tubers monthly and lightly mist the packing medium if you notice severe shriveling.
Tip #2: Gladiolus Corms
Gladiolus spikes showcase breathtaking vertical color across summer borders, but their corms perish when winter temperatures freeze the soil. Cold moisture rapidly rots the tender corm tissue beneath the ground.
Plan your harvest roughly six to eight weeks after blooming finishes or immediately after the first autumn frost touches the leaves. You want the foliage to begin yellowing naturally before you harvest.
Loosen the soil around each plant with a hand trowel or spading fork placed several inches from the stem base. Carefully pry upward beneath the roots to free the corms without slicing their protective husks.
Grasp the faded foliage near the soil surface and lift the root cluster smoothly from the loosened dirt. Gently shake off excess soil clinging to the corm and root base.
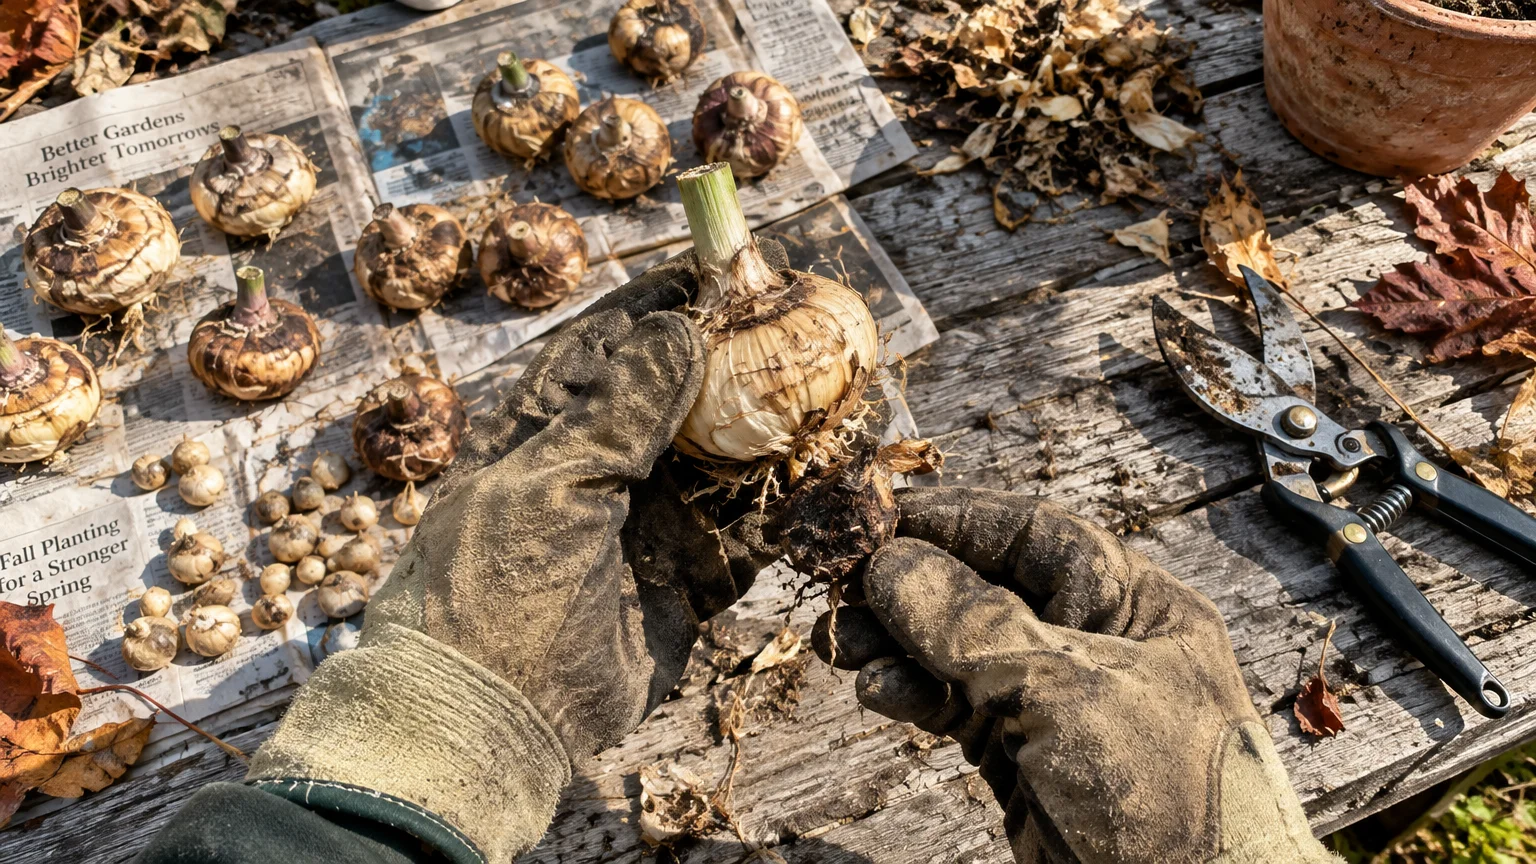
Snip the foliage back to roughly one inch above the corm using sharp, clean garden shears. Leaving a tiny stub helps protect the central growing tip from accidental mechanical damage during handling.
Spread your harvested corms in a single layer across trays lined with cardboard or newspaper. Place the trays in a warm, dry room with good air circulation for three weeks to cure properly.
Curing allows the outer skins to turn papery and dry, sealing the corm against pathogens. Once cured, twist off and discard the shriveled old mother corm clinging beneath the plump new corm.
Separate and discard any tiny, immature cormels unless you wish to spend several years nursing them into flowering-sized plants. Discard any soft, diseased, or discolored corms immediately to safeguard your healthy collection.
Place the cleaned, cured corms into breathable mesh onion bags, old pantyhose, or shallow paper sacks. Breathable containers prevent moisture buildup, which creates the ideal breeding ground for mold and mildew.
Store the bags in a dark, dry space maintained between thirty-five and forty-five degrees Fahrenheit. An unheated basement, root cellar, or insulated attached garage provides ideal winter quarters.
Tip #3: Canna Lily Rhizomes
Canna lilies bring dramatic tropical architecture to your landscape, but their fleshy rhizomes will turn to slush in frozen ground. In USDA hardiness zones seven and colder, you must dig them each autumn.
Wait for the first autumn frost to singe the broad, lush foliage before you begin digging. This frost shock signals the canna to withdraw vital nutrients into its underground storage system.
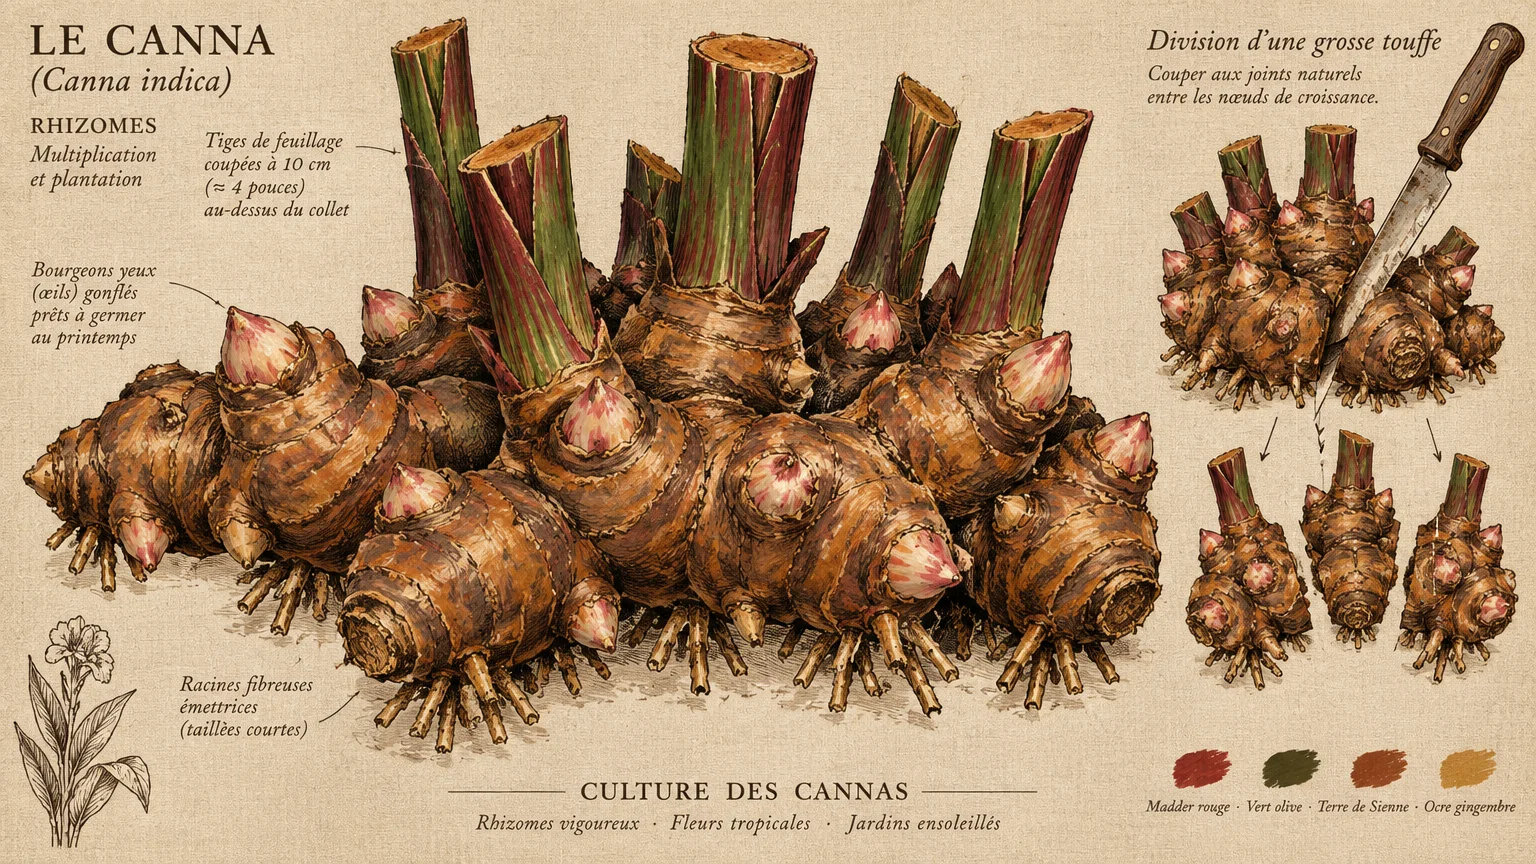
Prune the sturdy stalks down to roughly four to six inches above the ground using clean lopping shears. The remaining stem stubs serve as sturdy lifting handles as you work the rhizomes loose.
Dig a wide perimeter around the clump with a sharp spade, staying at least eight inches away from the outermost stalks. Canna rhizomes spread horizontally and form extensive, interconnected root mats near the soil surface.
Pry upward slowly from underneath the entire clump to release it from the ground without snapping the rhizome joints. Gently shake away loose dirt clumps to expose the underlying rhizome structure.
Allow the lifted clumps to air dry in a frost-free, sheltered garage or shed for several days. This brief drying interval toughens the outer skin and reduces surface moisture.
Trim away long, stringy feeder roots and inspect the rhizome knuckles for any soft or rotting tissue. Cut away any damaged segments using a sterile knife, dusting the wounds with powdered sulfur.
You can divide large rhizome masses now or wait until spring planting time arrives. Ensure each saved division contains at least two or three prominent, healthy eye buds.
Place the rhizomes in plastic tubs, milk crates, or cardboard boxes layered with slightly damp peat moss, perlite, or coarse vermiculite. The packing medium must remain barely damp—never wet—to prevent the rhizomes from desiccating.
Store your packed cannas in a dark location where temperatures stay reliably between forty-five and fifty-five degrees Fahrenheit. Check the storage bins every month, discarding any rotted segments promptly.
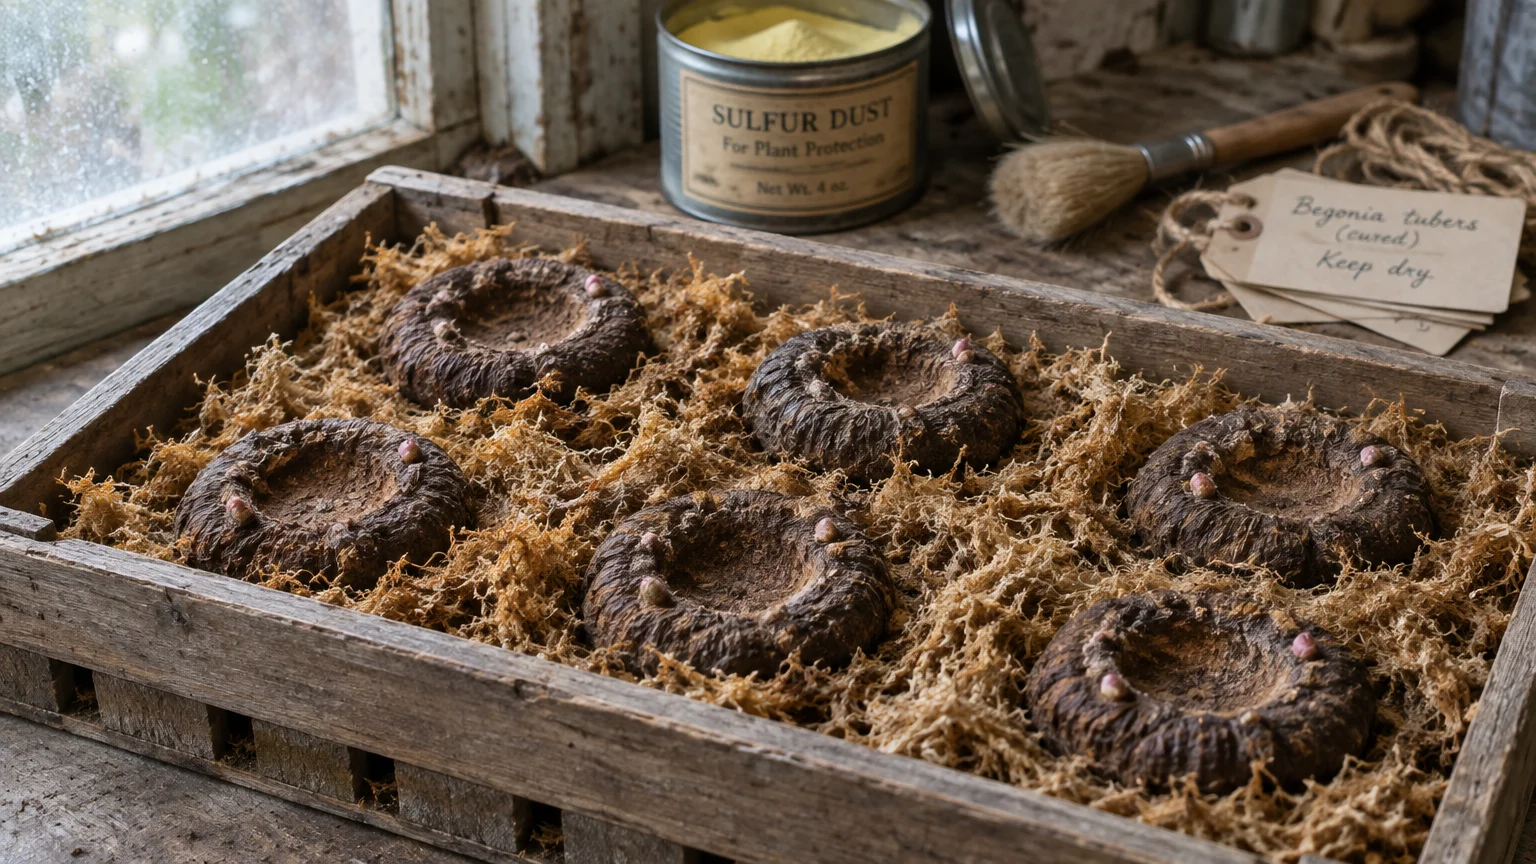
Tip #4: Tuberous Begonias
Tuberous begonias brighten shady garden beds and hanging baskets with gorgeous, rose-like blossoms. However, these shade-loving plants have succulent stems and water-dense tubers that freeze easily.
Dig your tuberous begonias before the first hard freeze strikes, typically when autumn temperatures drop and foliage begins to yellow. Prolonged exposure to cold, wet autumn soil encourages destructive tuber rot.
Excavate the tubers carefully using a narrow hand trowel, digging several inches away from the base of the plant. Begonias develop shallow root systems, making them simple to lift with minimal root disturbance.
Snap the succulent stems off cleanly at the base where they connect to the tuber using gentle finger pressure. Never pull forcefully on the stems, which can tear the fragile top surface of the tuber.
Avoid washing begonia tubers with water because excess moisture easily penetrates their porous surfaces. Instead, allow the clinging soil to dry naturally and gently brush it away with a soft-bristled brush.
Lay the cleaned tubers out in a single layer on trays lined with newspaper in a warm, dry room. Cure them for two full weeks until the outer skin hardens and the stem scar seals firmly.
Discard any tubers that feel soft, lightweight, or show signs of sunken gray mold. Only firm, heavy tubers will successfully survive long winter dormancy and sprout vigorous shoots next spring.
Pack the cured tubers concave-side up inside shallow cardboard boxes filled with dry peat moss, dry sand, or vermiculite. Arranging them cup-side up prevents moisture from collecting in the central depression.
Ensure the tubers do not touch each other within the packing medium to prevent the spread of fungal decay. The surrounding material insulates the tubers against sudden temperature swings and desiccation.
Store the containers in a dark, dry environment between forty-five and fifty degrees Fahrenheit. A cool interior closet or unheated basement shelf offers the perfect balance of temperature and darkness.
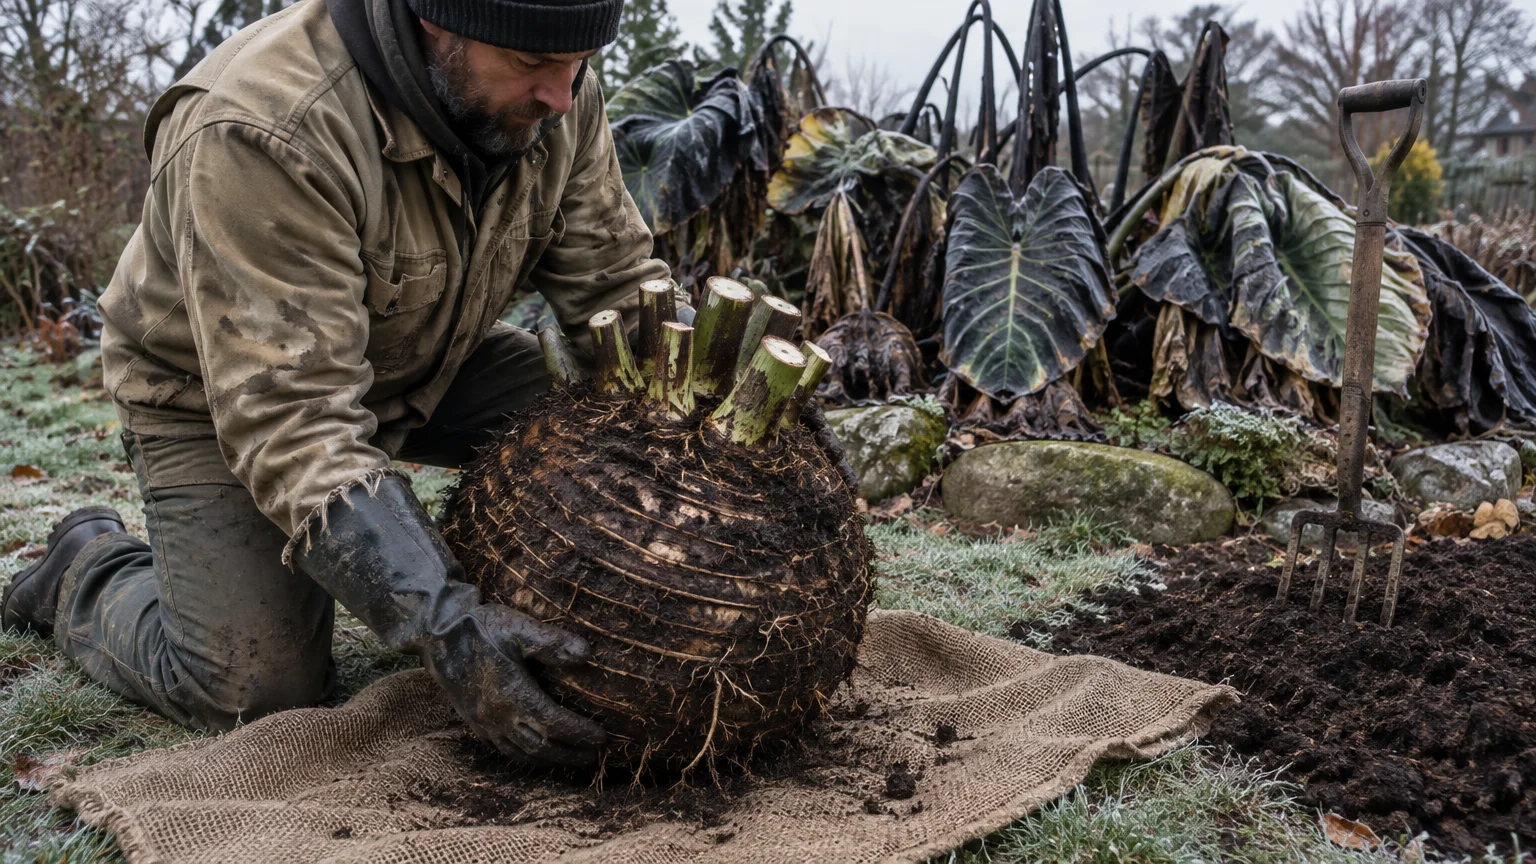
Tip #5: Elephant Ears (Colocasia and Alocasia)
Elephant ears make a stunning statement with their massive, heart-shaped tropical foliage. Because these plants hail from humid tropical climates, freezing soil quickly turns their central tubers to mush.
Begin harvesting your elephant ear tubers immediately after the first light autumn frost wilts the large leaves. Leaving them in cold, water-saturated ground invites soil-borne fungal pathogens into the crown.
Use a clean pruning saw or sturdy loppers to cut the succulent petioles down to roughly four inches above ground level. This short stalk stub helps protect the central growing point during extraction.
Dig a wide circle around the base of the plant using a heavy spading fork, working twelve to fifteen inches outward. Elephant ears produce strong anchoring roots that spread wide to support their heavy canopy.
Pry upward carefully around the circumference until the dense, heavy root mass loosens from the ground. Lift the tuber clump free, supporting it from underneath with your hands.
Rinse away stubborn soil with a garden hose to inspect the tuber surface clearly. Check for any mushy lesions or insect damage, trimming away suspect spots with a sterile utility knife.
Allow the large tubers to dry in a warm, shaded, well-ventilated garage or shed for one full week. Thorough surface drying creates a protective barrier against dehydration and decay.
Dust any cut surfaces or scrapes with sulfur powder to prevent airborne mold spores from infecting the tissue. Trim off excess fibrous feeder roots once they have dried and shriveled.
Place the dried tubers in breathable burlap sacks or cardboard boxes lined with dry peat moss or wood shavings. Ensure the storage medium surrounds the tubers completely to cushion them and absorb ambient moisture.
Maintain winter storage temperatures between fifty and sixty degrees Fahrenheit. Elephant ears prefer slightly warmer storage conditions than hardier bulbs, so avoid freezing porches or cold crawl spaces.
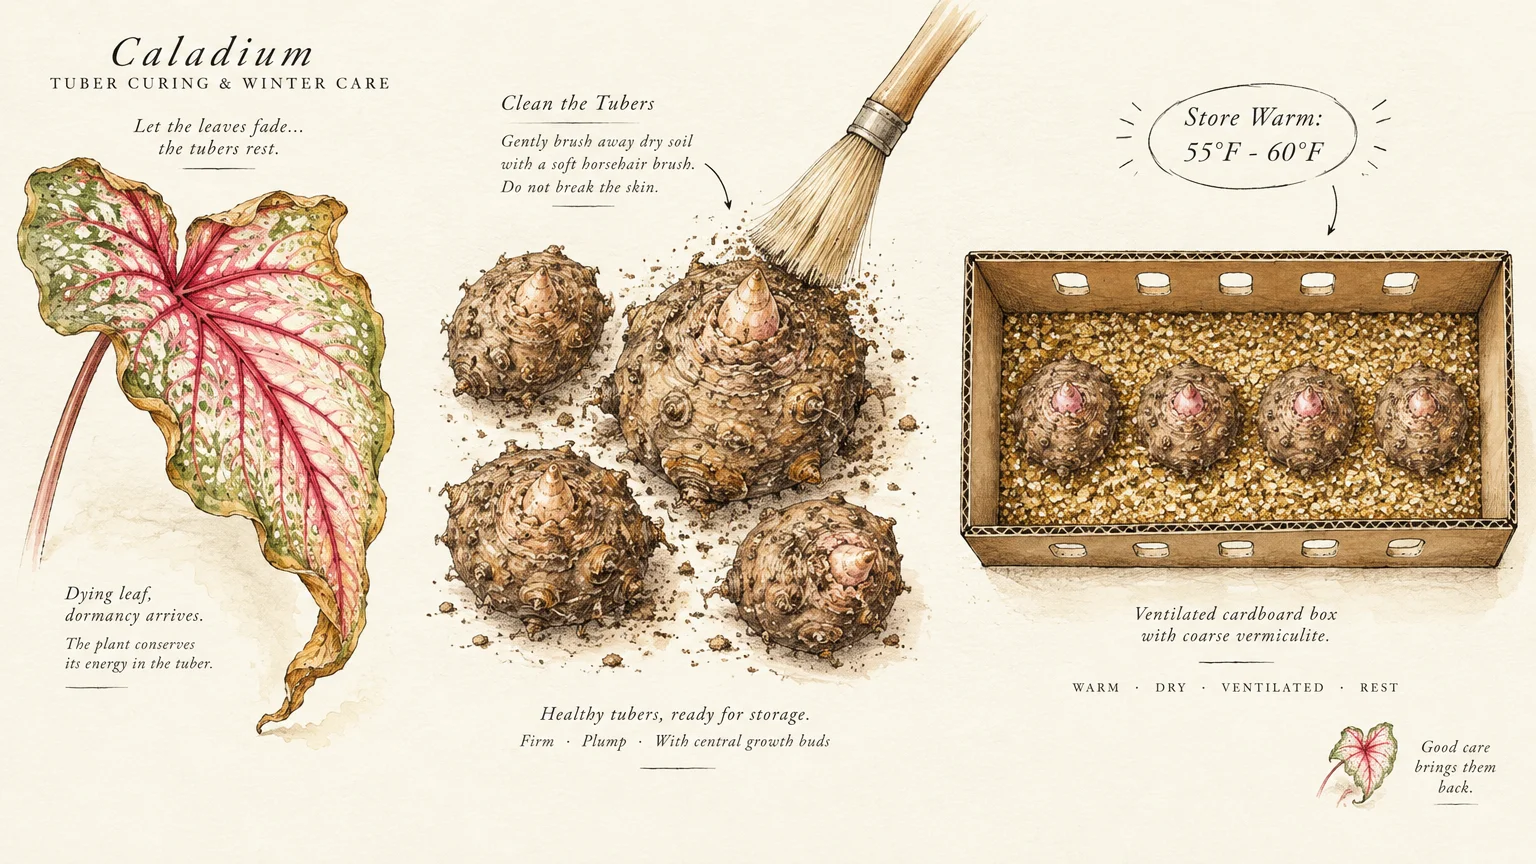
Tip #6: Caladium Tubers
Caladiums illuminate shade borders and patio containers with breathtaking foliage painted in vivid crimson, rose, and white. These tropical beauties are exceptionally sensitive to cold autumn temperatures.
Lift your caladium tubers in early autumn before soil temperatures fall below fifty-five degrees Fahrenheit. Do not wait for frost, as chilled soil triggers internal decay long before leaves freeze.
Carefully loosen the soil around your caladiums using a small hand trowel or garden fork. Dig several inches away from the foliage to protect the delicate knobby tubers beneath the surface.
Lift the entire plant by the base of the stems, keeping the foliage attached to the tuber. Leaving the leaves intact allows remaining plant energies to migrate into the tuber during curing.
Spread the whole plants across drying screens or newspaper in a warm, dry room with excellent ventilation. Maintain room temperatures between seventy and seventy-five degrees Fahrenheit during this crucial curing period.
Allow the plants to cure for two to three weeks until the leaves turn dry, brown, and brittle. Once fully dried, gently pull or twist the dead foliage away from the tubers.
Brush away any remaining dry soil clinging to the tubers using your fingers or a soft brush. Discard any tubers that feel soft, wrinkled, or hollow inside.
Store caladium tubers in breathable mesh produce bags, old nylon stockings, or open paper sacks. Breathable containers ensure consistent air circulation around each tuber throughout the resting season.
You can also pack them loosely in dry vermiculite or peat moss to prevent accidental contact between tubers. Ensure the packing medium remains dry because moisture triggers mold growth on dormant caladiums.
Store your caladiums in a warm indoor location kept between sixty and sixty-five degrees Fahrenheit. A high shelf in a heated interior closet provides the cozy warmth these tropical tubers require.
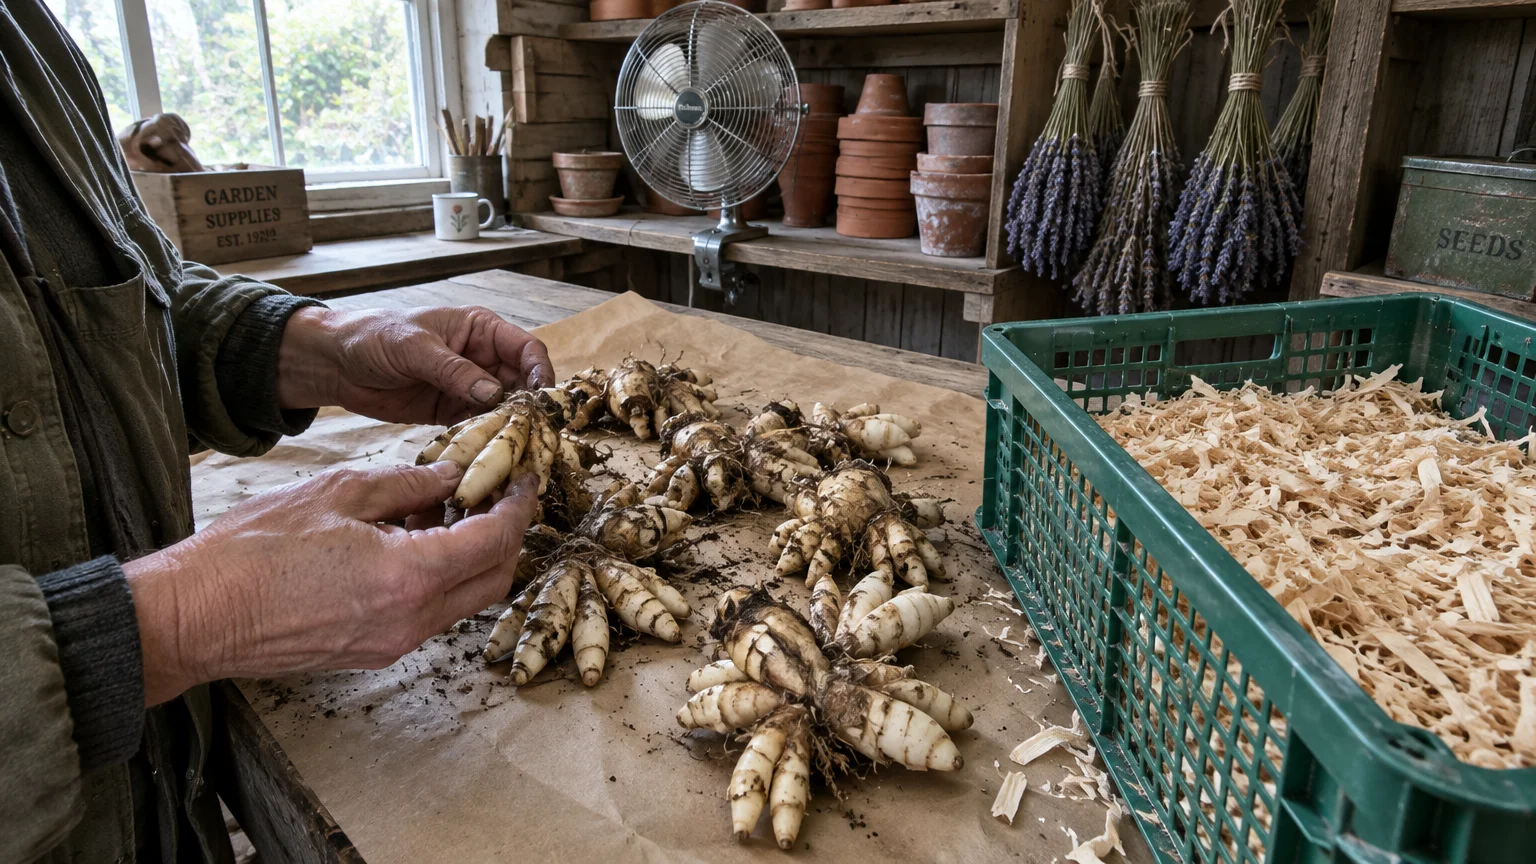
Tip #7: Calla Lily Rhizomes
Calla lilies offer magnificent sculptural blooms and elegant speckled foliage that brighten borders and containers throughout the summer. These tender rhizomes cannot survive sub-freezing soil temperatures during harsh winters.
Harvest calla lily rhizomes in autumn when the foliage begins to yellow and flop over naturally. This natural decline indicates the plant has concluded its active growth cycle and entered winter dormancy.
Cut the dying foliage back to about two inches above the soil line using sanitized pruning shears. This small stem stub helps you identify the top of the rhizome during winter handling.
Insert your garden spade ten inches away from the base of the plant to prevent slicing the rhizomes. Gently rock the spade back and forth to loosen the surrounding soil evenly.
Lift the entire root clump smoothly out of the ground, supporting the rhizomes with both hands. Gently shake off loose soil so you can examine the underlying rhizome knuckles.
Wash away remaining dirt under a gentle stream of tap water to expose the pale rhizome surfaces. Carefully inspect each piece for bacterial soft rot, which manifests as foul-smelling, water-soaked tissue.
Cut away any damaged or decaying sections with a sterile knife, discarding heavily infected rhizomes into the trash. Dip cut surfaces in powdered sulfur or cinnamon to create a protective antifungal barrier.
Lay the clean rhizomes out on wire drying racks in a warm, well-ventilated room out of direct sunlight. Allow them to cure for seven to ten days until the outer skins become dry and firm.
Place the cured rhizomes into cardboard boxes or wooden flats layered with slightly damp peat moss or vermiculite. Ensure individual rhizomes do not touch one another so air can circulate between them.
Keep the storage containers in a dark room held consistently between fifty and fifty-five degrees Fahrenheit. Check on them monthly and discard any specimens that display signs of rot.
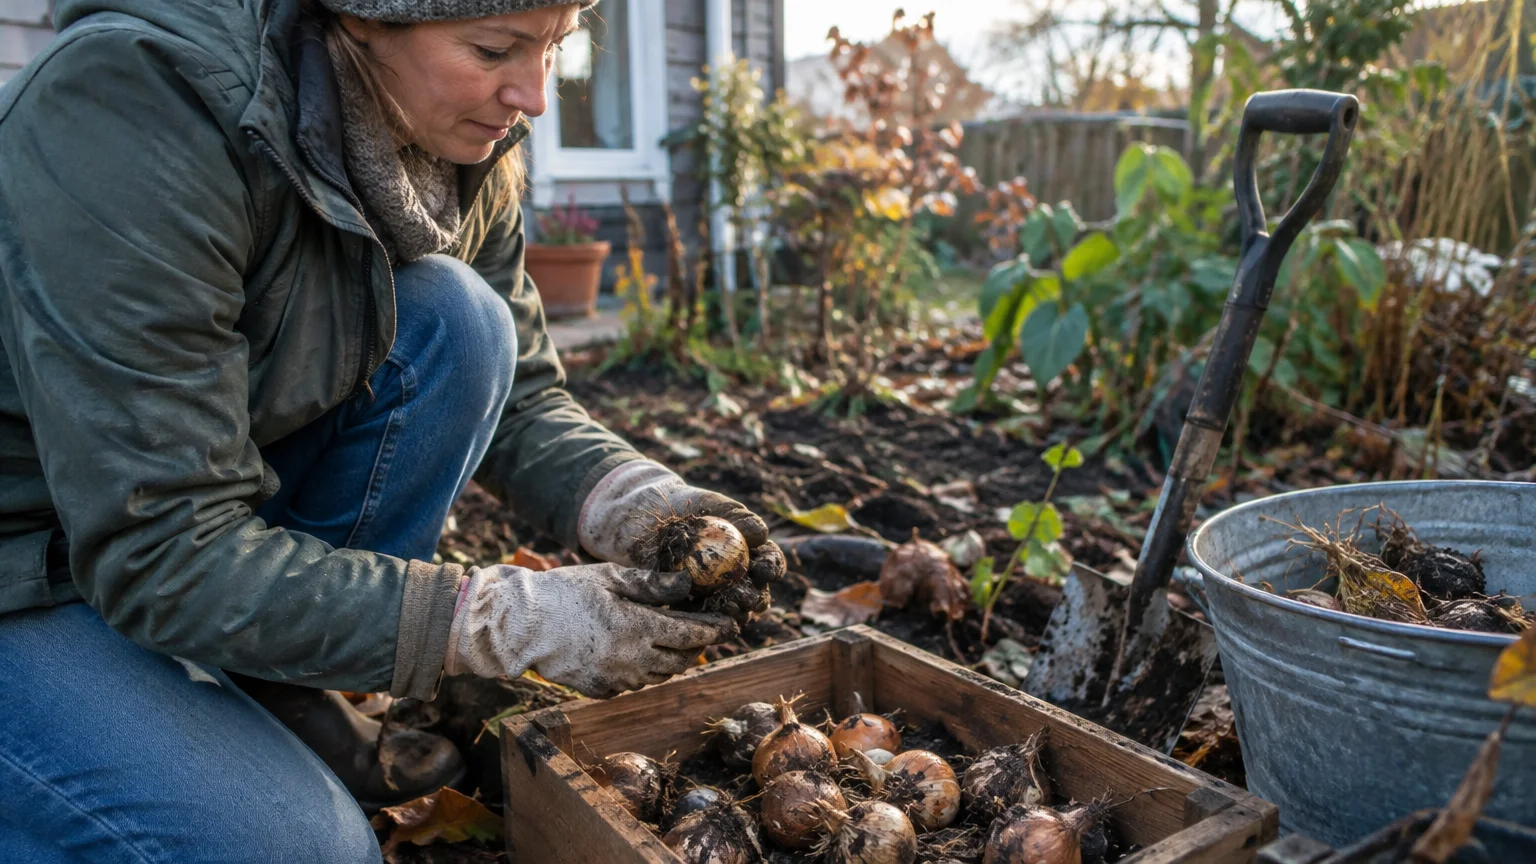
Putting It All Together: Enjoy Your Beautiful Garden
Digging up your tender bulbs and tubers before freezing weather sets in protects your gardening investment. Taking action now guarantees you will enjoy spectacular, healthy displays when warm spring weather returns.
Always prioritize careful digging, gentle cleaning, thorough curing, and proper storage temperatures for every variety. These simple steps shield your plants from destructive winter rot and lethal cold damage.
Check your stored tubers and rhizomes once a month throughout the winter season. Promptly remove any shriveled or softening specimens before fungal problems spread to neighboring healthy roots.
For region-specific advice, consult your local University Extension program (find yours via the USDA directory). For plant databases and inspiration, visit the Missouri Botanical Garden or the Royal Horticultural Society.
Disclaimer: This article provides general gardening advice. Always consider your specific climate, soil conditions, and local pests. Follow safety guidelines when using gardening tools and products.
Frequently Asked Questions
Can I leave tender bulbs in the ground if I add heavy mulch?
Heavy mulch protects marginally hardy plants in mild zones, but it will not save tender bulbs in freezing soils. Freezing winter moisture penetrates thick mulch and rots tubers rapidly in cold climates.
Digging and storing your tender bulbs indoors remains the only reliable method to guarantee their winter survival.
What happens if I dig up my bulbs before a frost occurs?
You can dig bulbs before frost strikes if autumn freezes arrive unexpectedly early in your region. However, allowing foliage to die back naturally helps plants store maximum energy for vibrant spring growth.
If you must dig early, cure the plants with their green leaves attached so stored sugars migrate down.
What should I do if my stored tubers begin to shrivel?
Light shriveling indicates your winter storage environment lacks adequate humidity. You can remedy this issue by misting the surrounding peat moss or packing medium lightly with clean water.
Avoid wetting the tubers directly, as excessive surface moisture encourages devastating fungal mold outbreaks.
How do I know if a stored bulb or tuber has rotted?
A healthy bulb or tuber feels firm, solid, and heavy for its size throughout winter dormancy. In contrast, rotted specimens feel spongy, mushy, or completely hollow when you squeeze them gently.
Discard any rotting specimens immediately to prevent airborne fungal pathogens from spreading to healthy dormant stock.