You can enjoy homegrown organic produce all winter without building an expensive, climate-controlled walk-in cooler. A few simple adjustments let you savor crisp roots, savory aromatics, and rich squash long after freezing weather arrives.
Strategic winter vegetable storage protects your hard work from frost damage, moisture loss, and premature rot. By matching each crop to its ideal temperature and humidity level, you create a steady seasonal food supply right at home.
These reliable storage vegetables require minimal effort to preserve through freezing temperatures. Transform ordinary basements, unheated closets, or insulated bins into dependable larders packed with fresh, nutrient-dense garden nutrition.
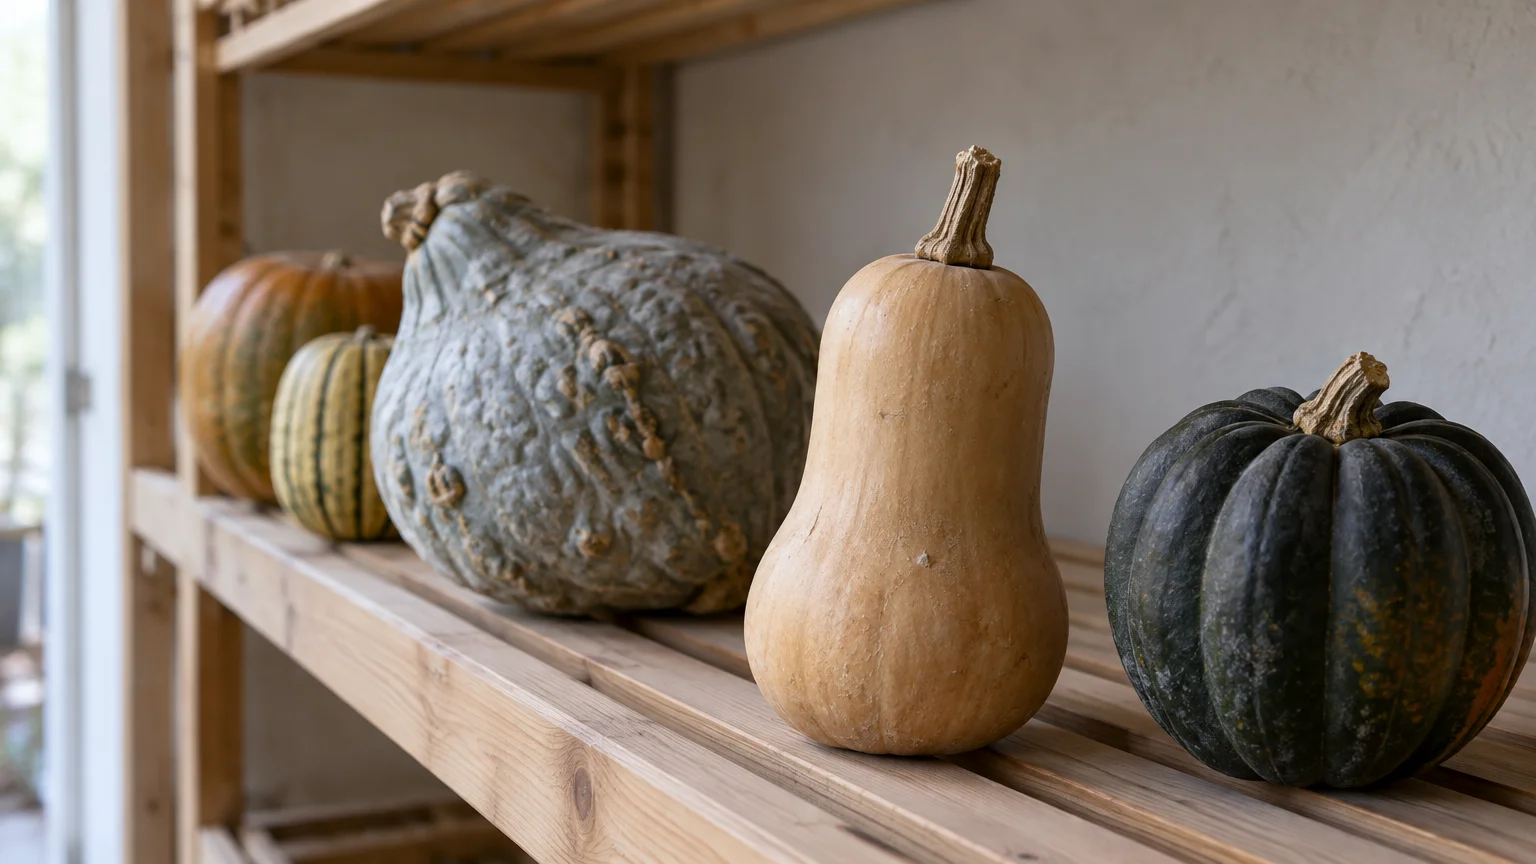
Tip #1: Winter Squash for Sweet Pantry Staples
Winter squash varieties like Butternut, Acorn, and Hubbard produce thick, durable rinds that seal moisture inside. These rugged shells shield the tender, sugary flesh from dry winter air; they keep the interior perfectly preserved.
Harvest your squash on a sunny afternoon before the first hard frost strikes your garden patch. Always leave at least two inches of stem attached to prevent decay pathogens from penetrating the vulnerable fruit flesh.
Cure the harvested fruit in a warm, well-ventilated room at 80 to 85 degrees Fahrenheit for ten days. This vital warmth hardens the skin, heals surface scuffs, and concentrates the natural sugars within.
After curing, relocate your squash to a dry pantry kept between 50 and 55 degrees Fahrenheit. Maintain low relative humidity around 50 to 60 percent to prevent fungal growth on the rinds.
Do not allow the squashes to touch each other on your pantry shelves. Proper air circulation prevents condensation from forming and stops rogue mold spores from spreading between neighboring fruits.
Acorn squash keeps for two to three months, while dense Butternut and Hubbard squashes stay fresh for six months. Check them periodically and immediately cook any specimen showing softened skin around the stem.
Tip #2: Storage Onions for Savory Foundation Flavors
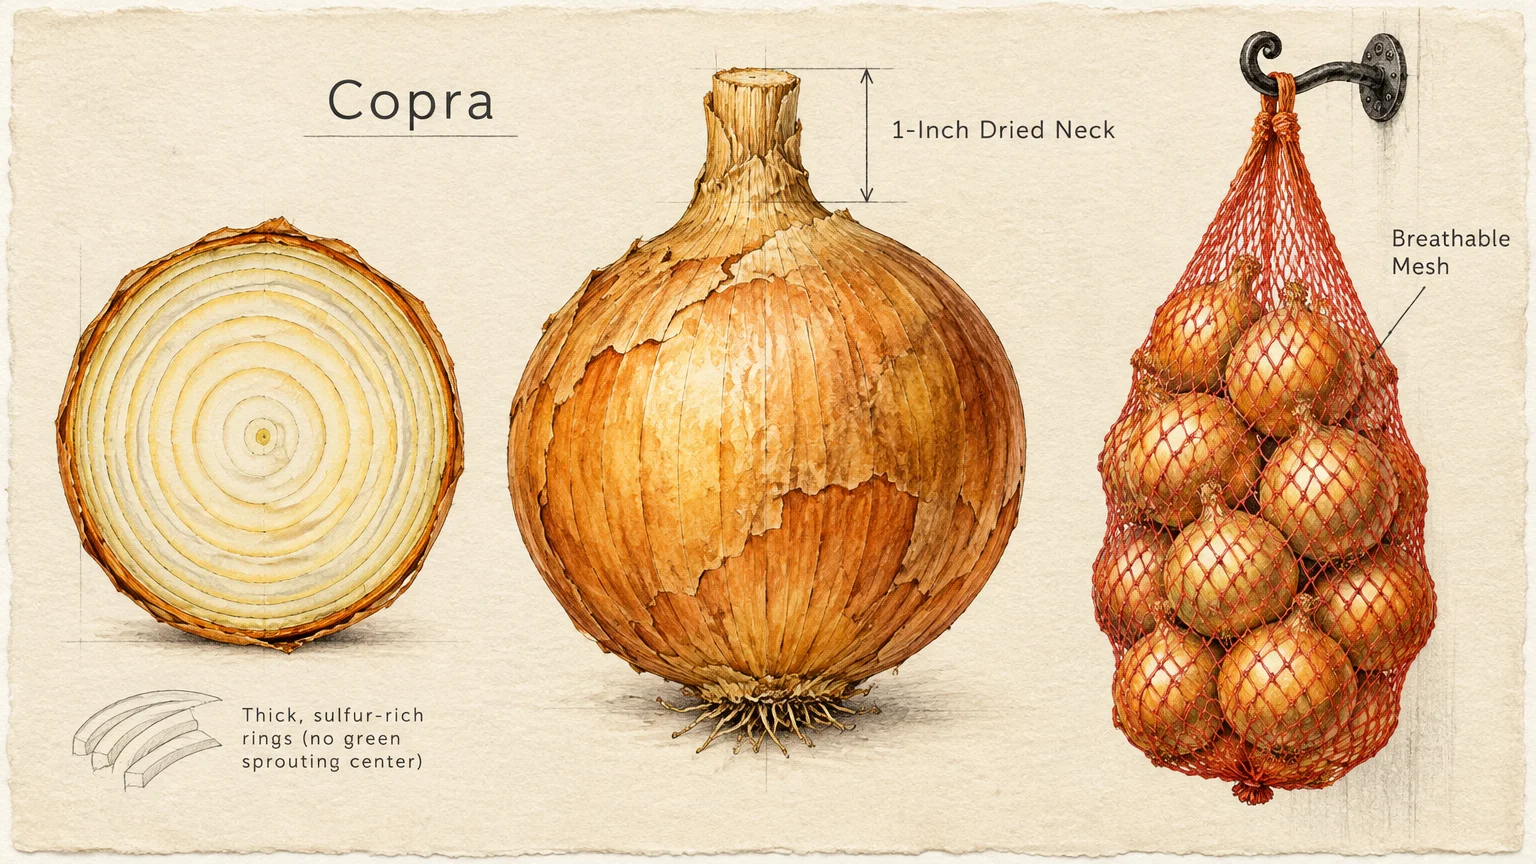
Storage onions contain high sulfur levels and dense, pungent flesh that resists bacterial breakdown. Heavy-duty cultivars like Copra, Patterson, and Stuttgarter form tight, paper-like skins engineered for enduring winter dormancy.
Pull your onions when half of the green foliage weakens and flops over naturally in the field. Allow the freshly dug bulbs to dry under cover in a warm, airy area for three full weeks.
The curing phase finishes once the plant necks turn completely dry, brown, and papery. Trim the wiry roots and clip the dried foliage to one inch above the bulb shoulder.
Store your cured onions in breathable mesh bags, wire baskets, or slatted wooden crates to maximize air movement. Keep the storage room near 32 to 38 degrees Fahrenheit with roughly 65 percent relative humidity.
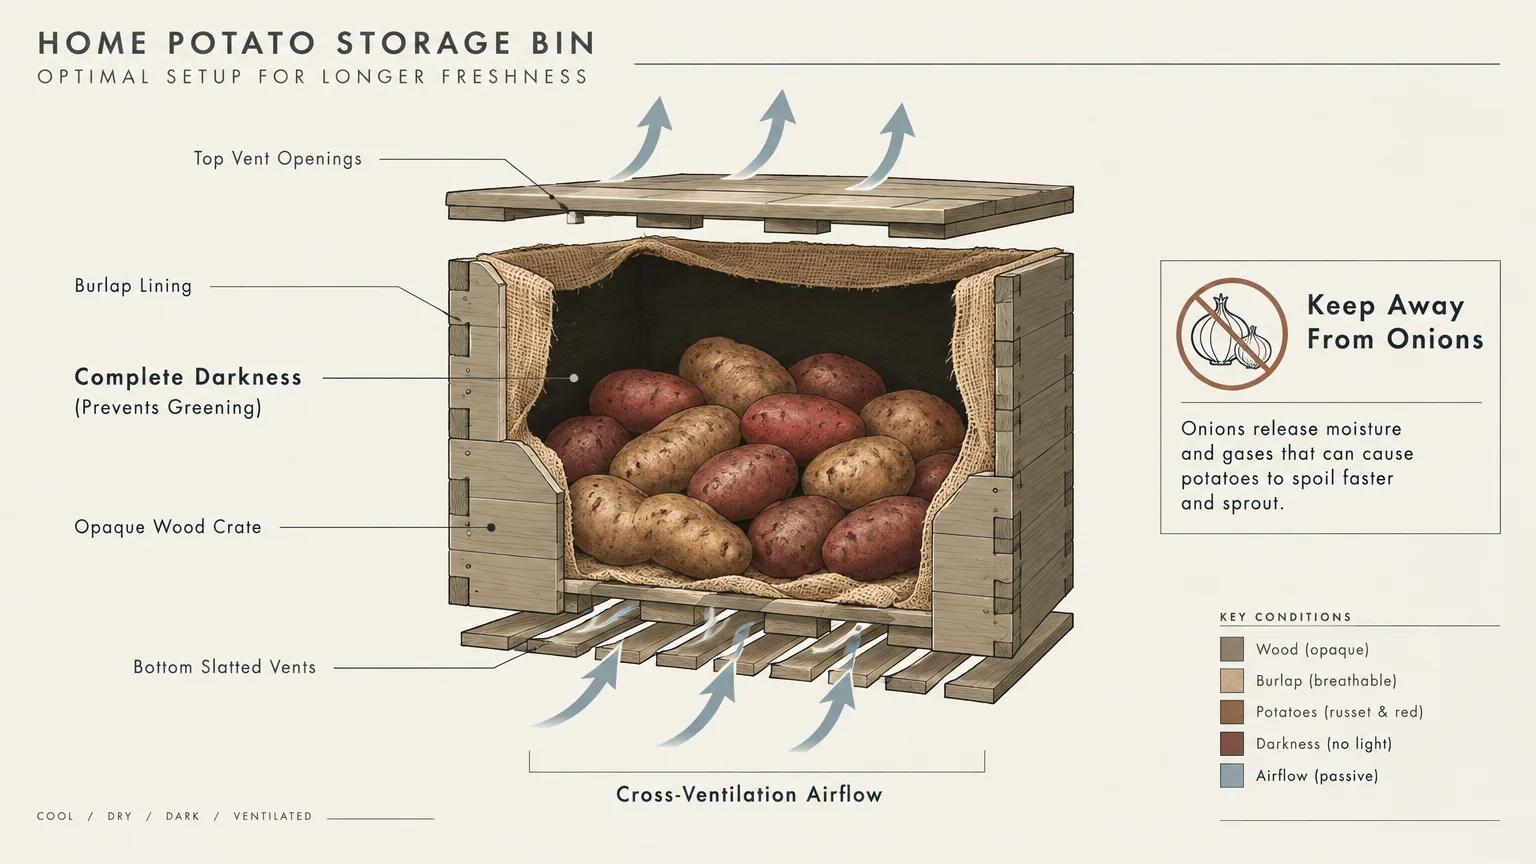
Never store onions alongside potatoes in your home pantry. The moisture and respiratory gases exchanged between them cause both crops to sprout rapidly and rot prematurely.
Discard or cook any onions with thick, soft necks right away, as only completely sealed necks hold up through spring. Pungent storage types regularly last eight to nine months under these chilly, dry conditions.
Tip #3: Hardneck and Softneck Garlic for Robust Bulbs
Garlic stands as one of the easiest, most rewarding long-lasting vegetables you can preserve for winter dining. Multiple protective wrappers defend the interior cloves against desiccation and airborne fungal spores.
Harvest garlic bulbs when the lower three leaves turn yellow-brown while five upper leaves remain green. Gently loosen the soil with a garden fork and lift the bulbs without bruising their wrappers.
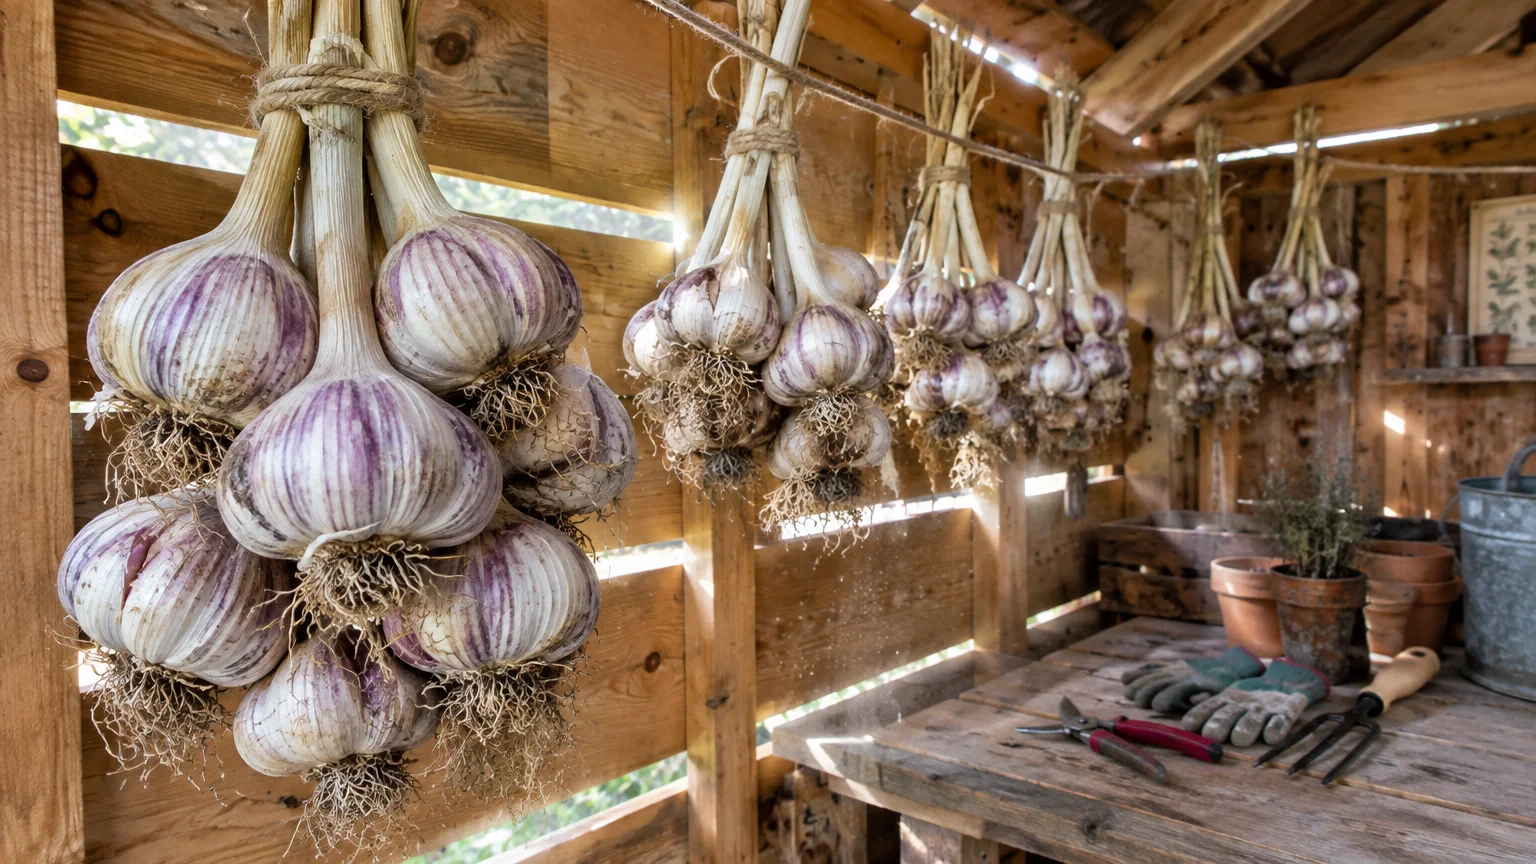
Hang garlic bunches in a shady, drafty outbuilding for three to four weeks to cure thoroughly. Good air movement tightens the outer parchment and seals the cut stem against opportunistic pests.
Trim the dried roots to a half-inch and cut the stiff stems two inches above the bulb. Softneck varieties possess pliable stems, allowing you to weave beautiful, functional hanging braids for compact kitchen storage.
Keep your cured garlic in a cool, well-ventilated room between 55 and 60 degrees Fahrenheit. Avoid cold refrigerators, as temperatures below 50 degrees Fahrenheit trigger rapid sprouting and ruin the cloves.
Stored properly in dark, breathable wire baskets, softneck garlic keeps for up to nine months; hardneck varieties remain plump for five to six months.
Tip #4: Late-Season Potatoes for Reliable Cellar Bulk
Potatoes anchor your winter vegetable storage plan by providing hearty calories through the coldest months. Late-season, thick-skinned varieties like Kennebec, Burbank Russet, and Katahdin offer far better longevity than thin-skinned summer cultivars.
Allow the potato vines to die back completely, then wait two additional weeks before digging the tubers. This underground curing period thickens the skin, protecting your potatoes against nicks, scuffs, and rot organisms.
Cure unwashed potatoes in complete darkness at 55 to 60 degrees Fahrenheit for ten to fourteen days. High humidity during curing helps the skin heal minor abrasions suffered during harvest.
Relocate the healed potatoes to a dark, humid root cellar maintained between 38 and 42 degrees Fahrenheit. Maintaining high humidity—around 90 percent—stops the tubers from shriveling and losing crispness.
Never let storage temperatures drop below 38 degrees Fahrenheit; chilling triggers an enzyme that converts starches into unwelcome sugars. This reaction causes a strange sweetness and turns fried potatoes unappealingly dark.
Block out all ambient light to prevent toxic solanine development, which turns the skins bitter and green. Check crates monthly and pick off any emerging sprouts before they drain the tuber’s energy.
Tip #5: Sweet Potatoes for Warm and Nutrient-Dense Roots
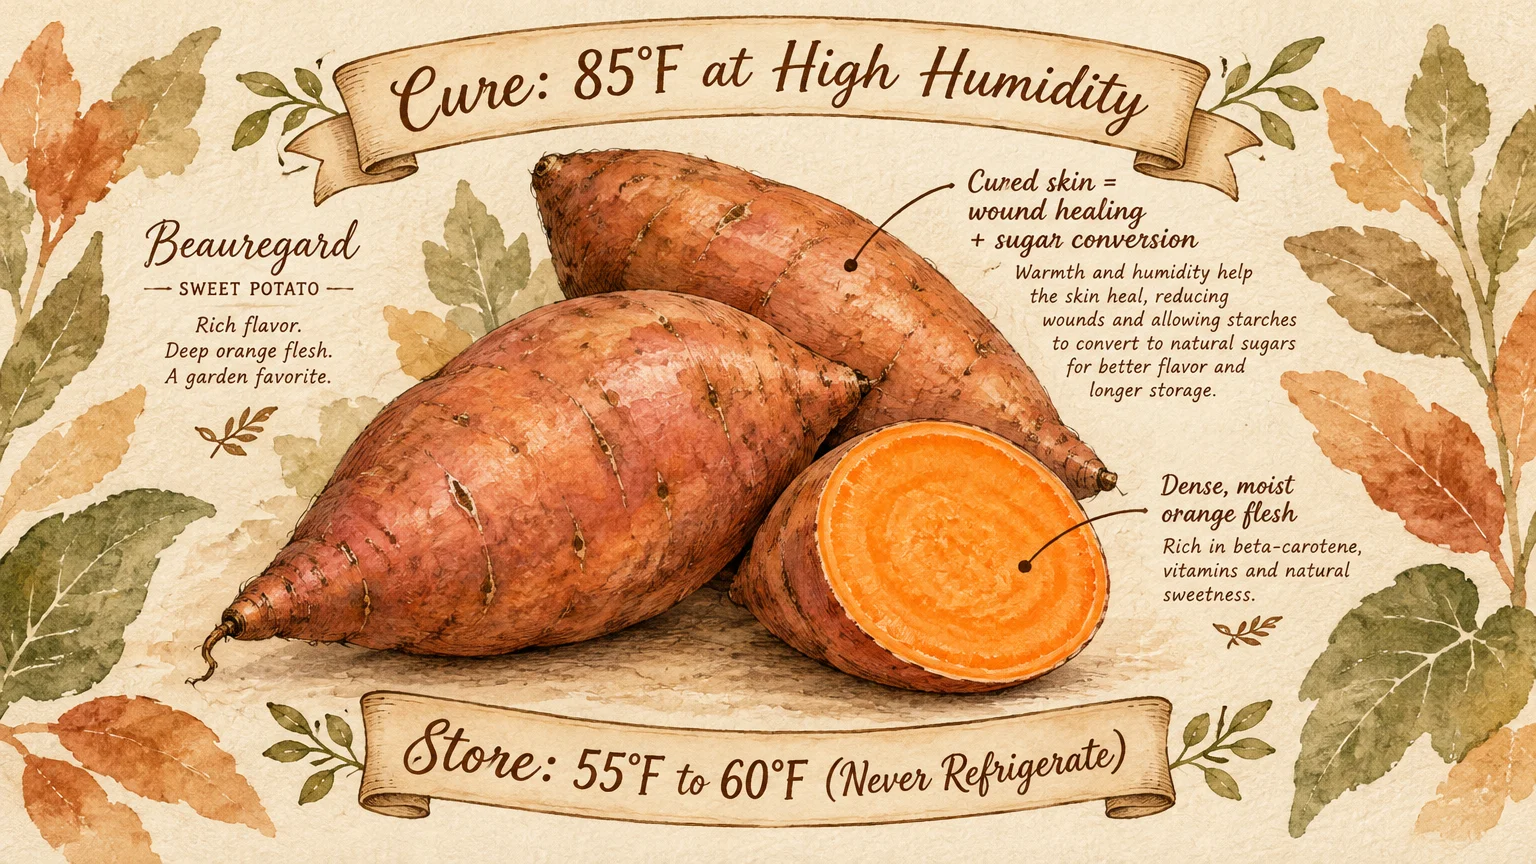
Sweet potatoes require warm handling, setting them apart from standard cold-loving root cellar vegetables. Dependable cultivars like Beauregard, Covington, and Jewel produce high-yielding, nutrient-packed roots that last into the following summer.
Dig your sweet potatoes before the first autumn freeze chills the soil below 55 degrees Fahrenheit. Cold ground damages tropical roots, causing internal discoloration and a rapid decline in culinary quality.
Cure freshly dug tubers immediately in a warm room at 85 degrees Fahrenheit with 85 to 90 percent humidity for ten days. This heat stimulates cork development over wounds and converts starches into luscious sugars.
Following curing, move the roots into a dry, temperate closet kept between 55 and 60 degrees Fahrenheit. Never refrigerate sweet potatoes; exposure to chill produces hard white spots and off flavors during cooking.
Wrap individual tubers in clean newsprint and nestle them inside ventilated cardboard boxes or slatted baskets. This cushioning shields the roots from drafts and maintains a uniform, gentle microclimate.
Properly cured sweet potatoes improve in flavor as they age, retaining their superb moisture and sweetness for eight to ten months.
Tip #6: Crisp Carrots Stored in Moist Sand
Carrots concentrate natural sugars in response to autumn cold, making them exceptionally crisp and sweet for winter storage. Late-maturing varieties like Danvers 126, Bolero, and Autumn King yield thick cores that resist shriveling.
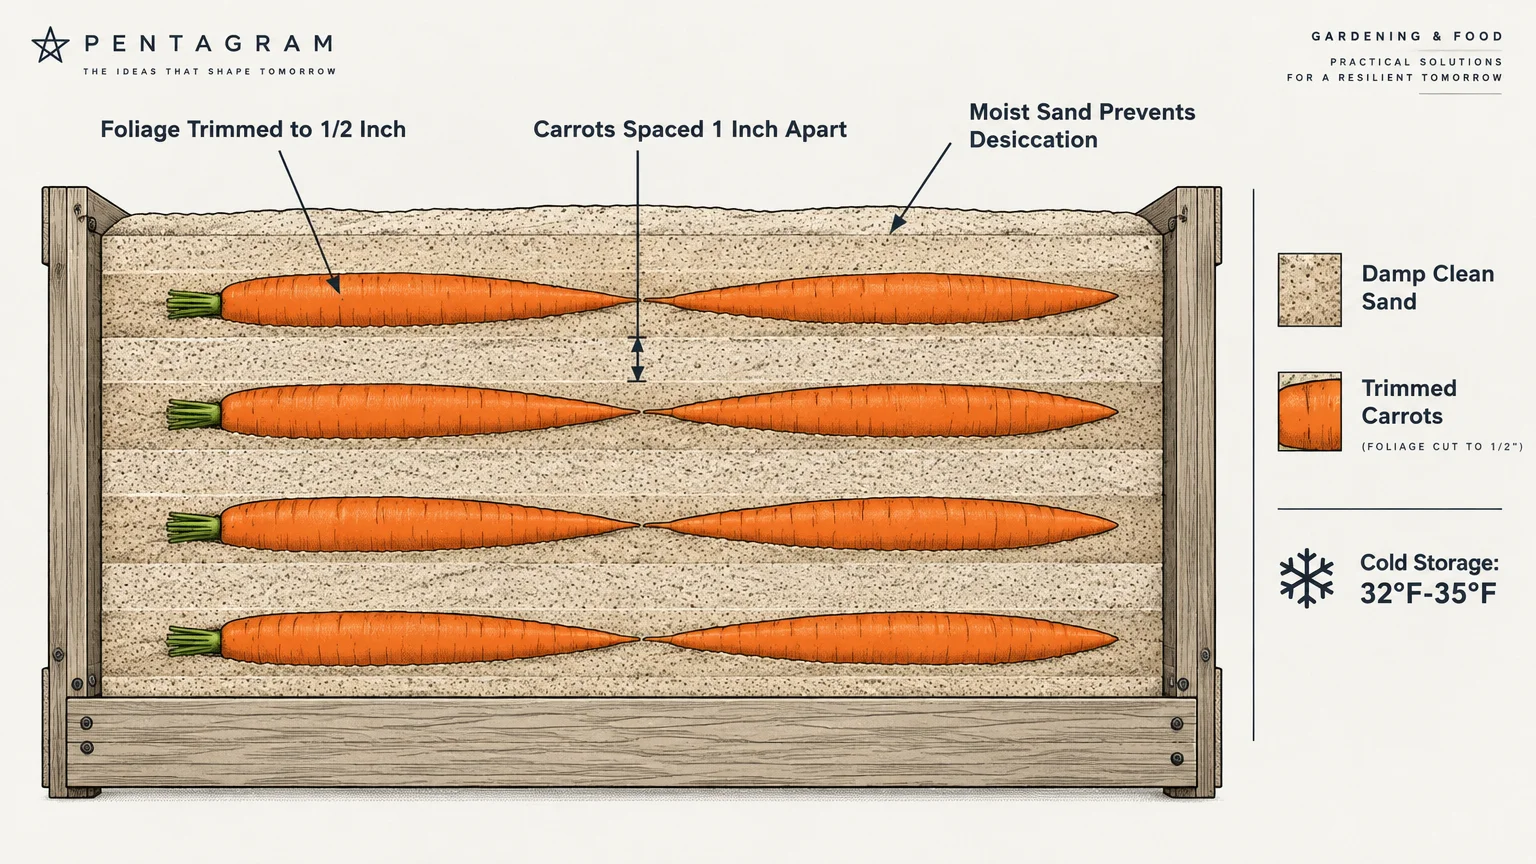
Harvest carrots after several light frosts have sweetened their flavor profile. Slice away the green leafy foliage a quarter-inch above the crown, as leaving foliage attached draws vital moisture from the root.
Brush away loose clods of garden soil, but resist any temptation to wash the roots. Unwashed skins retain a protective microbial barrier that defends the carrot against mold spores and rot.
Pack the unwashed carrots into deep bins filled with slightly moist builder sand, shredded leaves, or clean sawdust. Arrange them in alternate layers so the roots never touch each other directly.
Place your packing bins in a chilly location kept between 32 and 36 degrees Fahrenheit with 95 percent humidity. Cold conditions keep the roots dormant, preventing both premature sprouting and water evaporation.
Check the sand moisture every four weeks; mist it lightly with cold water if it feels dry to the touch. These sandy caches keep garden carrots fresh and delightfully crunchy for up to six months.
Tip #7: Earthy Beets for Colorful Winter Feasts
Beets deliver earthy sweetness, iron, and vibrant color when fresh garden salads become a distant memory. Varieties like Detroit Dark Red, Lutz Green Leaf, and Cylindra form solid, dense roots tailored for extended storage.
Pull your beets before the first hard freeze hardens the soil surface and damages exposed root shoulders. Select medium roots roughly two to three inches wide, as oversized specimens often turn woody and fibrous.
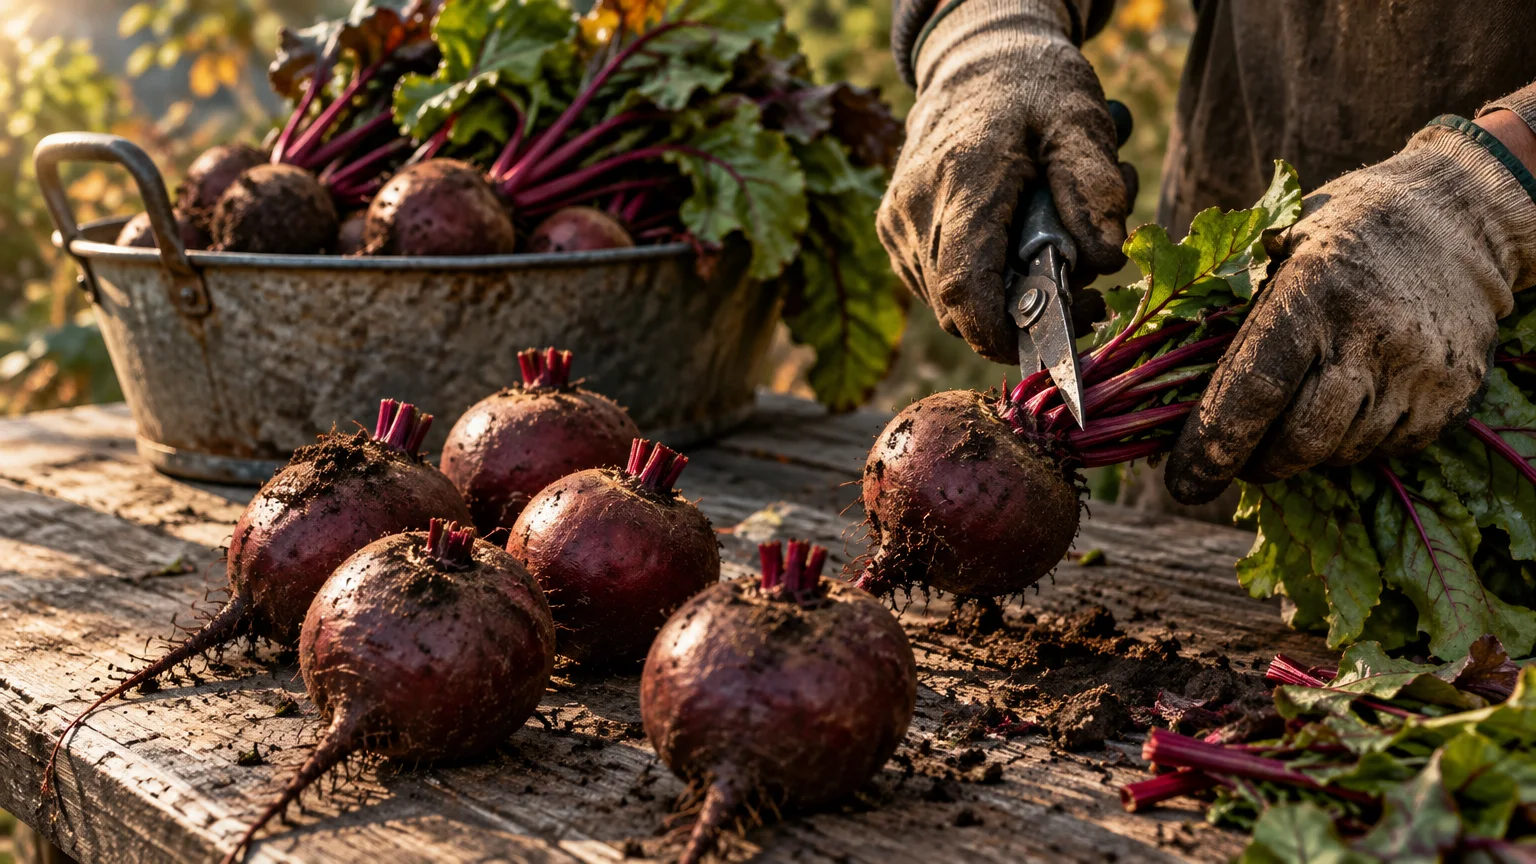
Twist off the leafy beet tops by hand, leaving a one-inch stub of stem attached. Leaving this small stem stub prevents the root from bleeding sap and drying out in storage.
Do not trim the slender taproot at the bottom, and avoid scrubbing off the protective dry dirt. Layer your beets in plastic bins or wooden crates surrounded by damp peat moss or sand.
Maintain storage temperatures between 32 and 40 degrees Fahrenheit alongside 90 to 95 percent relative humidity. Keep the storage medium barely damp; excess water invites mold, while dry sand causes roots to soften.
Properly packed beets retain their smooth texture and sweet, mineral flavor for up to five months in a cool cellar.
Tip #8: Frost-Sweetened Parsnips Kept Cold and Crisp
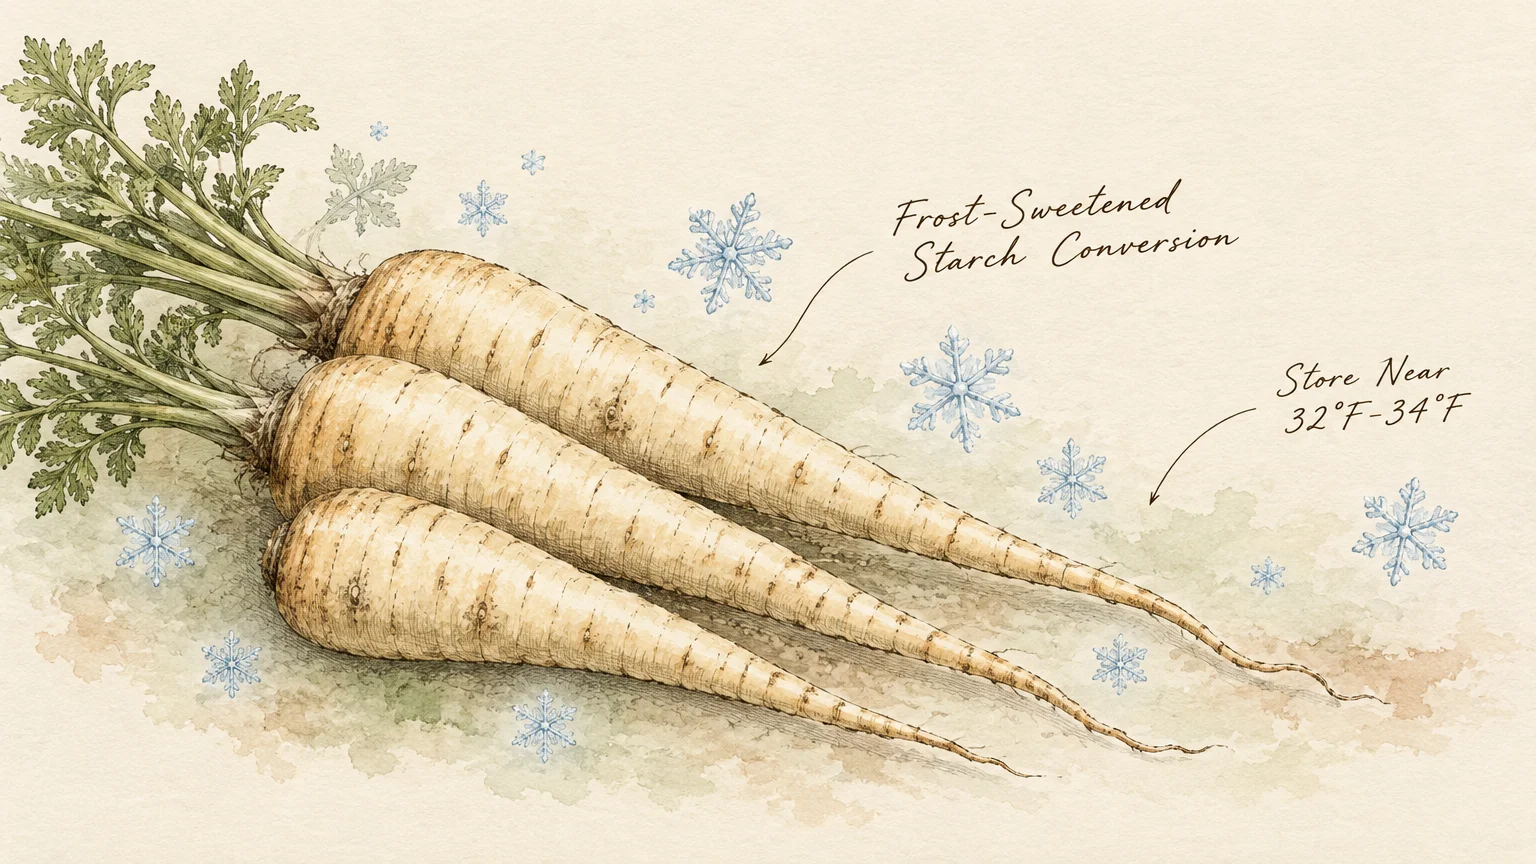
Parsnips taste exponentially sweeter after exposure to freezing soil temperatures, which convert complex starches into delectable natural sugars. Reliable heirloom cultivars like Hollow Crown and Harris Model easily withstand harsh winter weather.
You can leave parsnips directly in your garden bed beneath a thick foot of clean straw mulch. Simply pull back the insulating straw and dig fresh roots whenever the ground remains unfrozen.
If your winter soil freezes rock-solid, dig the entire crop in late autumn before the deep freeze sets in. Cut the leafy greens off cleanly, leaving a short half-inch crown atop each root.
Layer the unwashed roots into buckets or storage totes filled with slightly damp sand or coconut coir. Keep the bedding medium just moist enough to hold together when squeezed into a ball.
Hold your parsnip containers in a frigid space between 32 and 34 degrees Fahrenheit with high humidity. Maintaining near-freezing temperatures locks in their sweet, nutty flavor and prevents early leaf regrowth.
Parsnips stored in cold sand remain deliciously firm and tender for four to six months, perfect for hearty winter stews.
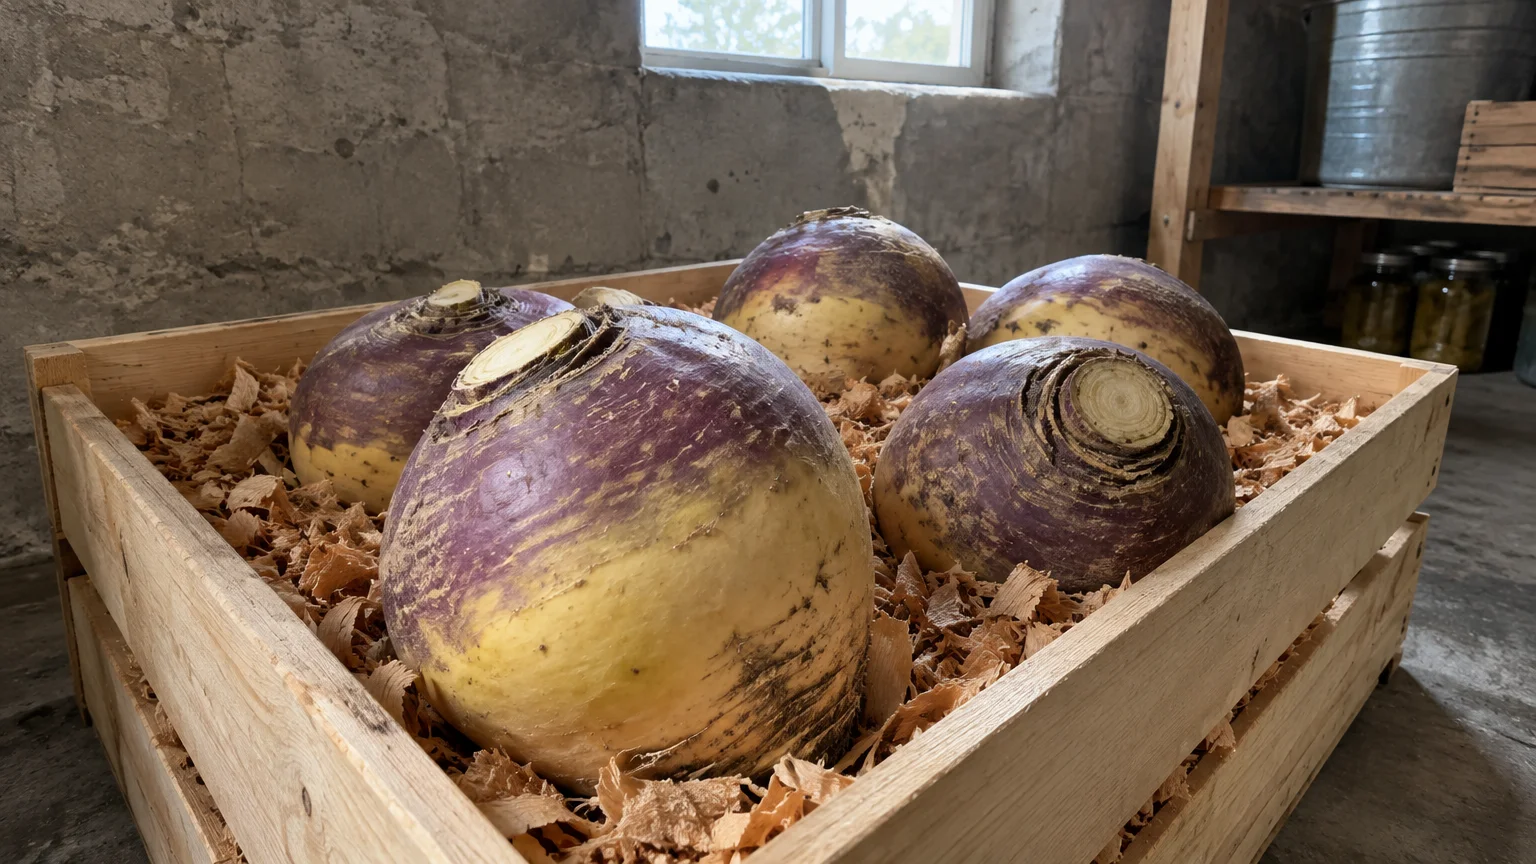
Tip #9: Dense Rutabagas for Long-Lasting Roots
Rutabagas are classic, dependable brassicas that outlast almost every other root vegetable in your cold pantry. Stalwart varieties such as American Purple Top yield massive, nutrient-rich roots that thrive in chilly storage conditions.
Harvest your rutabagas late in autumn after several hard frosts have tempered their naturally sharp, mustardy bite. Aim for roots measuring four to five inches across for the best balance of density and tender texture.
Lop the leafy tops back to the root shoulder and snip off the scraggly bottom taproot. Brush away dry garden soil without cutting into the thick, waxy outer skin.
Commercial packers dip rutabagas in melted food-grade wax to prevent dehydration during shipping. You can achieve identical long-term preservation by packing unwashed roots into damp sawdust inside heavy-duty perforated bins.
Store the packing bins in a root cellar maintained between 32 and 35 degrees Fahrenheit with 90 percent humidity. Good humidity prevents the yellow flesh from becoming tough or losing its pleasing moisture.
Thanks to their dense cellular structure, stored rutabagas stay firm and culinary-ready for six to eight months with minimal shrinkage.
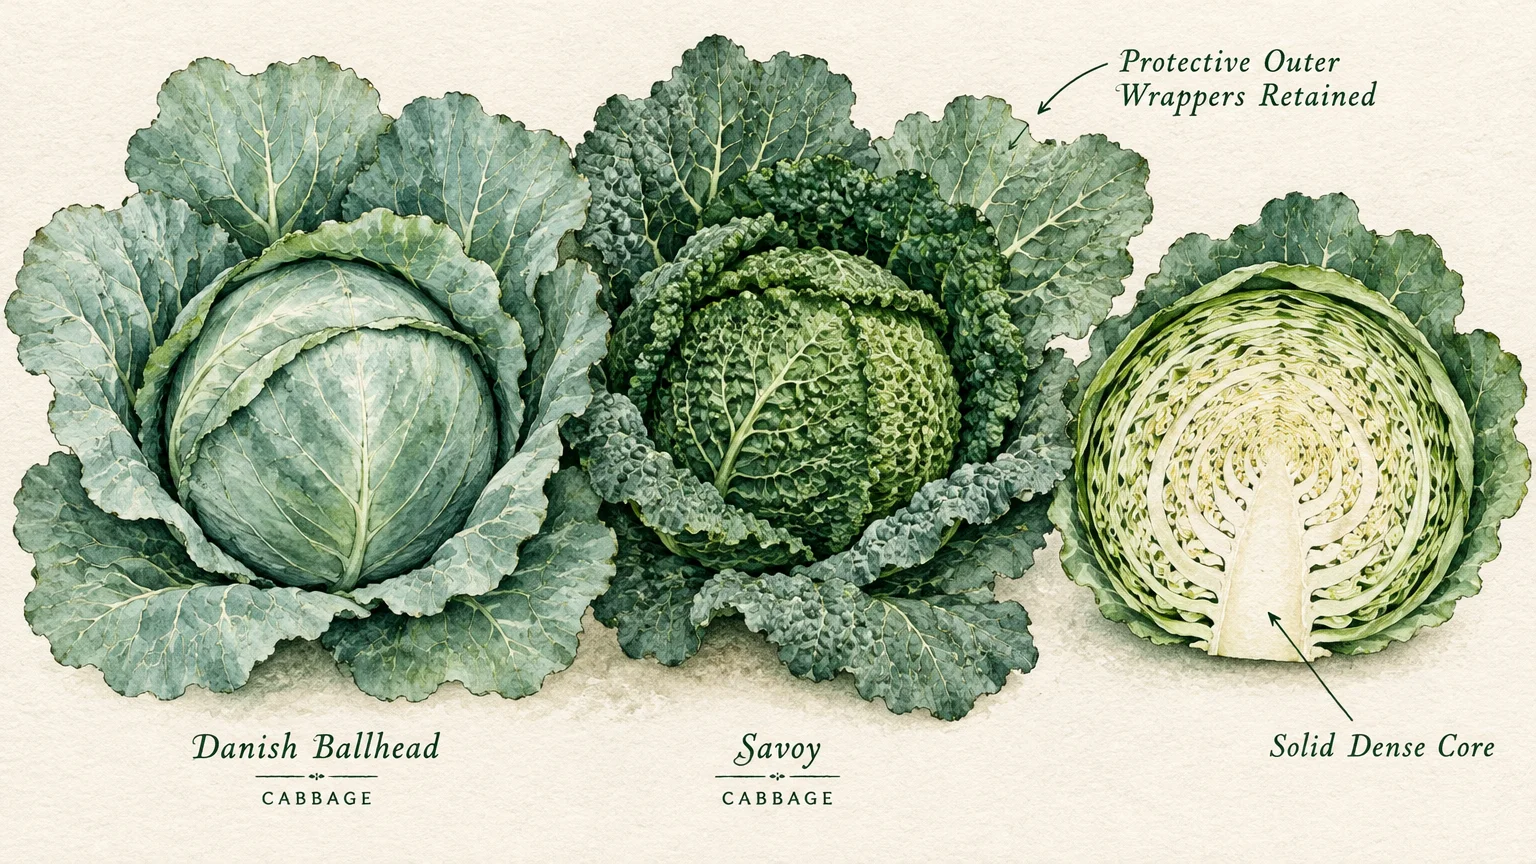
Tip #10: Late-Season Cabbage for Crunchy Slaws and Soups
Late-season storage cabbages form rock-solid heads designed to survive months of freezing cellar temperatures. Workhorse cultivars like Danish Ballhead, Brunswick, and Late Flat Dutch develop thick, tight leaves that lock in moisture.
Harvest your cabbages late in autumn when the heads feel exceptionally firm, dense, and heavy in your hands. Leave several outer wrapper leaves intact; they act as sacrificial shields against physical bruising and surface dehydration.
Pull the entire cabbage plant up by the roots if your storage cellar has available overhead beams. Hanging whole plants upside down by their stalks extends freshness and keeps heads off damp floor surfaces.
If shelf space is preferred, slice the stem cleanly at ground level and arrange heads in single layers on slatted benches. Ensure the heads do not touch one another so air can circulate freely around the outer leaves.
Maintain cold conditions between 32 and 34 degrees Fahrenheit with 90 to 95 percent relative humidity. Cold air prevents decay microbes from proliferating while high humidity stops the outer leaves from wilting.
Peel away any papery or discolored outer wrapper leaves as needed throughout winter. The dense heart underneath remains crisp, vibrant, and delicious for fresh salads or boiling until early spring.
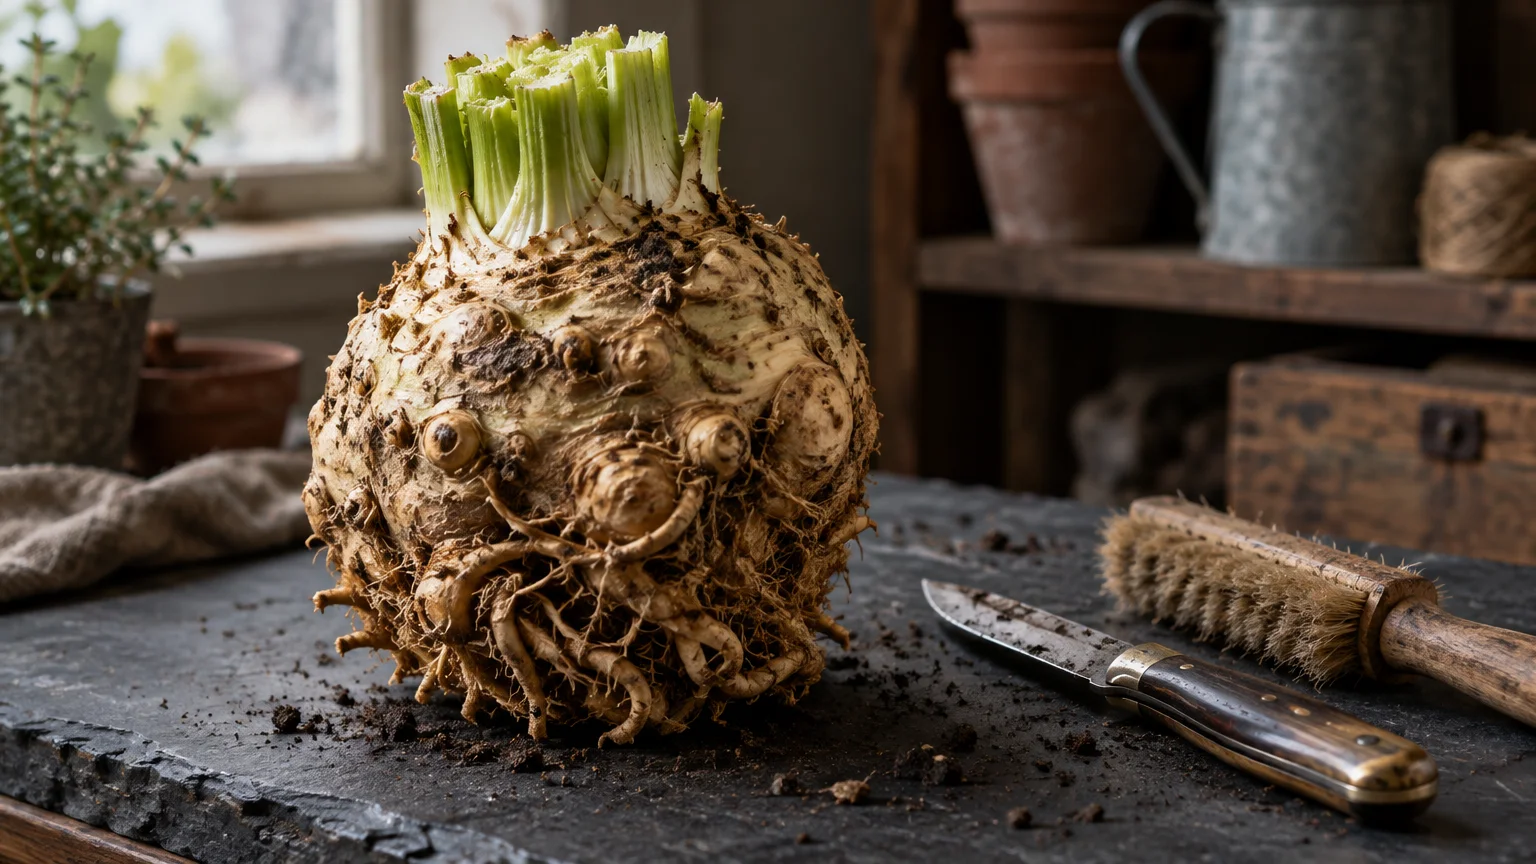
Tip #11: Robust Celeriac for Fragrant Winter Cooking
Celeriac, or celery root, produces a swollen, knobby hypocotyl packed with intense herbal celery flavor. Sturdy cultivars such as Giant Prague and Brilliant offer fantastic keeping qualities long after tender stem celery succumbs to autumn frosts.
Lift your celeriac in late autumn, as the roots develop richer flavors after experiencing light seasonal frosts. Use a sturdy digging fork to loosen the surrounding soil, taking care not to puncture the root body.
Trim the dense mass of tangled hair roots from the base and slice the leafy foliage back to one inch. Leave the clinging field dirt on the root to protect the knobby exterior during storage.
Pack the unwashed celeriac into plastic storage totes filled with damp peat moss, builder sand, or shredded leaves. Leave the container lid slightly ajar to allow essential gas exchange while preserving vital internal moisture.
Hold the totes in an unheated cellar or cold room between 32 and 36 degrees Fahrenheit with 95 percent humidity. Maintaining near-freezing temperatures suppresses root decay and halts premature sprouting throughout the winter season.
Stored properly in damp bedding, celeriac keeps its firm texture and aromatic punch for five to six months.
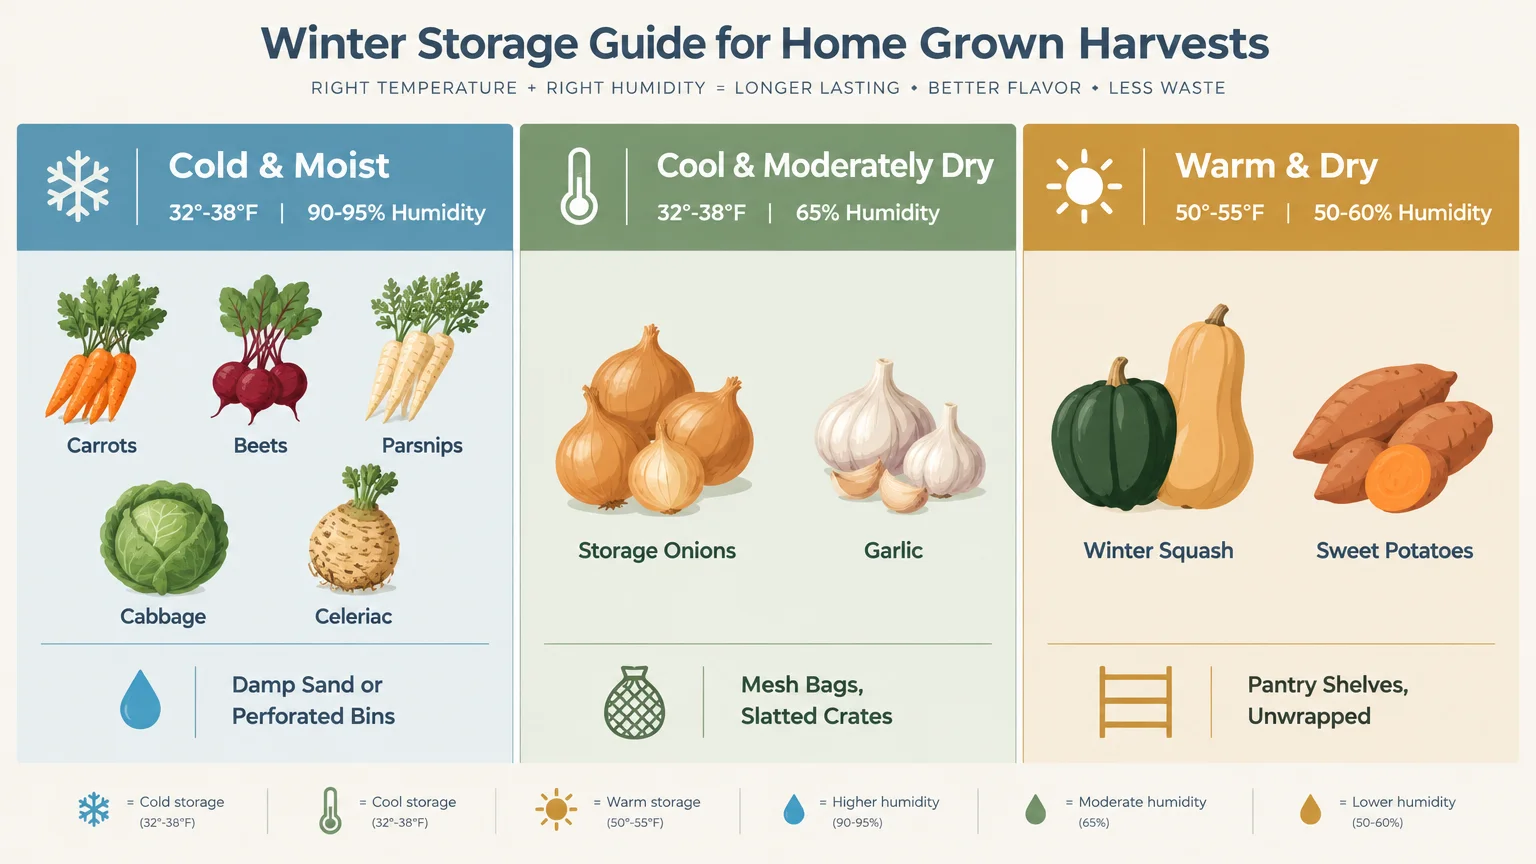
Putting It All Together: Enjoy Your Beautiful Garden
Storing homegrown vegetables transforms your gardening efforts into a reliable year-round food source. By matching each crop to its required temperature and humidity zone, you preserve summer’s bounty with minimal energy.
Group your vegetables by storage needs; keep cold-hardy roots in high humidity and squash in dry pantries. Always segregate ethylene-producing crops like ripening apples and onions from sprouting-sensitive potatoes.
Inspect your stockpiles every two weeks to spot any softening roots or early signs of decay. Removing a single deteriorating specimen immediately preserves the overall health of your entire seasonal food cache.
You do not need a fancy underground bunker to master winter storage; simple basements, coolers, or porches work wonders. When storing produce winter after winter, embrace these straightforward preservation techniques to enjoy delicious, organic meals straight from your garden until spring.
Frequently Asked Questions
Can you store potatoes and onions together in the same pantry?
Never store potatoes and onions in close proximity. Onions emit ethylene gas that triggers rapid sprouting in dormant potatoes, while potato moisture causes onions to soften and rot.
What is the ideal temperature range for a root cellar?
Most traditional root cellar vegetables store best between 32 and 40 degrees Fahrenheit. Pair this chilly atmosphere with 90 to 95 percent relative humidity to keep roots crisp and prevent desiccation.
Should you wash root vegetables before storing them for winter?
Do not wash root vegetables before packing them into long-term storage containers. Excess water promotes fungal rot, while washing removes the beneficial soil microbes that naturally protect roots against airborne decay organisms.
How do you store winter vegetables without a traditional root cellar?
You can use unheated basements, enclosed porches, crawlspaces, or insulated coolers placed in an attached garage. Monitor temperatures closely with a digital minimum-maximum thermometer to keep conditions safely above the freezing point.
For region-specific advice, consult your local University Extension program (find yours via the USDA directory). For plant databases and inspiration, visit the Missouri Botanical Garden or the Royal Horticultural Society.
Disclaimer: This article provides general gardening advice. Always consider your specific climate, soil conditions, and local pests. Follow safety guidelines when using gardening tools and products.