Proper winter storage protects your investment and ensures your gear performs flawlessly when spring arrives. Neglecting simple seasonal maintenance invites rust, cracked wood, and dull blades that ruin expensive gear.
When you winterize garden tools properly, you extend their lifespan by decades; you also save valuable hours during the busy planting rush. Cold winter storage spaces can wreak havoc on unprotected steel and weathered timber.
By sidestepping seven common seasonal blunders, you preserve sharp edges and smooth mechanics with minimal effort. Your shovels, pruners, and tillers will stay pristine all winter long.
Tip #1: Storing Blades Covered in Dirt and Plant Sap
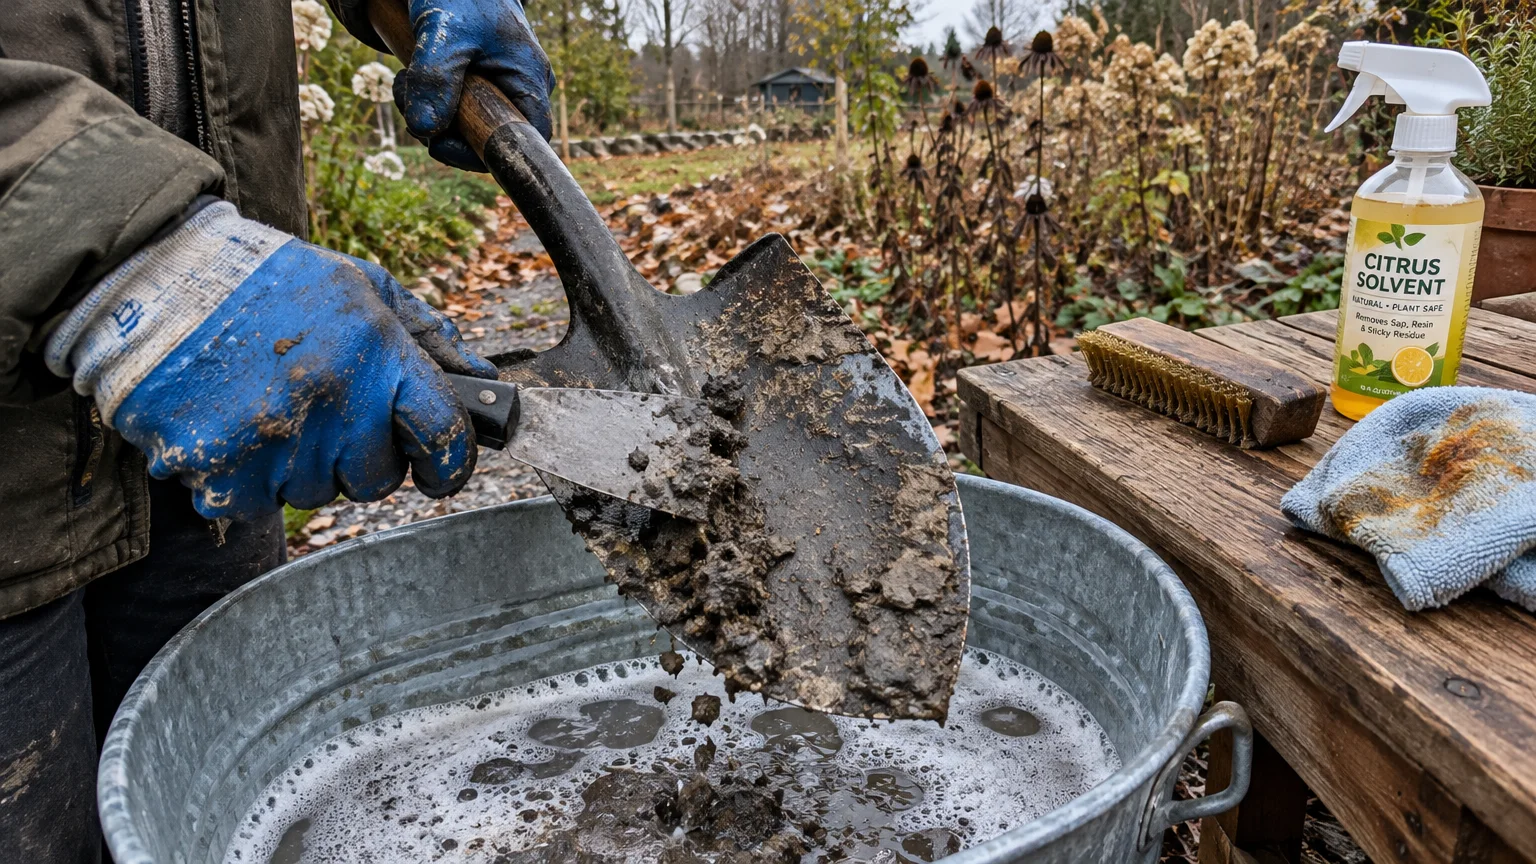
Many gardeners lean muddy shovels into shed corners after the final autumn cleanup. Dried soil traps moisture directly against steel surfaces, which sparks oxidation beneath the crust.
Plant sap contains acidic resins that chemically pit bypass pruner blades and hedge shears. As winter sets in, this crusty buildup accelerates metal degradation throughout the dormant months.
Effective garden tool care winter routines begin with thorough mechanical cleaning. Scrape away stubborn clay clods with a stiff wire brush or a steel putty knife.
Soak sticky resin spots in warm, soapy water to dissolve surface tension. For stubborn evergreen sap, scrub the blades with mineral spirits or a citrus-based solvent.
Rinse every metal surface thoroughly to remove loosened residue and chemical grime. Clean water removes loose grit before it can settle into mechanical pivot joints.
Never pack damp tools away in dark closets or unheated sheds. Wipe down every blade with a clean microfiber rag until the steel feels bone dry.
Pay close attention to pivot joints on hand pruners, where hidden debris creates friction. Clean pivots ensure effortless operation when you trim fruit trees in early spring.
Keep a small brass-bristle brush in your cleanup kit for delicate blade bevels. Brass removes stubborn debris without scratching the polished metal surfaces.
This straightforward cleaning habit prevents premature pitting and keeps cutting edges crisp. It forms the essential baseline of dependable tool maintenance.

Tip #2: Skipping Protective Oils for Rust Prevention
Bare steel oxidizes rapidly when exposed to humid winter air and fluctuating seasonal temperatures. Without a shielding barrier, microscopic moisture droplets settle on metal and trigger persistent rust.
Dedicating time to tool rust prevention ensures smooth pivot movement and preserves structural integrity. A simple barrier keeps steel resilient against winter dampness.
Apply a generous coat of boiled linseed oil or camellia oil across all clean metal surfaces. Mineral oil also serves as an affordable, non-toxic alternative that repels humidity effectively.
Avoid thick automotive grease on hand tools because it attracts airborne dust and abrasive debris. Lightweight protective oils create a slick, microscopic barrier without gummy buildup.
For shovels and hoes, fill a five-gallon bucket with coarse builder sand and clean motor or vegetable oil. Plunging blades into this oily sand keeps them conditioned and clean.
The abrasive sand scrubs away residual surface grime while oil seals the raw steel against ambient moisture. Store tool heads directly in the sand bucket throughout the winter months.
Reapply a few drops of 3-In-One oil to tension springs and pivot bolts on loppers. This prevents internal rusting that could seize mechanical components during deep freeze cycles.
Wipe excess oil off with a clean rag so handles and blades do not feel slick. A microscopic film provides all the defense your steel needs against winter damp.
Taking ten minutes to oil your gear now spares you hours of tedious wire-brushing when warm weather returns.
Tip #3: Stashing Dull Blades Until Spring Planting
Postponing blade sharpening until spring creates unnecessary stress during the busy planting season. Dull cutting edges crush delicate plant stems, tear bark, and demand excessive physical force.
Regular garden tool maintenance includes restoring factory bevels before tucking equipment away for winter. Freshly sharpened edges resist corrosion better because smooth, polished steel sheds ambient moisture quickly.
Inspect pruners, loppers, and spade edges for burrs, nicks, and uneven bevels. Clean cutting edges promote fast wound healing on dormant fruit trees and woody perennials.
Use a medium-grit diamond hone or whetstone to sharpen cutting blades at their original angle. Most bypass pruners feature a precise twenty-degree factory bevel that requires careful matching.
Push the whetstone across the beveled edge in smooth, uniform strokes toward the tip. Maintain consistent pressure to establish a razor-sharp edge without gouging the blade face.
Never sharpen the flat backside of a bypass blade; simply hone away any raised wire burr with a single flat stroke. This maintains flush shearing alignment between blade and hook.
Sharpen the leading edges of your garden spades and trenching shovels with a standard mill bastard file. Sharp shovels slice through heavy root masses and dense sod with remarkably little effort.
Color the blade bevel with a black permanent marker before sharpening with a whetstone. As you file, the disappearing ink shows you precisely where the stone makes contact.
Apply a final drop of mineral oil over the freshly exposed steel to prevent flash rusting on newly ground surfaces.
Tip #4: Neglecting Wooden Handles and Shafts
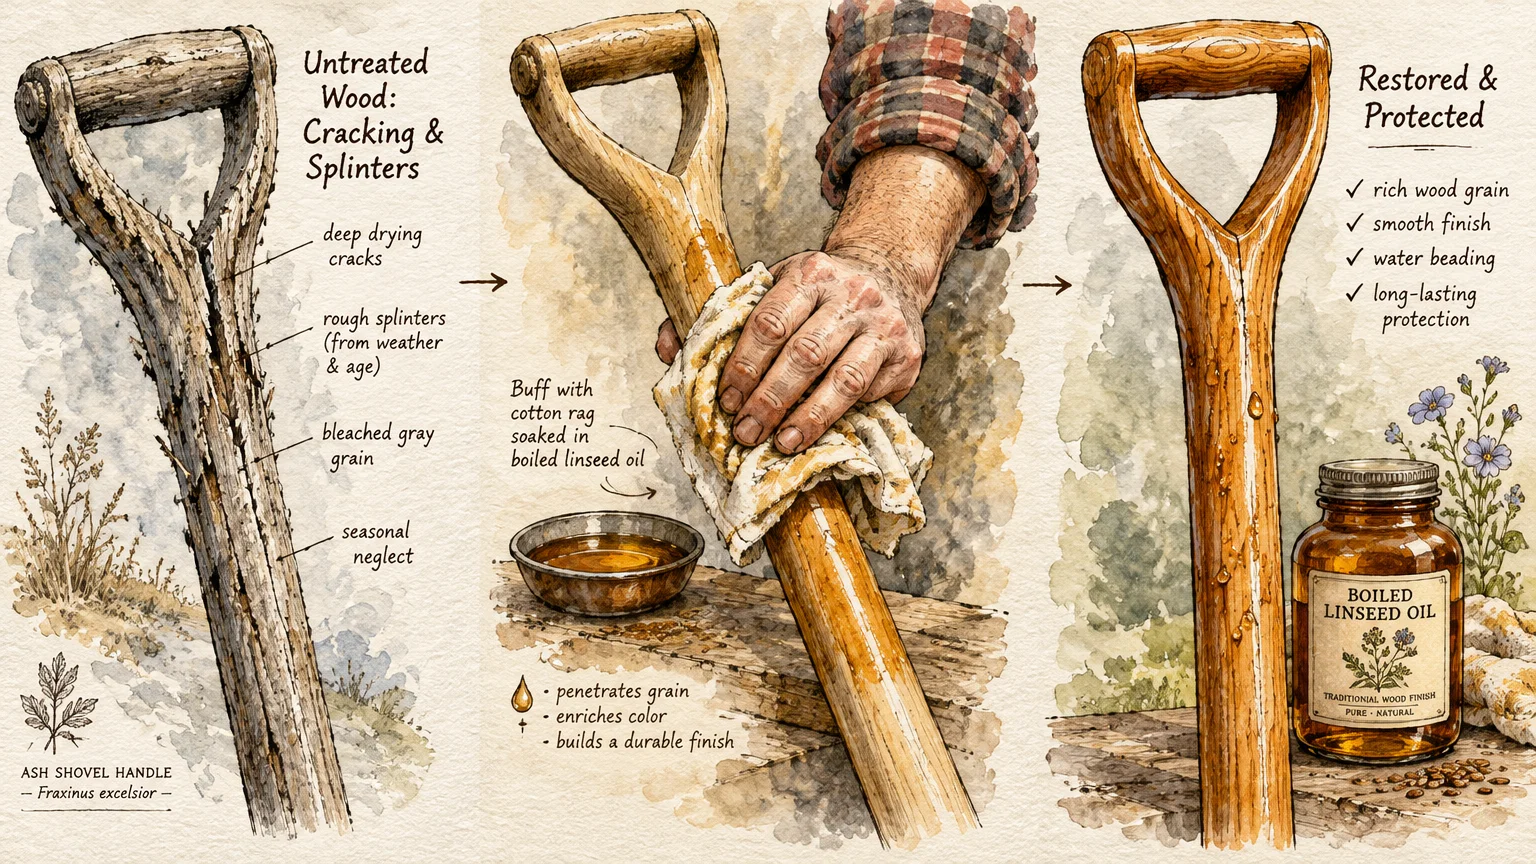
Ash, hickory, and oak handles endure heavy strain during digging, lifting, and weeding. Leaving unconditioned wood in dry winter sheds causes timber fibers to shrink, crack, and splinter.
Rough handles cause painful blisters and can snap unexpectedly under heavy loads. Consistent conditioning protects the natural cellular structure of your prized hardwood tools.
Inspect wooden shafts for splinters, structural fractures, and peeling factory varnish. Smooth weathered surfaces by buffing them thoroughly with medium-grit sandpaper, rubbing along the grain.
Wipe away sanding dust with a dry tack cloth before applying nourishment to the wood. Rub pure boiled linseed oil deep into the timber using a soft cotton rag.
Allow the wood to soak up the oil for thirty minutes, then buff away any sticky surplus. Multiple thin coats penetrate deeper and cure better than a single heavy slather.
The cured oil creates a water-resistant, satin finish that repels moisture while letting the wood flex naturally. You will enjoy a secure, splinter-free grip that feels comfortable in bare hands.
Check the metal rivets and ferrules connecting the handle to the tool head for any looseness. Tighten loose hardware or tap loose ferrules snug before setting tools aside.
Store oily application rags in an airtight metal container submerged in water before disposal. This critical safety step prevents spontaneous combustion caused by oxidizing drying oils.
Caring for wooden shafts extends their working lifespan by decades, saving you the expense of buying replacement handles.
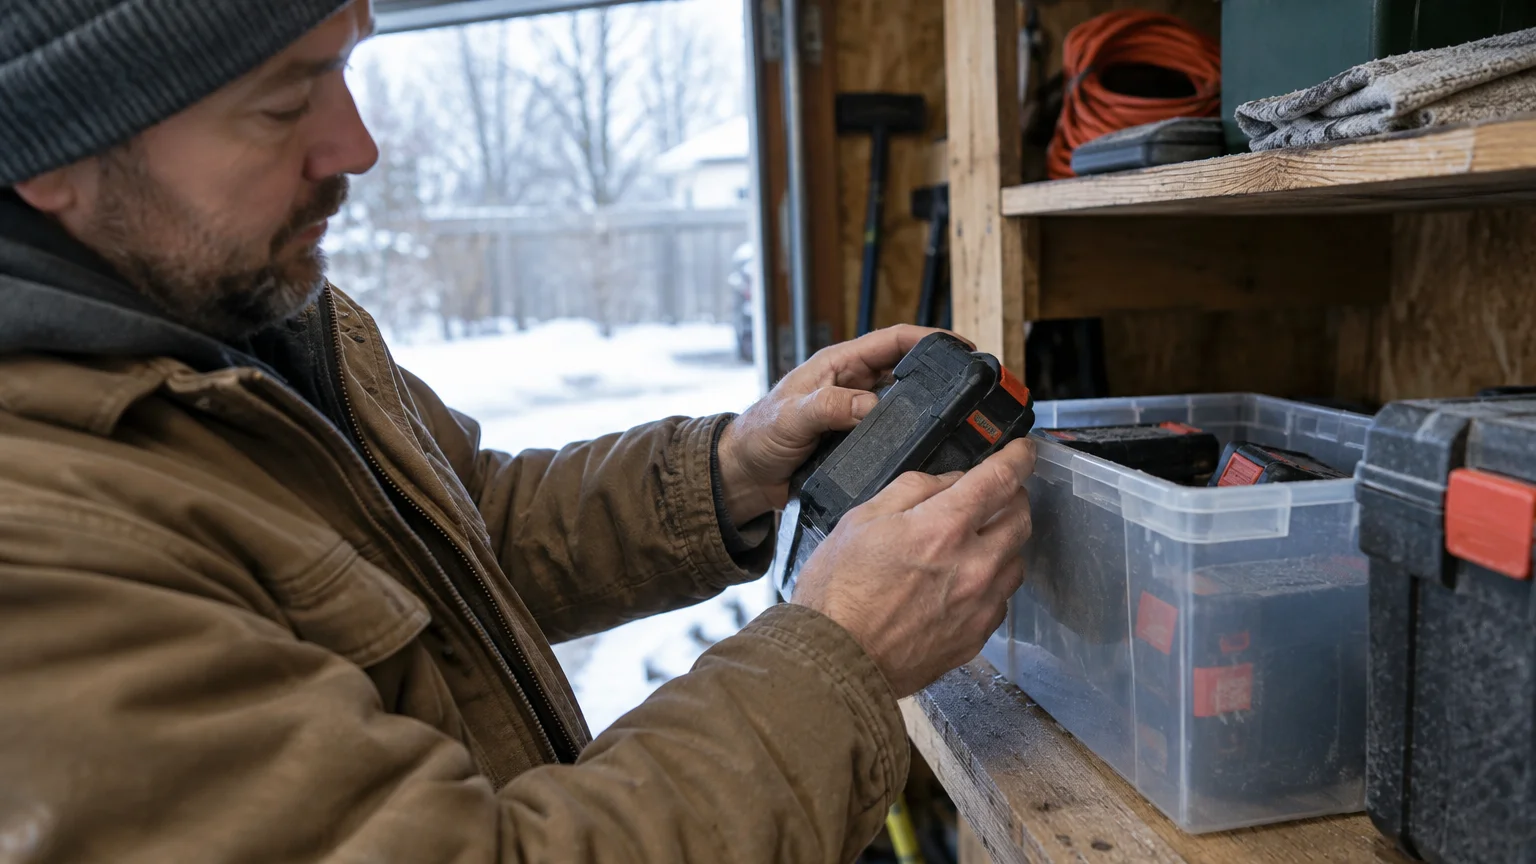
Tip #5: Leaving Lithium-Ion Batteries in Freezing Temperatures
Modern cordless garden tools rely on sophisticated lithium-ion battery packs for portable power. Leaving these power cells in an unheated shed during sub-zero freezes permanently damages their chemical balance.
Freezing conditions cause internal resistance to spike, reducing total cell capacity and shortening battery longevity. Severe cold can even trigger internal safety circuits that disable batteries permanently.
To winterize garden tools equipped with rechargeable packs, uncouple batteries from trimmers, blowers, and mowers. Bring them indoors where temperatures remain above fifty degrees Fahrenheit.
Store lithium batteries at roughly forty to sixty percent charge rather than fully depleted or completely full. Storing packs at maximum charge under cold stress strains internal cathode materials.
Avoid leaving batteries on charging cradles for months at a time. Continuous trickle charging generates unnecessary heat that degrades cell chemistry during dormant storage periods.
Clean the metal electrical contact terminals with a dry cotton swab to eliminate grime or corrosion. Clean connections ensure instant power delivery when spring yard work calls.
Avoid leaving cordless batteries plugged into active chargers throughout the winter months. Unplug the charging units once batteries reach their storage voltage to protect delicate internal circuitry.
Keep chargers indoors in a temperature-controlled environment away from damp basements or drafty windows. Maintaining battery health saves you from purchasing costly replacement packs prematurely.
Taking these simple electrical precautions ensures your cordless lineup starts instantly on the first sunny spring morning.

Tip #6: Leaving Untreated Gasoline in Power Equipment
Ethanol-blended gasoline begins degrading in as little as thirty days inside small fuel tanks. Storing mowers, tillers, and string trimmers with untreated fuel causes severe carburetor gumming and fuel line corrosion.
Ethanol attracts ambient humidity from winter air, leading to fuel phase separation at the bottom of the tank. This acidic, watery layer eats through aluminum carburetors and rots rubber gaskets.
Add a high-quality fuel stabilizer to a fresh batch of gasoline, then fill the equipment tank nearly full. Running the engine for five minutes circulates stabilized fuel through the carburetor bowl and fuel lines.
The full tank limits internal air space, preventing condensation from forming on interior metal walls during freeze-thaw cycles. Stabilized fuel remains fresh for up to two years without degrading.
Alternatively, drain the fuel tank completely and run the engine until it exhausts all remaining fuel. This dry-storage method prevents varnish deposits from clogging microscopic carburetor jets.
Remove spark plugs to inspect their electrodes for carbon buildup, gap wear, or oil fouling. Pour a teaspoon of clean engine oil into the spark plug cylinder hole, then pull the starter cord slowly.
This simple trick lubricates cylinder walls and piston rings, shielding bare internal metal against winter oxidation. Replace the spark plug loosely to keep out dust until spring startup.
Replace dirty air filters and check engine oil levels before putting power equipment away. Entering winter with fresh engine oil neutralizes acidic combustion byproducts that corrode internal bearings.
Taking these engine precautions guarantees quick, painless pull-starts when your lawn wakes up from winter dormancy.
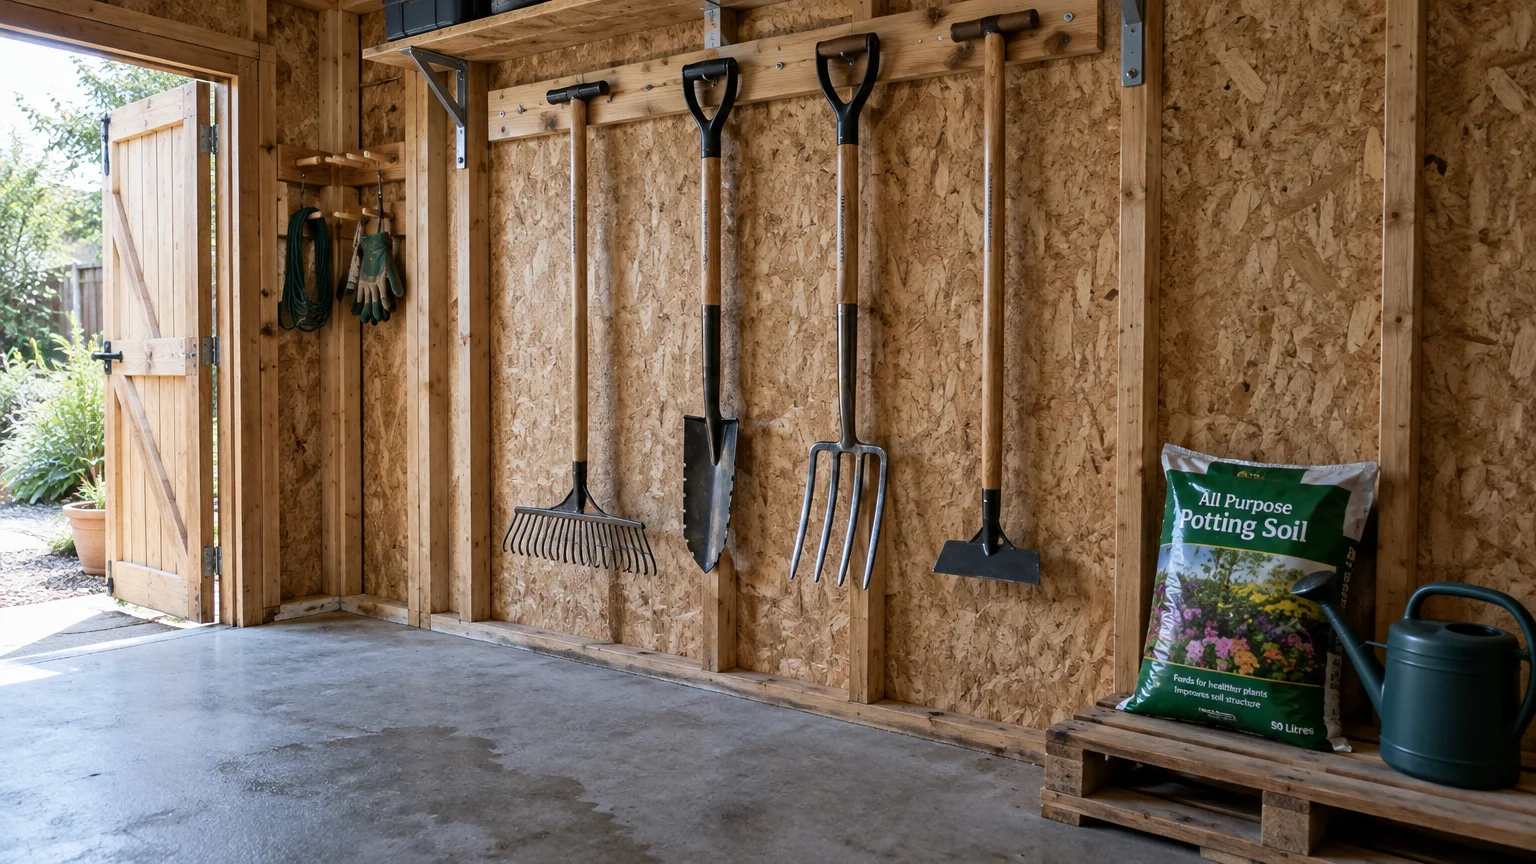
Tip #7: Storing Metal Tools Directly on Cold Concrete Floors
How you store garden tools during winter matters just as much as how you clean them. Leaving spades and forks resting directly on bare concrete floors exposes them to persistent moisture.
Concrete acts like a dense sponge, drawing ground moisture upward through natural capillary action. Tools resting on basement or garage slabs develop aggressive rust patches along points of contact.
Mount heavy-duty wall racks, pegboards, or tool brackets to suspend long-handled equipment safely off the ground. Hanging tools promotes 360-degree air circulation and keeps sharp edges safe from accidental damage.
If wall space is limited, stand shovels and rakes inside wooden crates or upon wooden pallets. Wood provides a natural thermal break that prevents moisture condensation from attacking metal ferrules.
Avoid storing your gardening supplies in unventilated plastic tubs where trapped humidity condenses against cold surfaces. Open airflow keeps metal dry and prevents mold from colonizing leather tool sheaths.
Organize tools by function so you can grab pruners, trowels, and weeders without rummaging through tangled heaps. Orderly storage protects sharp cutting edges from knocking against hard metal surfaces.
Install a silicone or rubber boot over shovel blades if they must rest on hard ground. This barrier cushions sharp edges and halts corrosive moisture transfer from concrete.
Keep small hand tools organized in a dry drawer or canvas roll rather than tossing them into buckets. Proper organization makes your workspace an inviting sanctuary throughout the off-season.
Thoughtful placement eliminates physical clutter and keeps your gear elevated away from damp, corrosive concrete.

Putting It All Together: Enjoy Your Beautiful Garden
Preparing your garden gear for winter takes only a single afternoon, yet it yields incredible rewards all year long. Taking proactive steps ensures your tools remain dependable companions in the garden.
When warm breezes return and tender shoots emerge, you will reach for sharp, rust-free shears with absolute confidence. You will skip frustrating delays, broken handles, and costly replacements.
Healthy, well-maintained tools create clean cuts that protect your shrubs and ornamental trees from disease pathogens. Pristine equipment makes every outdoor task feel effortless, enjoyable, and deeply satisfying.
As you pack your gear away, take pride in the flourishing borders and lush harvest beds you nurtured this past season. Winter provides well-earned rest for both you and your hardworking tools.
Take a few moments this weekend to examine your garden shed inventory. You will head into the quiet winter season knowing your faithful gear is protected, organized, and ready for work.
Treat your garden equipment with mindful care this winter; your landscape will reward your diligence with breathtaking vitality and blooming beauty.
Frequently Asked Questions
How often should I oil my garden tools during winter?
One thorough application of oil before winter storage usually protects your tools until spring. If you store equipment in an unheated shed with high humidity, inspect surfaces mid-winter and apply a light refresh coat.
Can I use vegetable cooking oil on wooden tool handles?
Culinary vegetable oils turn rancid, become sticky, and attract rodents over time. Always use boiled linseed oil, tung oil, or pure Danish oil to cure into a durable, water-resistant barrier.
What is the easiest way to remove existing rust from garden tools?
Submerge rusted steel heads in household white vinegar for several hours to dissolve iron oxide. Scrub away loosened flakes with fine steel wool, dry thoroughly, and coat immediately with protective oil.
Should I store bypass pruners in the open or locked position?
Store bypass pruners closed and locked to protect the sharpened cutting edge from accidental impacts. Keep tension springs lightly lubricated with machine oil so they do not stiffen or bind over winter.
How do I safely store hoses and watering wands for winter?
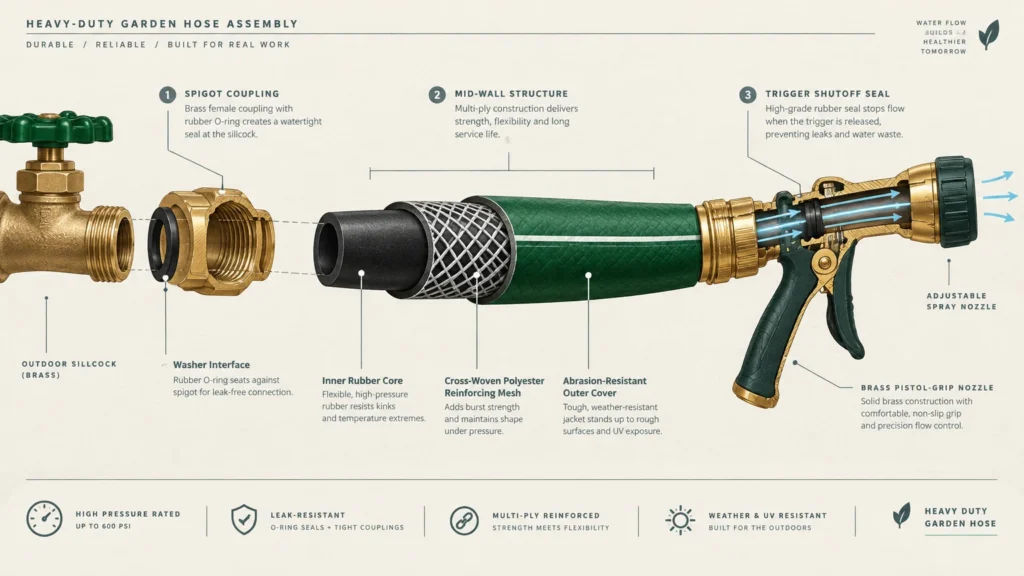
Drain every drop of water from garden hoses, spray nozzles, and watering wands before freezing weather arrives. Expanding ice cracks brass fittings, ruptures inner vinyl linings, and destroys internal trigger valves.
Coil your drained hoses loosely onto a curved wall hanger inside a garage or shed. Keeping hoses out of freezing elements prevents rubber embrittlement and extends their working life.
For region-specific advice, consult your local University Extension program (find yours via the USDA directory). For plant databases and inspiration, visit the Missouri Botanical Garden or the Royal Horticultural Society.
Disclaimer: This article provides general gardening advice; always consider your specific climate, soil conditions, and local pests. Follow safety guidelines when using gardening tools and products.