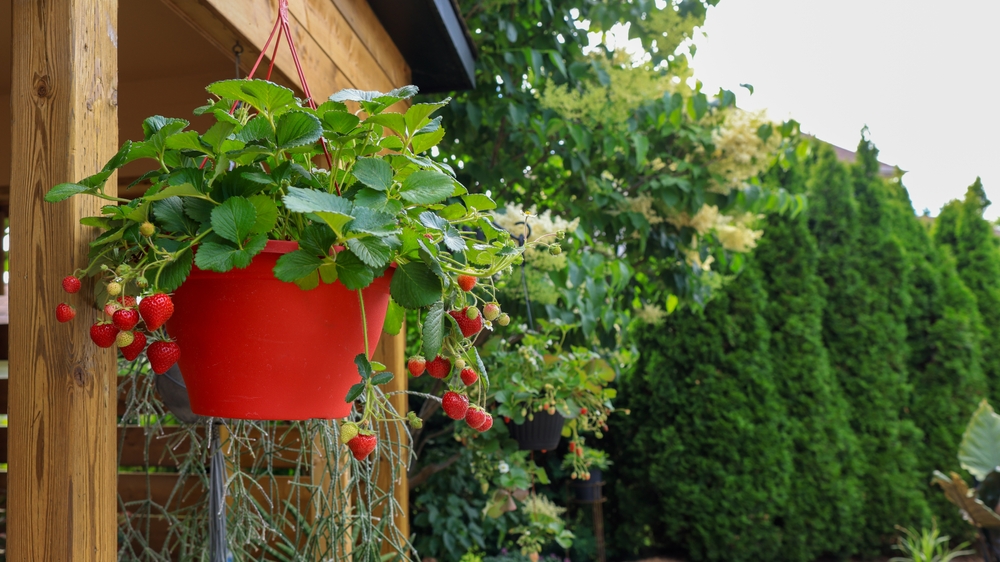
Growing fresh produce indoors provides a constant supply of vibrant, nutritious ingredients right at your fingertips regardless of the weather outside. You can bypass seasonal limitations and cultivate a thriving indoor garden that yields delicious harvests 365 days a year. Transforming a sunny windowsill or a dedicated corner with grow lights into a productive green space requires minimal equipment and strategic planning. Selecting the right plants dramatically increases your chances of a bountiful yield, allowing you to enjoy crisp greens without stepping foot outdoors. Master the rewarding practice of home gardening within the comfort of your kitchen by focusing on these eight highly adaptable vegetable varieties.
Tip #1: Scallions (Green Onions)
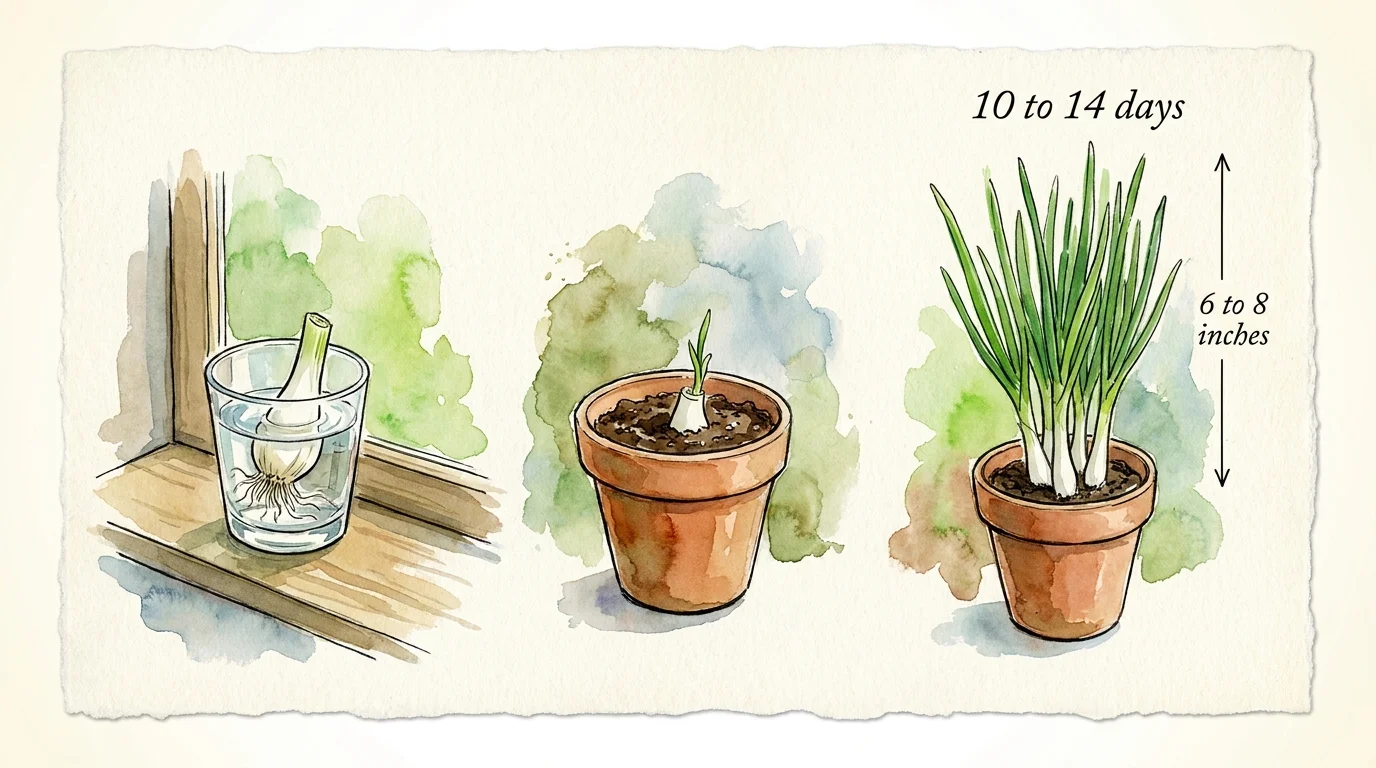
Scallions serve as the ultimate confidence-builder for any home gardening enthusiast. These resilient alliums grow rapidly and require remarkably little space, making them a perfect candidate for your indoor garden. You can start scallions from seeds, but the most efficient method involves repurposing kitchen scraps. When you purchase green onions from the grocery store, slice off the bottom inch containing the white root base. Plant these root sections directly into a small pot filled with a high-quality, well-draining potting mix. Leave the very top of the cutting exposed to the air.
Place your container in a sunny windowsill that receives at least four to six hours of direct light daily. Maintain consistent moisture in the soil without allowing it to become waterlogged. Within just a few days, you will notice vibrant green shoots emerging from the center of the cuttings. After 10 to 14 days, your scallions will reach a harvestable height of six to eight inches. You can snip off what you need for your morning omelet or evening stir-fry, and the plant will continue to regenerate. This continuous growth cycle provides you with a reliable, year-round harvest of fresh garnishes while significantly reducing household food waste.
Tip #2: Radishes
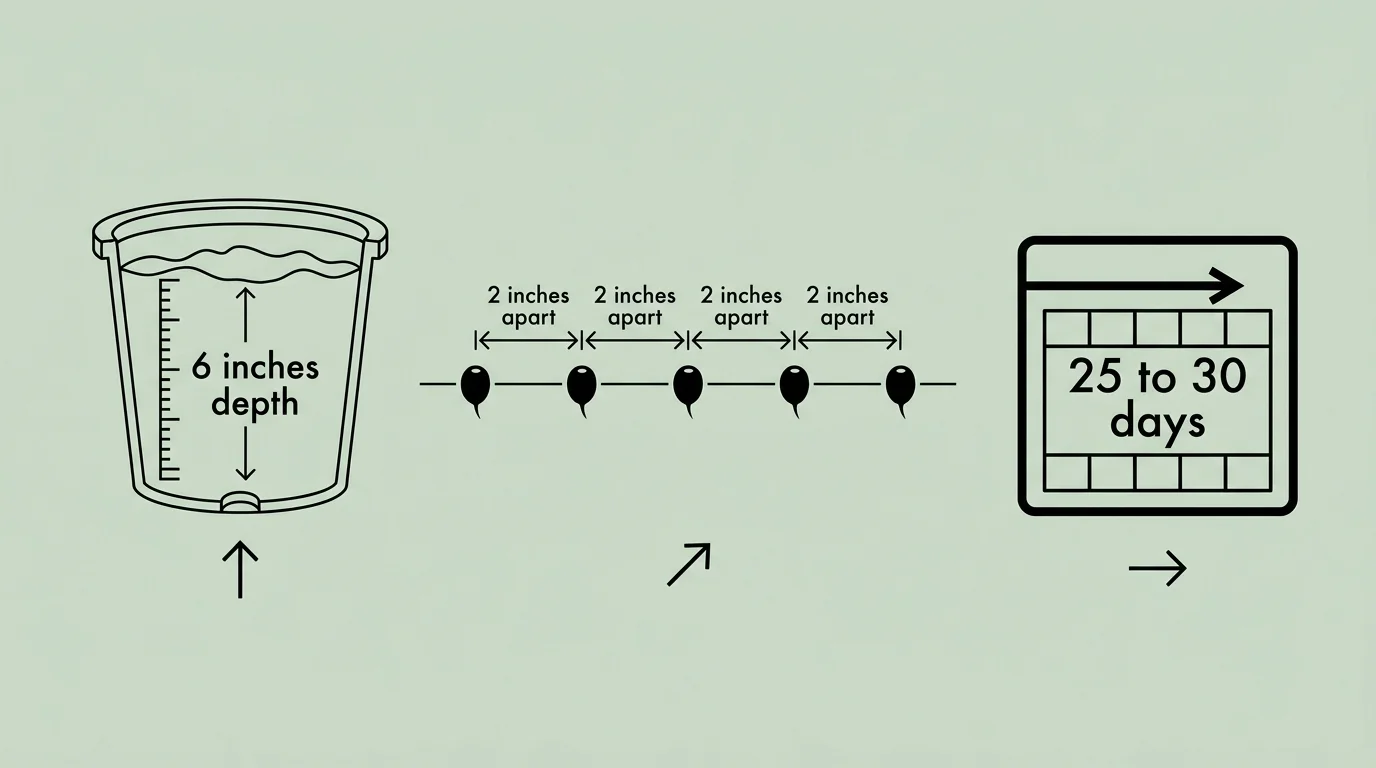
Radishes offer incredible speed and satisfying crunch, maturing faster than nearly any other root vegetable in your indoor garden. Most indoor gardeners avoid root crops because they assume these plants require massive amounts of space; however, radishes thrive in relatively shallow containers. You only need a pot with a depth of six inches to cultivate popular, fast-growing varieties like French Breakfast or Cherry Belle. Fill your container with a loose, aerated potting mix to ensure the growing roots encounter zero resistance. Heavy or compacted soil leads to deformed vegetables and stunted growth.
Sow your seeds about half an inch deep, spacing them roughly two inches apart. If you broadcast the seeds, you must thin the seedlings diligently once they sprout to prevent overcrowding. Radishes require bright light to develop robust roots rather than just excessive foliage. Position your pots under full-spectrum LED grow lights for 12 hours a day or place them in a south-facing window. Keep the soil evenly moist at all times; erratic watering causes the delicate roots to split or develop an overly spicy, woody texture. In just 25 to 30 days from planting, you can pull perfectly crisp, peppery radishes directly from your indoor soil.
Tip #3: Spinach
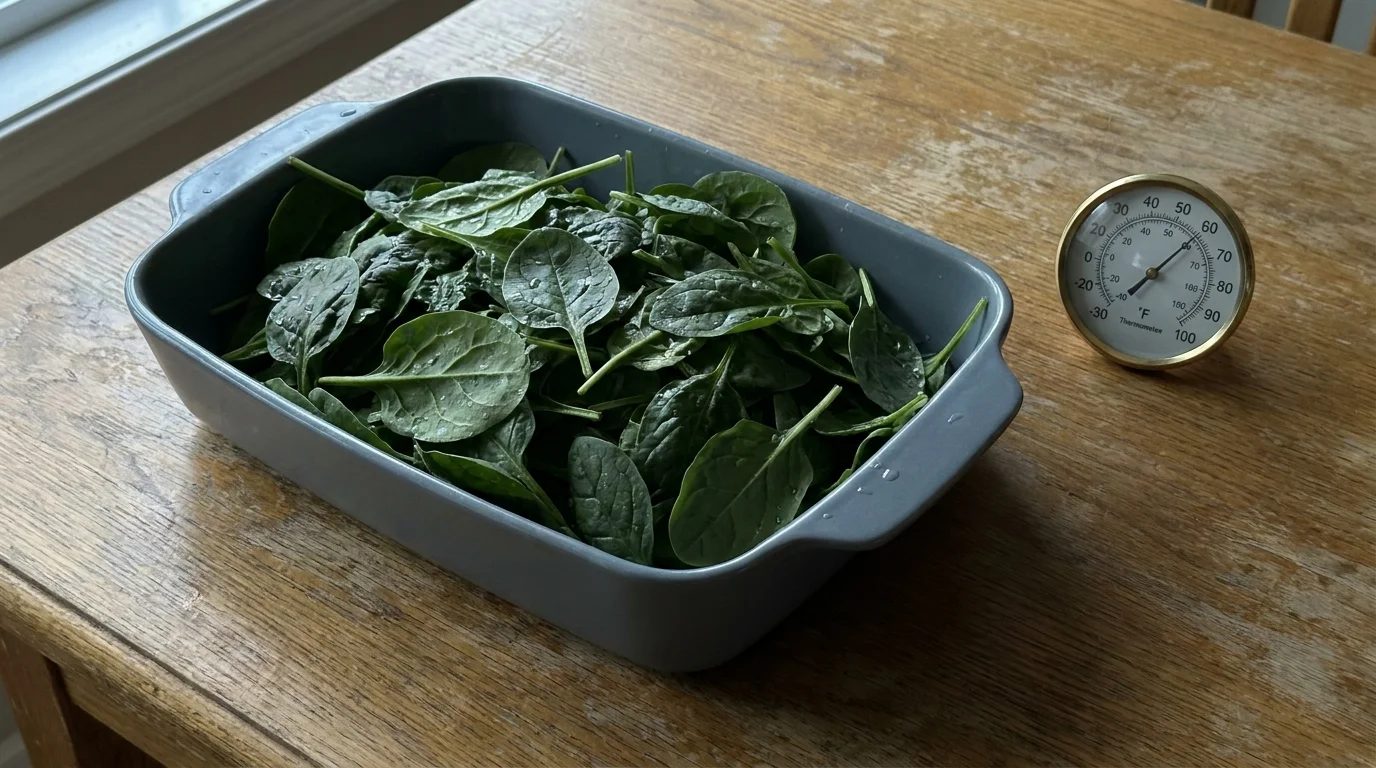
Spinach stands out as a nutritional powerhouse that adapts exceptionally well to indoor environments. Unlike fruiting vegetables that demand intense heat and blazing sun, spinach actually prefers cooler temperatures and moderate lighting. Your typical indoor climate, usually kept between 60 and 70 degrees Fahrenheit, provides the ideal environment for this leafy green. Heat causes spinach to bolt—meaning it prematurely produces flowers and turns bitter—so the controlled temperature of your home works heavily in your favor. Select a wide container with drainage holes and fill it with a nutrient-rich potting blend.
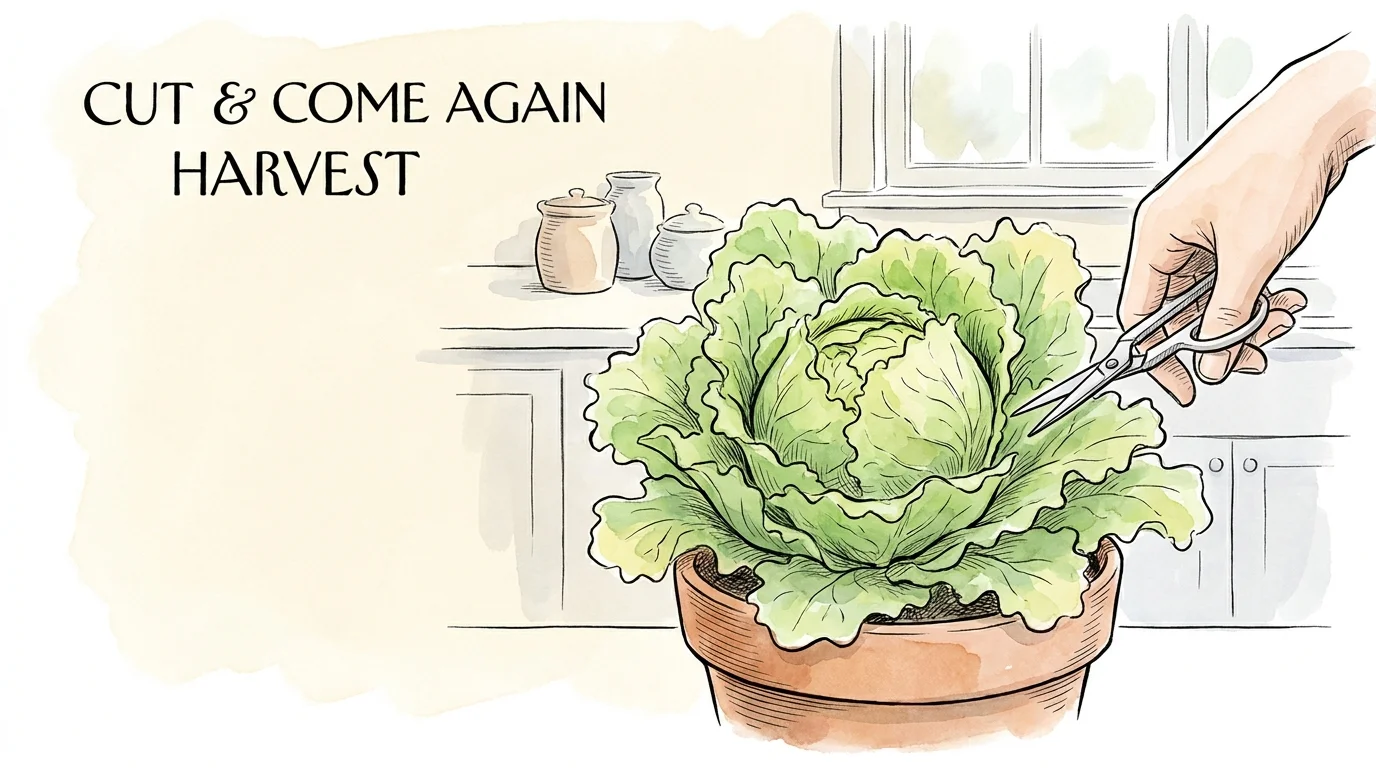
Spinach develops a shallow root system, so a pot depth of four to five inches provides plenty of room for healthy growth. Plant your seeds a quarter-inch deep and keep the soil surface damp until germination occurs, usually within a week. Provide your spinach with 10 to 12 hours of light daily. You can begin harvesting in about 40 days using the “cut-and-come-again” method. Simply snip the older, outer leaves with clean scissors, leaving the inner crown intact. The plant will continuously push out fresh growth, supplying you with tender, iron-rich greens for your salads and smoothies over several months.
Tip #4: Microgreens
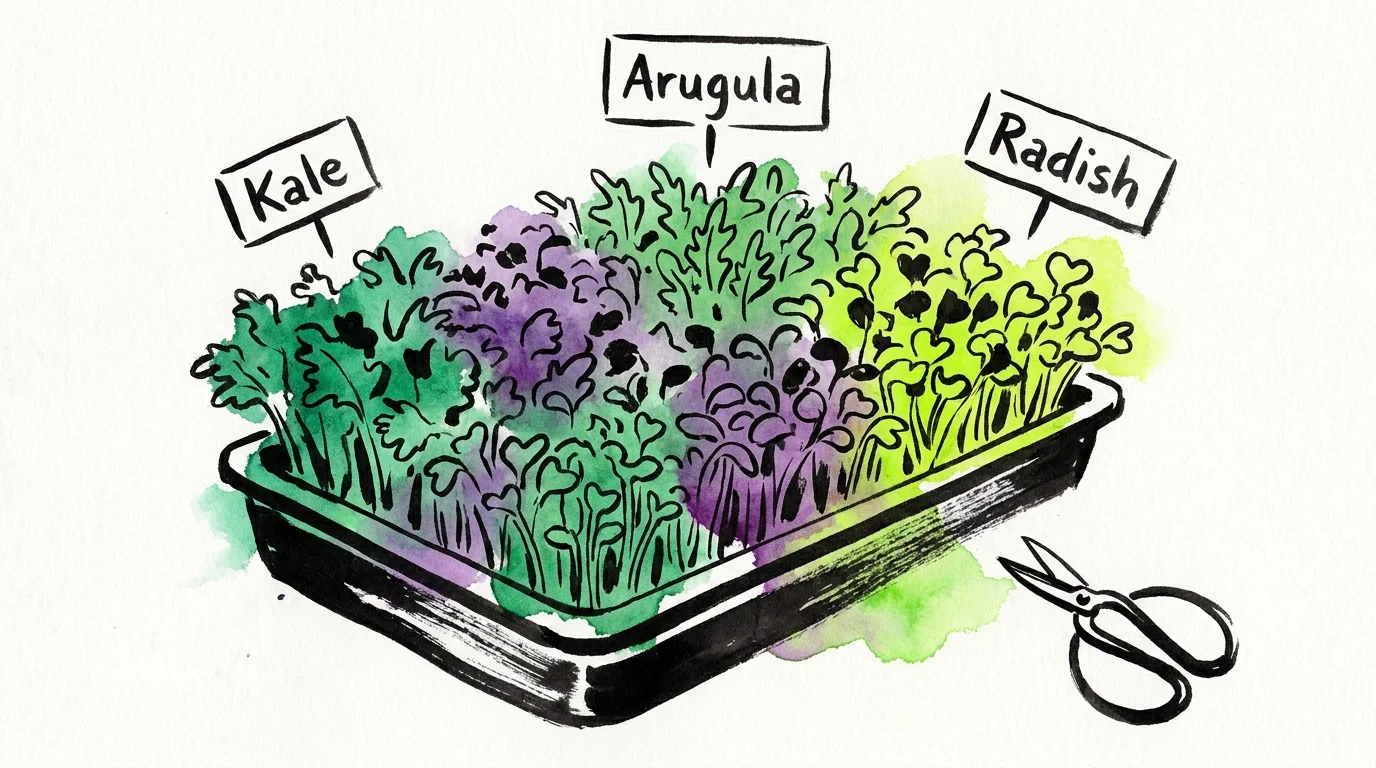
Microgreens deliver an explosive concentration of flavor and nutrition, packing up to 40 times more vitamins than their fully mature counterparts. These tiny seedlings represent the easiest and fastest path to indoor gardening success, requiring practically zero long-term maintenance. You can grow microgreens from the seeds of almost any vegetable or herb, including broccoli, kale, radishes, and peas. Start with a shallow tray—even a repurposed clamshell container with drainage holes works perfectly. Fill the tray with one to two inches of coconut coir or fine seed-starting mix.
Broadcast your seeds thickly across the surface; because you will harvest them as babies, they do not require traditional spacing. Press the seeds gently into the soil and mist them generously with water. Cover the tray with a dark lid or another tray to simulate underground darkness, which encourages strong, even germination. After two or three days, remove the cover and place the tray under bright grow lights or near a sunny window. The pale stems will rapidly turn a vibrant green as they photosynthesize. Harvest your microgreens in 10 to 14 days by cutting the stems just above the soil line when the first set of true leaves appears.
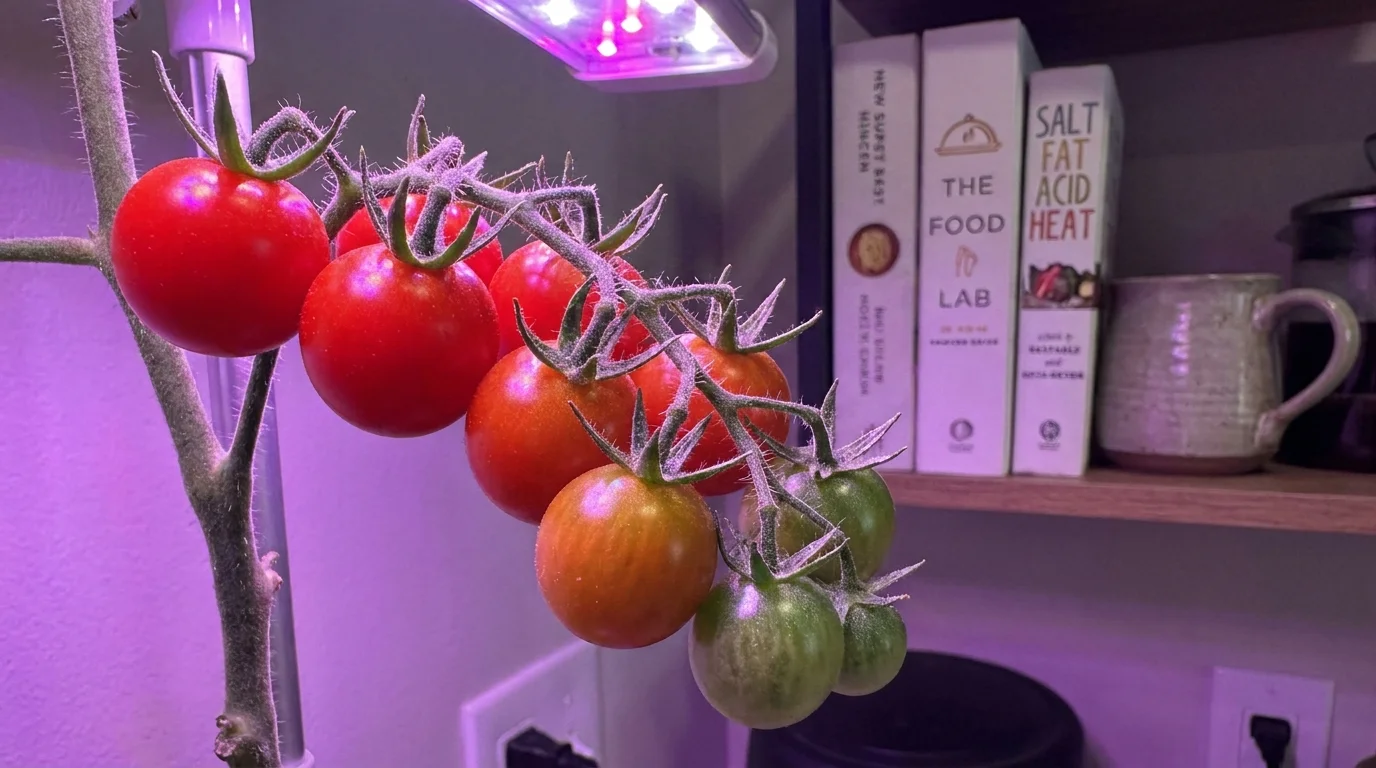
Tip #5: Cherry Tomatoes
Growing tomatoes indoors year-round challenges the traditional gardening mindset, but selecting the right variety guarantees spectacular results. Standard indeterminate tomato plants grow into sprawling vines that easily overtake a living room, but micro-dwarf varieties stay incredibly compact. Cultivars like Micro Tom, Orange Hat, or Tiny Tim rarely exceed 12 to 18 inches in height, making them perfect for your indoor garden. Plant your seeds in a high-quality potting mix within a one-gallon container to provide adequate root space.
Tomatoes demand intense light to produce fruit; you must provide 14 to 16 hours of strong LED grow lighting daily, positioned just a few inches above the canopy. Since your indoor environment lacks the wind and pollinating insects found outdoors, you must assist with pollination manually. Gently shake the main stem of the plant every few days once flowers appear, or vibrate the back of the blossoms with an electric toothbrush to release the pollen. Feed your plants every two weeks with a specialized, water-soluble tomato fertilizer high in phosphorus and potassium. Within 60 to 80 days, you will enjoy the unmatched sweetness of sun-ripened, homegrown cherry tomatoes straight from your windowsill.
Tip #6: Loose-Leaf Lettuce
Loose-leaf lettuce provides a highly reliable, low-maintenance foundation for your indoor vegetable garden. Unlike iceberg or romaine varieties that require time and space to form tight heads, loose-leaf varieties like Black-Seeded Simpson, Buttercrunch, or Lollo Rosso grow as open rosettes. This growth habit allows you to harvest individual leaves continuously without destroying the plant. Lettuce possesses a very shallow root system, meaning you can grow multiple plants in a wide, shallow container or a specialized window box.
Fill your chosen vessel with a moisture-retentive potting mix and scatter the seeds thinly across the top, barely covering them with a dusting of soil. Lettuce seeds require light to germinate, so avoid burying them deeply. Keep the soil surface constantly moist using a spray bottle until the sprouts emerge. Your lettuce will thrive under 10 to 12 hours of artificial light or in a bright, ambient room. Avoid placing the pots directly over heating vents, as the dry, hot air causes the delicate leaves to wilt and turn bitter. Begin harvesting when the leaves reach three to four inches in length, picking the outermost greens to ensure a steady supply for your daily salads.
Tip #7: Carrots
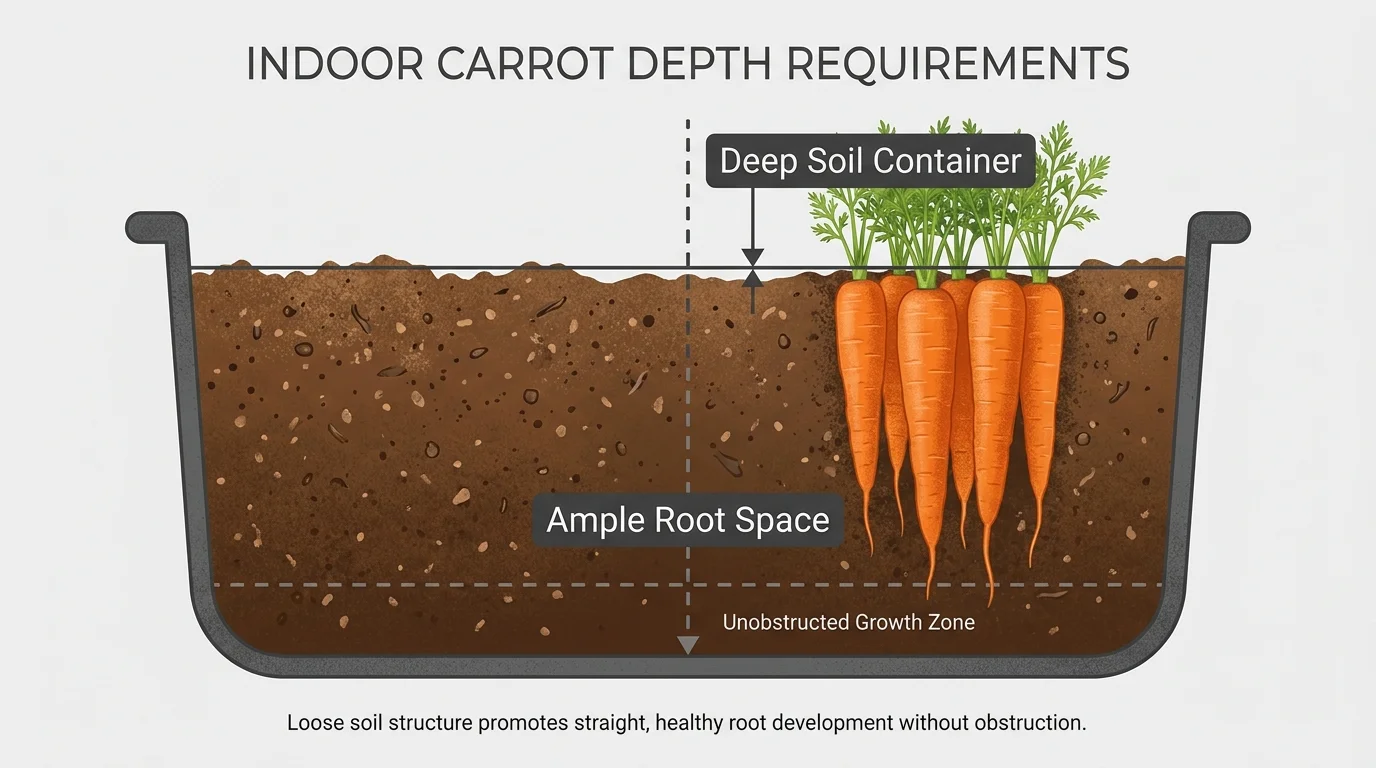
Carrots might seem like an unlikely candidate for indoor cultivation, but you can successfully grow these sweet roots inside by making a few simple adjustments. Standard carrot varieties develop deep taproots that require a foot or more of soil, but short, spherical varieties like Parisian or stout types like Little Finger perform beautifully in containers. Choose a pot that is at least eight to ten inches deep to ensure the roots have ample downward space. Soil texture heavily dictates your success with indoor carrots.
You must use a very loose, sandy potting mix completely free of rocks, heavy clay, or large pieces of bark; any obstruction causes the carrots to fork and deform. Plant your seeds roughly a quarter-inch deep and keep the soil surface consistently damp to soften the tough seed coats. Carrot seeds germinate slowly, often taking up to two or three weeks, so patience remains essential. Once they sprout, thin the seedlings to stand two inches apart. Provide 12 hours of bright light daily and maintain even moisture in the soil. Fluctuating water levels cause the roots to split. Harvest your crisp, sweet carrots in about 65 to 75 days.
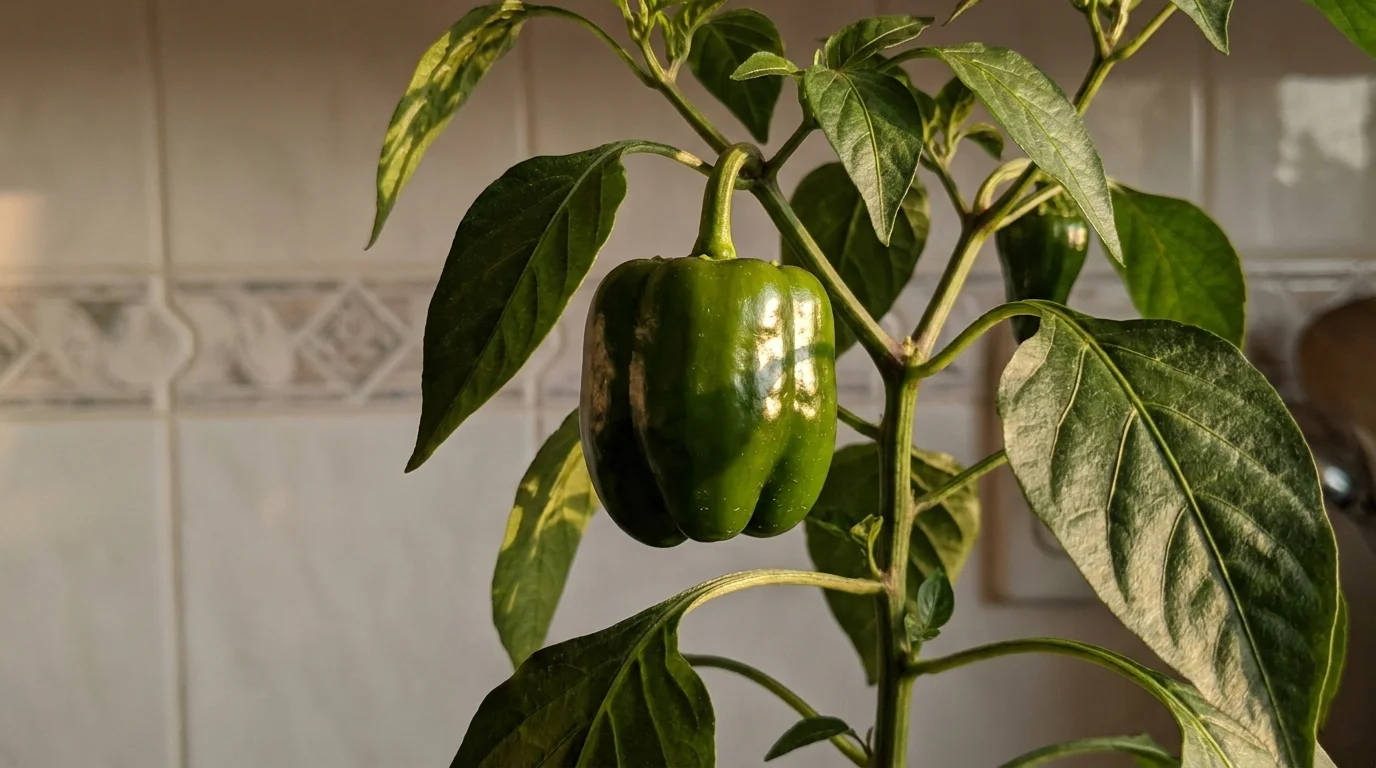
Tip #8: Bell Peppers
Cultivating bell peppers indoors unlocks a fascinating botanical secret: pepper plants naturally grow as perennials. In an outdoor garden, winter frost kills them, but inside your climate-controlled home, a single pepper plant can live and produce fruit for years. Select small-fruited bell pepper varieties or sweet mini peppers, as they adapt more readily to container life than massive, thick-walled varieties. Start your seeds in a warm location, ideally using a seedling heat mat to boost soil temperatures to 80 degrees Fahrenheit until germination occurs.
Once your seedlings develop true leaves, transplant them into a permanent two- or three-gallon pot with excellent drainage. Peppers thrive in warm environments and demand plenty of light, requiring at least 14 hours under full-spectrum grow lights each day. Allow the top inch of soil to dry out between waterings to prevent root rot. Like indoor tomatoes, your pepper plants require manual pollination. When the delicate white flowers open, use a small, soft paintbrush to gently transfer pollen from flower to flower. Apply a balanced liquid fertilizer every two weeks during the active fruiting phase to support the development of vibrant, crunchy peppers right in your kitchen.

Putting It All Together: Enjoy Your Beautiful Garden
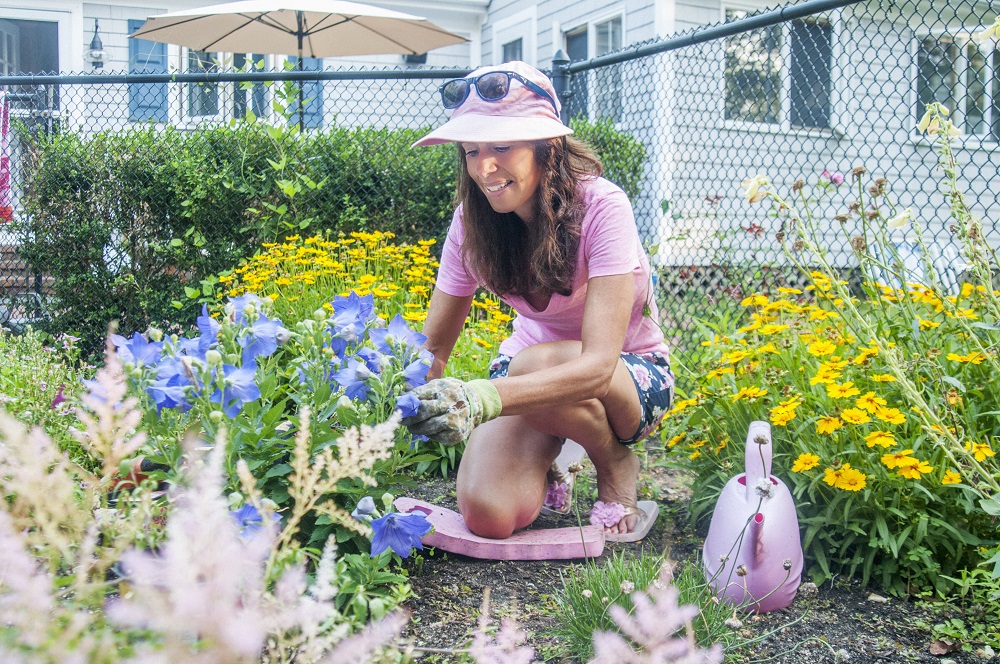
Creating an indoor vegetable garden transforms your living space into a vibrant, productive oasis. You have learned that growing your own food does not require acres of land, perfect weather, or hours of backbreaking labor. By carefully selecting adaptable crops like shallow-rooted greens, fast-growing radishes, and compact fruiting plants, you establish a reliable food source just steps from your cutting board. Success hinges on recreating ideal outdoor conditions inside your home.
Invest in a quality full-spectrum LED grow light to provide the energy your plants need to synthesize nutrients effectively. Prioritize high-quality, well-draining potting soil rather than heavy garden dirt, which quickly compacts in containers. Finally, develop a consistent watering routine, always checking the soil moisture levels before adding more water. Gardening remains a dynamic learning process, so embrace the journey and observe how your plants respond to their environment. As you harvest your first handful of crisp spinach or pluck a bright red cherry tomato from your windowsill, you will experience the deep, practical satisfaction that comes from nurturing a seed into a nourishing meal. Start small, stay observant, and enjoy your beautiful indoor harvest year-round.
Frequently Asked Questions
Do I absolutely need grow lights for indoor vegetables?
While some leafy greens and herbs tolerate the indirect natural light from a bright, south-facing window, most vegetables require intense light to thrive. Fruiting plants like tomatoes and peppers absolutely need 12 to 16 hours of full-spectrum light daily to produce blossoms and mature fruit. Modern LED grow lights consume very little electricity, generate minimal heat, and dramatically improve the growth rate and yield of your indoor garden. If you want consistent, year-round production regardless of the winter gloom outside, investing in a grow light becomes essential.
How often should I water my indoor vegetable plants?
Indoor plants lack the natural drainage and evaporation provided by outdoor sun and wind, making overwatering a common pitfall. You should never follow a strict calendar schedule for watering. Instead, check the moisture level manually by inserting your finger one inch deep into the soil. If the soil feels dry at that depth, water the plant thoroughly until moisture drains from the bottom of the pot. If the soil still feels damp, wait another day or two. Always ensure your containers feature drainage holes to prevent standing water, which quickly causes fatal root rot.
What type of soil is best for an indoor garden?
Never use topsoil or dirt dug directly from your outdoor garden. Outdoor soil contains pests, weed seeds, and fungal pathogens that rapidly multiply in a warm indoor environment. Furthermore, garden dirt compacts heavily in pots, suffocating delicate root systems. Always purchase a sterile, high-quality commercial potting mix. Look for blends containing peat moss or coconut coir for moisture retention, perlite or pumice for aeration, and compost or worm castings for baseline nutrition. This specialized mix ensures your vegetable roots receive the perfect balance of oxygen and moisture.
How do I manage pests on indoor plants?
Even isolated indoor gardens occasionally encounter pests like fungus gnats, aphids, or spider mites. Prevention serves as your best defense. Inspect your plants weekly, checking the undersides of leaves where pests tend to hide. Avoid overwatering your soil, as perpetually wet dirt breeds fungus gnats. If you spot an infestation, act immediately. Treat the affected foliage with a gentle insecticidal soap or cold-pressed neem oil spray. For fungus gnats, applying a top layer of dry sand over your potting soil interrupts their breeding cycle effectively without resorting to harsh chemicals.
For region-specific advice, consult your local University Extension program (find yours via the USDA directory). For plant databases and inspiration, visit the Missouri Botanical Garden or the Royal Horticultural Society.
Disclaimer: This article provides general gardening advice. Always consider your specific climate, soil conditions, and local pests. Follow safety guidelines when using gardening tools and products.