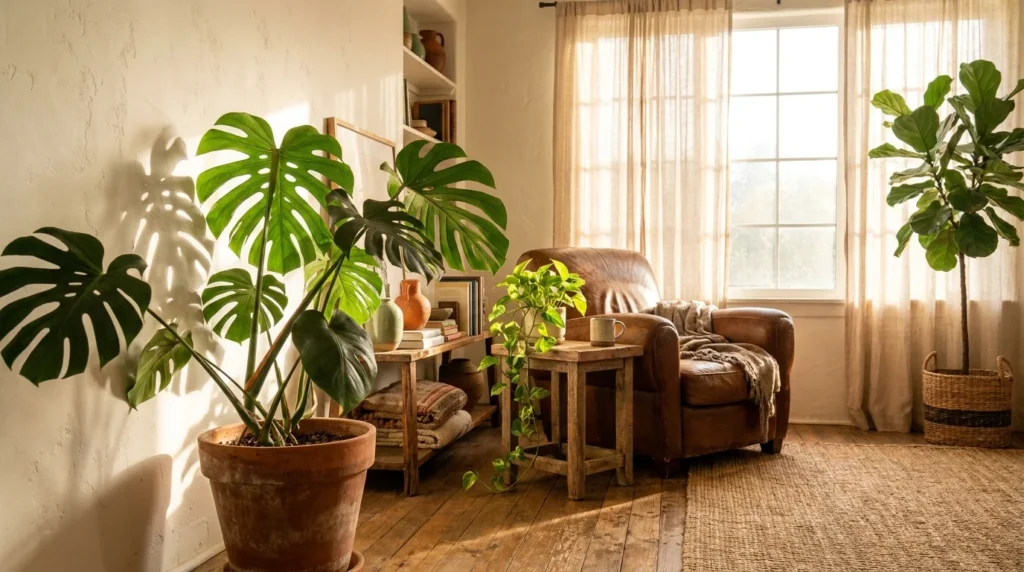
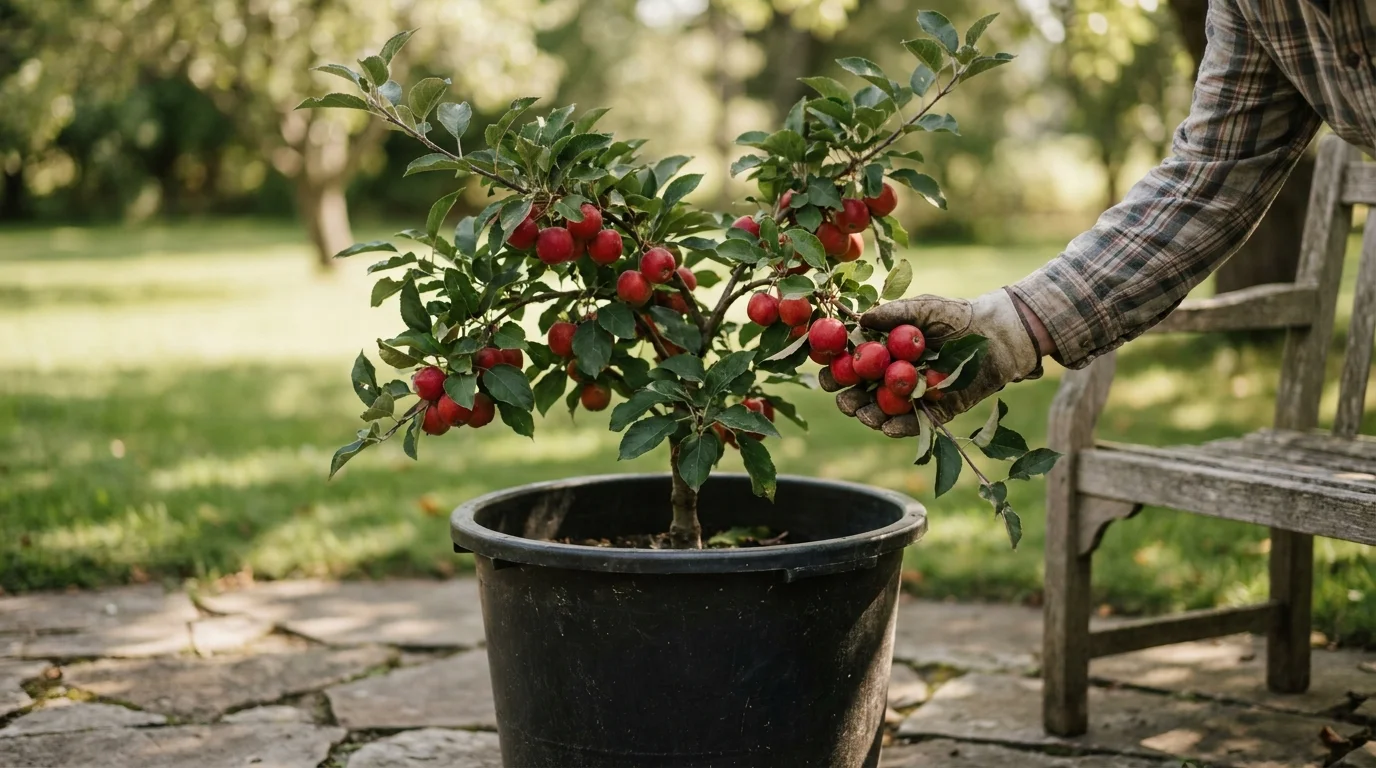
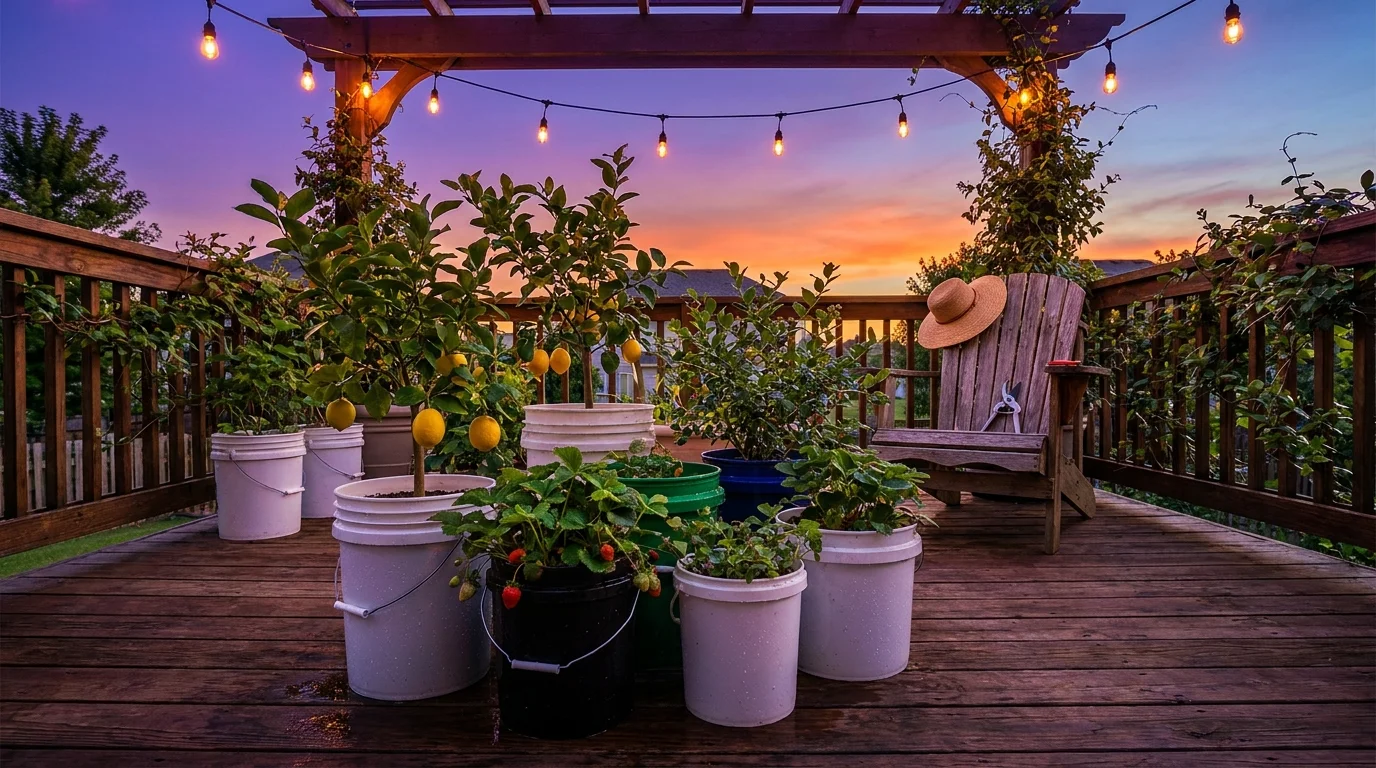
Transforming a small patio or balcony into a productive orchard requires nothing more than sturdy containers and the right plant varieties. You can harvest fresh, sun-ripened produce just steps from your kitchen door without digging up a single inch of lawn. Container gardening gives you excellent control over soil quality and moisture while protecting sensitive roots from ground-dwelling pests. This method also lets you cultivate warmth-loving species that might otherwise struggle in your native climate by simply moving them indoors during harsh winters. By selecting dwarf cultivars and maintaining consistent watering schedules, you can effortlessly grow an abundance of backyard fruit in compact spaces.
Tip #1: Meyer Lemons
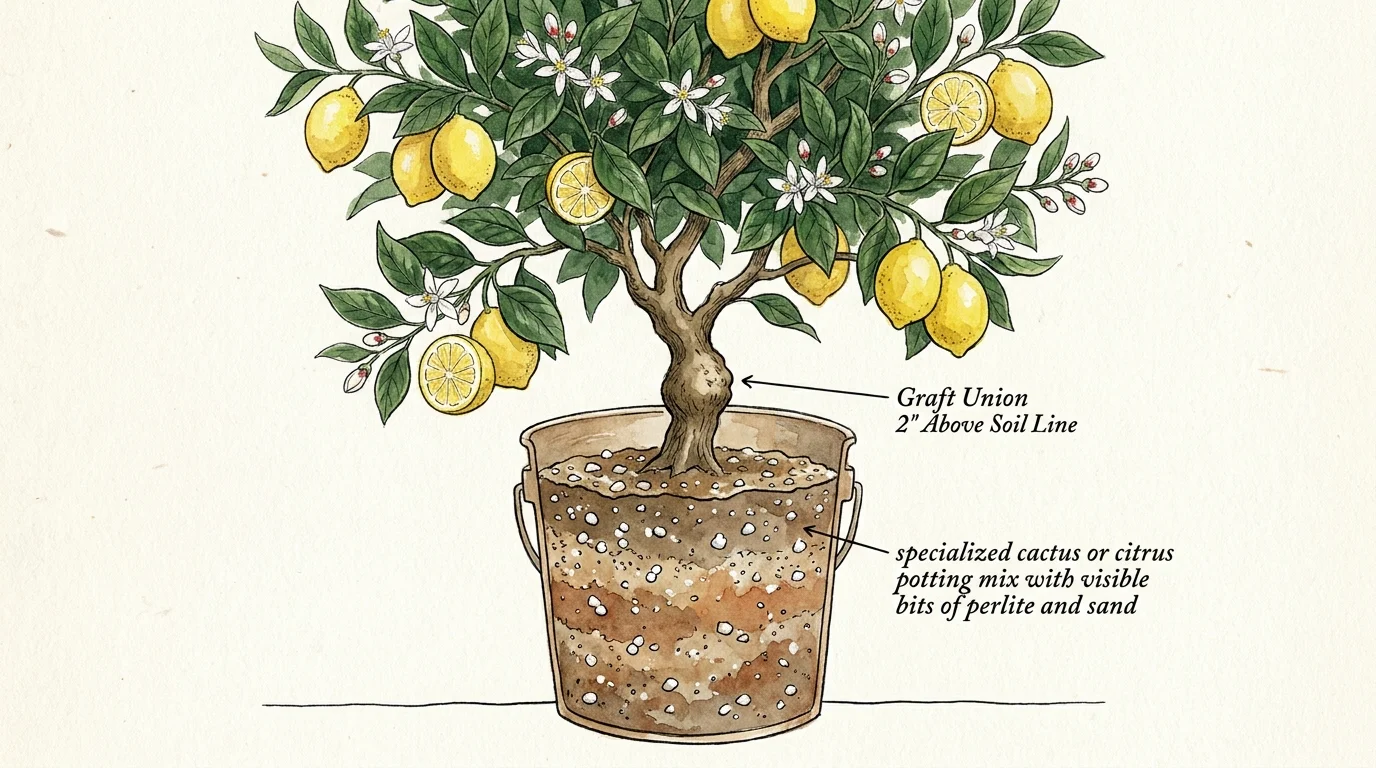
Meyer lemons represent the gold standard for container fruit gardening. A cross between a true lemon and a sweet mandarin orange, this variety produces thin-skinned, intensely aromatic fruit that you rarely find in standard grocery stores. Because Meyer lemon trees naturally stay relatively small, they adapt perfectly to life inside a bucket. You can easily keep them trimmed to a manageable four to five feet tall. As an added bonus, their brilliant white blossoms will fill your patio or sunroom with a heavy, intoxicating jasmine-like fragrance for weeks before the fruit sets.
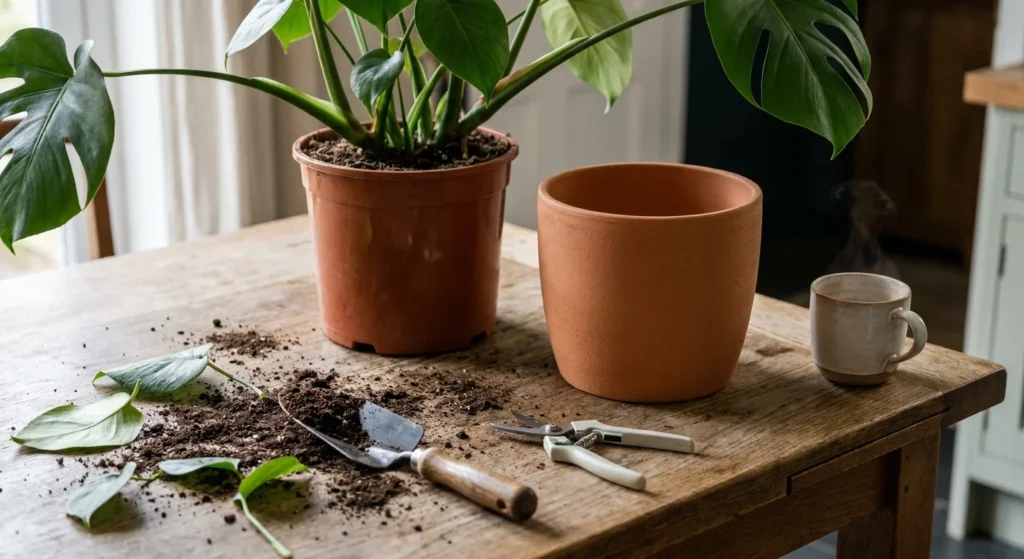
To get started, choose a standard five-gallon bucket or a similar container. You must drill several half-inch drainage holes in the bottom; citrus roots will rapidly rot if they sit in standing water. Fill your bucket with a specialized cactus or citrus potting mix. These blends contain high amounts of perlite and sand, allowing excess water to drain away instantly. Steer clear of standard garden topsoil, which compacts easily and starves the roots of oxygen. When placing your tree in the bucket, ensure the graft union—the swollen bump near the base of the trunk—remains at least two inches above the soil line.
Citrus trees are heavy feeders that demand consistent moisture and bright sunlight. Place your bucket in a location that receives at least six to eight hours of direct sunlight every day. Water the tree deeply whenever the top two inches of the potting mix feel dry to the touch, pouring until moisture escapes the bottom drainage holes. Apply a citrus-specific fertilizer containing high nitrogen and trace minerals like zinc and iron once a month during the active growing season. When winter temperatures threaten to drop below forty degrees Fahrenheit, simply carry your bucket indoors and place it near your brightest south-facing window.
Tip #2: Strawberries
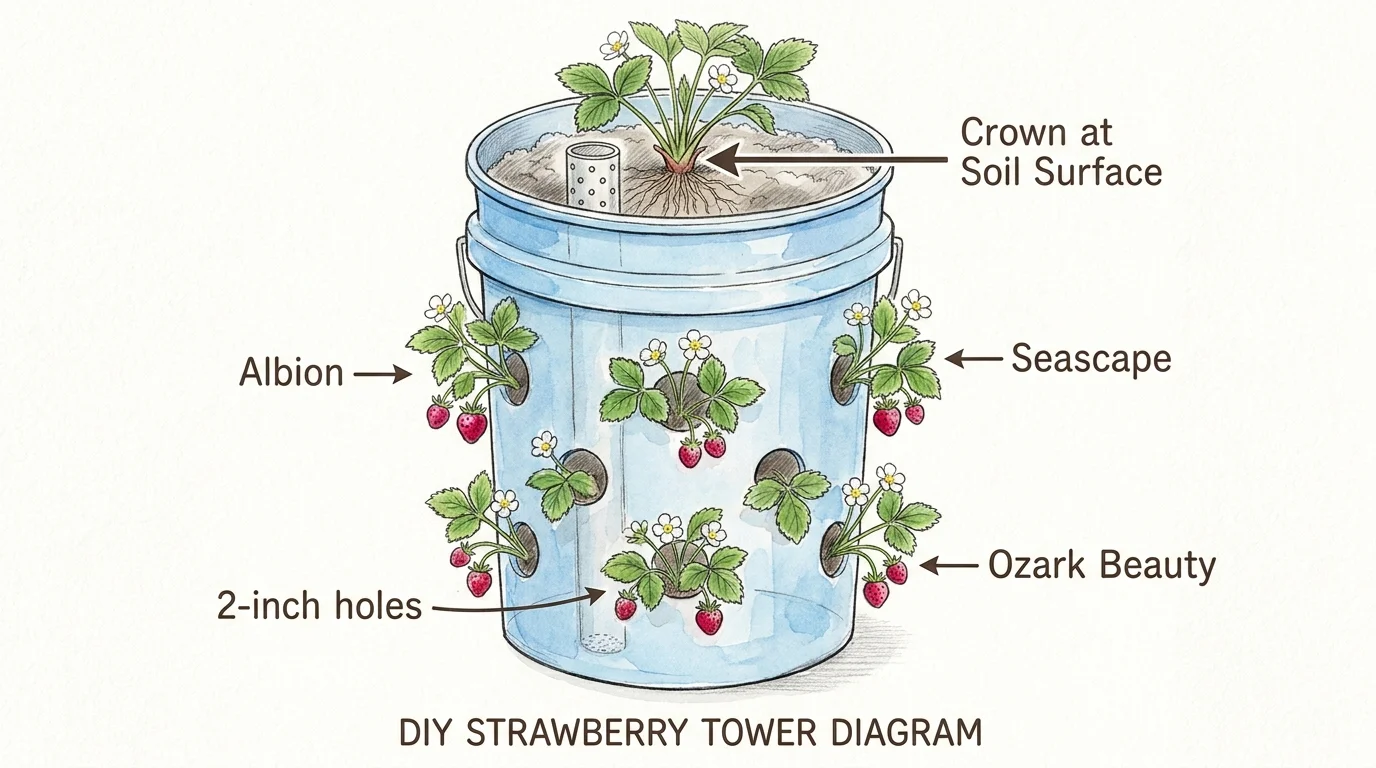
Strawberries possess an incredibly shallow root system, making them one of the absolute best fruits for bucket gardening. Instead of battling slugs, weeds, and soil-borne diseases in a traditional garden bed, lifting your strawberry plants off the ground eliminates most of these headaches overnight. For the best container results, seek out day-neutral or everbearing varieties like Albion, Seascape, or Ozark Beauty. Unlike June-bearing types that produce one massive crop and stop, everbearing strawberries will provide you with a steady trickle of sweet, ruby-red berries from late spring all the way until the first fall frost.
A standard five-gallon food-grade bucket can comfortably house three to four strawberry plants. You can even drill two-inch holes along the vertical sides of the bucket to create a DIY strawberry tower, maximizing your vertical growing space. Use a premium, fluffy potting soil rich in organic compost. The most critical step in planting strawberries involves the crown—the thick central part of the plant where the leaves meet the roots. You must plant the strawberry so the crown sits exactly at the soil surface. Burying the crown causes rapid rotting, while leaving the roots exposed causes the plant to dry out and die.
Because buckets dry out much faster than ground soil, you need to monitor moisture levels closely. During the peak of summer heat, your strawberry buckets will likely require daily watering. Apply a balanced, water-soluble organic fertilizer every two weeks to keep the plants pushing out new blossoms. Every three years, strawberry plants naturally begin to lose their vigor and produce fewer berries. When you notice a decline in fruit production, pull the old plants, replace the potting soil, and start fresh with vigorous new crowns.
Tip #3: Blueberries
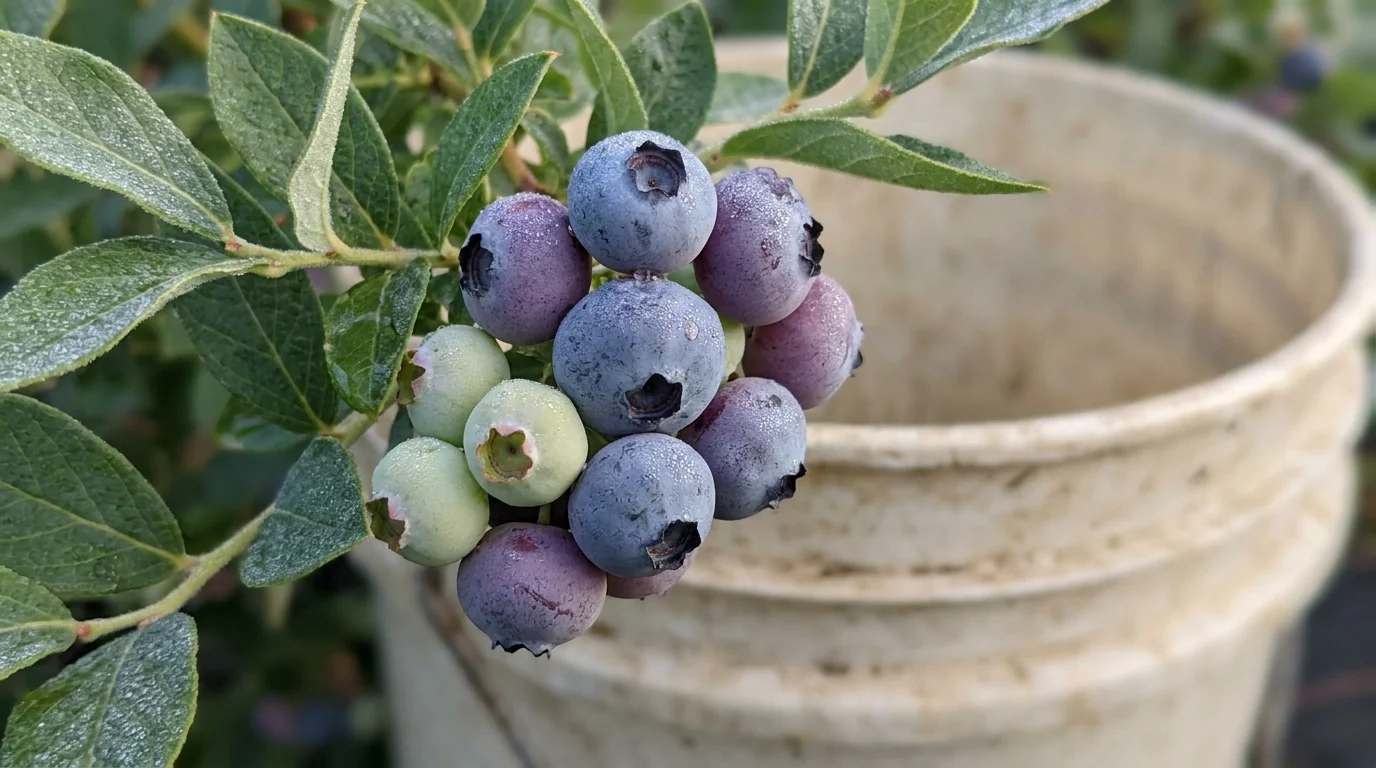
Growing blueberries in the ground often ends in frustration because these plants require highly acidic soil to survive. Most residential yard soil simply does not meet their strict pH requirements. Planting them in a bucket solves this problem completely, giving you total control over the soil chemistry. Dwarf and half-high varieties such as Top Hat, Sunshine Blue, and Jelly Bean thrive in confined spaces and rarely exceed three feet in height. For the largest harvests, plant two different varieties in separate buckets; cross-pollination dramatically increases both the size and the quantity of the berries.
Blueberries need a soil pH between 4.5 and 5.5 to properly absorb nutrients like iron. Without this acidity, their leaves will quickly turn yellow and drop off. Create your own highly acidic potting mix by blending equal parts peat moss, fine pine bark mulch, and standard potting soil. Choose a ten-gallon bucket to give their fibrous, spreading roots plenty of room to expand. Drill plenty of drainage holes, as blueberries love moisture but despise sitting in stagnant, muddy water.
Keep the soil consistently damp like a wrung-out sponge. Using collected rainwater is highly recommended, as municipal tap water often contains dissolved minerals that gradually raise the soil pH over time. Feed your plants in early spring with a fertilizer specifically formulated for acid-loving plants like azaleas and rhododendrons. As the green berries begin to blush blue in early summer, drape a sheet of protective bird netting over the bucket. Birds easily spot ripening blueberries and can strip a small bush bare in a single afternoon if left unguarded.
Tip #4: Figs
It sounds counterintuitive, but restricting a fig tree’s root system actually encourages it to produce more fruit. When planted in the open ground, figs often put all their energy into growing massive canopies of green leaves. Confining their roots in a bucket triggers a survival response, prompting the tree to focus heavily on developing sweet, jammy figs. Cultivars like Brown Turkey, Chicago Hardy, and Petite Negra perform exceptionally well in containers and will readily produce ripe fruit even in shorter growing seasons.
Start your young fig tree in a five-gallon or seven-gallon bucket, planning to pot it up to a fifteen-gallon container as it matures over the next few years. Use a rich, loamy potting mix heavily amended with compost to retain moisture. Figs drink an astonishing amount of water when their fruit begins to swell in mid-summer. You may find yourself watering a mature potted fig twice a day during intense heat waves. A layer of wood chip mulch applied over the top of the soil helps slow down evaporation.
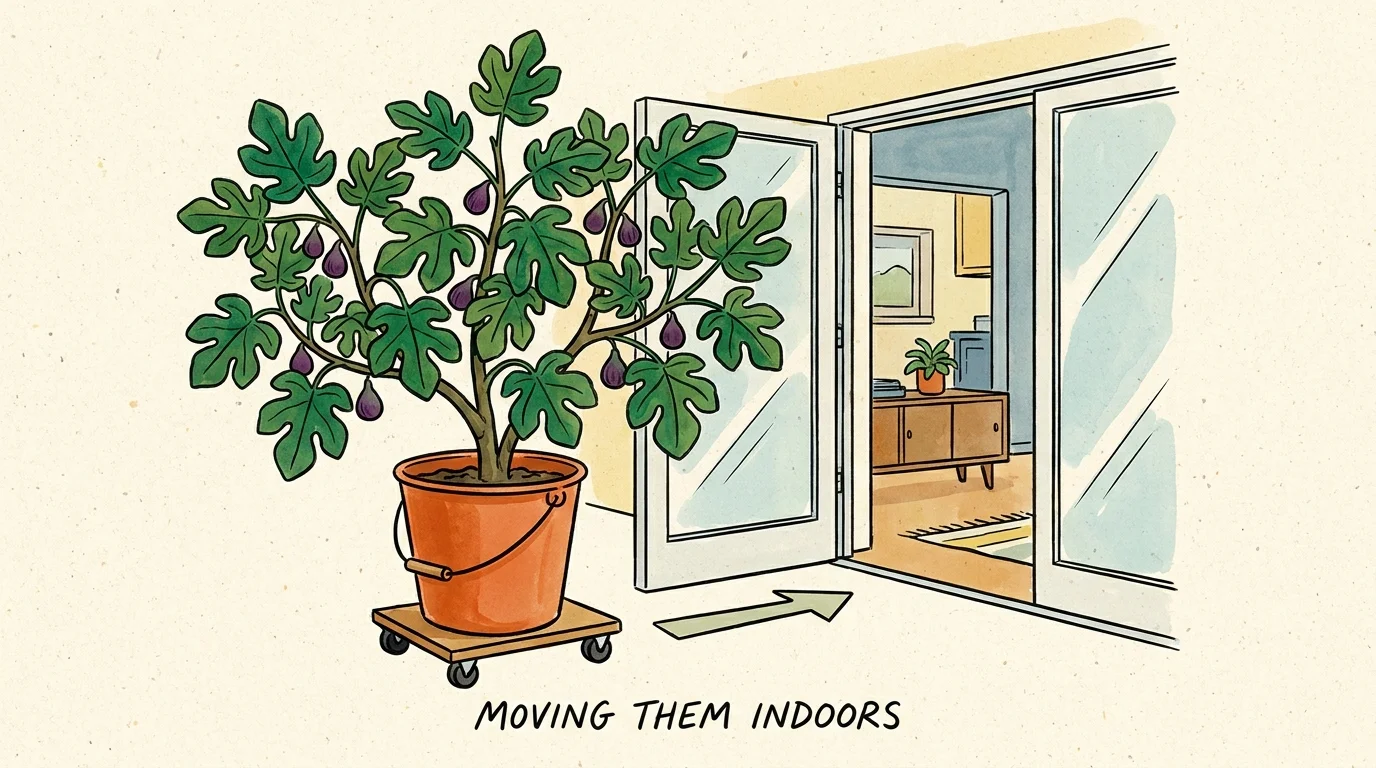
Figs handle heavy pruning beautifully, allowing you to maintain them at a custom height that fits your patio. When winter approaches, container figs offer a distinct advantage for gardeners in cold climates. Once the tree drops its leaves and goes completely dormant in late autumn, wheel the bucket into an unheated garage, shed, or basement. The tree does not need sunlight during this dormant phase; it merely needs protection from deep, root-killing freezes. Give it a tiny splash of water once a month to keep the soil from turning to dust, then bring it back outside when the threat of spring frost passes.
Tip #5: Dwarf Apples
You no longer need an acre of land to grow crisp, juicy apples. Horticultural advancements have led to the creation of columnar apple trees and extremely dwarfing rootstocks that keep trees incredibly small while yielding full-sized fruit. Columnar varieties like Scarlet Sentinel, Northpole, and Golden Sentinel grow straight upward like a pillar, developing fruiting spurs close to the main trunk without spreading wide branches. These narrow trees look visually striking on a patio and make harvesting incredibly easy.
A ten-gallon to fifteen-gallon bucket provides the perfect home for a dwarf apple tree. Drill at least five drainage holes to prevent waterlogging. Fill the container with a high-quality potting mix blended with a few handfuls of worm castings and bone meal to establish strong, healthy roots. Apple trees require cross-pollination to set fruit. You must purchase two different varieties that bloom at the same time and place their buckets relatively close to one another so bees can easily transfer pollen between the blossoms.
Proper thinning ensures your bucket-grown apple tree produces delicious fruit. After the spring blossoms fade and tiny green apples appear, you will often notice three or four small fruits clustered together. Pinch off the smaller ones, leaving only one dominant apple per cluster. This directs the tree’s limited container energy into growing large, perfectly formed apples rather than dozens of tiny, bitter ones. Water the tree consistently, and apply a balanced fruit tree fertilizer every spring as the leaf buds begin to swell.

Tip #6: Pineapples
Pineapples belong to the bromeliad family, featuring a surprisingly small, shallow root system that supports a massive, spiky plant. Because they do not need deep soil to anchor themselves, a standard three-gallon or five-gallon bucket offers more than enough room. You can purchase a young pineapple plant from a nursery, or you can grow one for free using the leafy crown from a grocery store pineapple. Simply twist the leafy top off the fruit, strip away the bottom inch of leaves to expose the root nodes, and let it sit on your counter for a few days to dry and callus over.
Once the cut end has dried, plant the crown directly into a bucket filled with a sandy, fast-draining cactus mix. Pineapples require intense sunlight and high heat to thrive, making them perfect candidates for the sunniest, hottest corner of your patio. They are incredibly drought-tolerant; you only need to water them when the soil feels completely dry halfway down the bucket. Overwatering represents the fastest way to kill a potted pineapple, as their specialized roots easily succumb to fungal rot.
Patience remains your greatest tool when growing pineapples. A newly rooted crown usually takes eighteen to twenty-four months to produce a flower and set a fruit. As a tropical plant, pineapples absolutely despise the cold. You must bring the bucket indoors long before the temperature drops to fifty degrees Fahrenheit. Place it near a sunny window for the winter. Once the fruit finally develops and turns a deep golden yellow, the intense, sugary flavor will prove completely worth the wait.

Tip #7: Pomegranates
Pomegranate trees bring striking ornamental beauty to a patio container alongside their delicious fruit. In early summer, they push out brilliant, trumpet-shaped, orange-red blossoms that attract hummingbirds from miles around. For bucket gardening, seek out dwarf varieties like Nana. This specific cultivar maxes out at roughly three feet tall and produces golf-ball-sized fruits packed with sweet-tart, ruby-red arils. They are robust, highly resilient plants that forgive occasional watering mistakes.
A ten-gallon bucket provides an ideal permanent home for a dwarf pomegranate. Because these trees originate from hot, arid climates in the Mediterranean and Middle East, they demand excellent drainage. Mix standard potting soil with generous amounts of coarse sand and perlite. Allow the top three inches of the soil profile to dry out completely before you provide a deep, thorough soaking. During the height of summer, they love full, unshaded sun.
Feed your pomegranate tree with a balanced, slow-release fertilizer in early spring as new foliage appears. While established plants tolerate drought well, they need steady, even moisture while the fruit develops; erratic watering causes the growing fruit skins to split open prematurely. Depending on your hardiness zone, dwarf pomegranates can survive mild winters outdoors. In colder northern climates, move the bucket into a sheltered, frost-free location once the tree drops its leaves for the winter season.
Tip #8: Raspberries
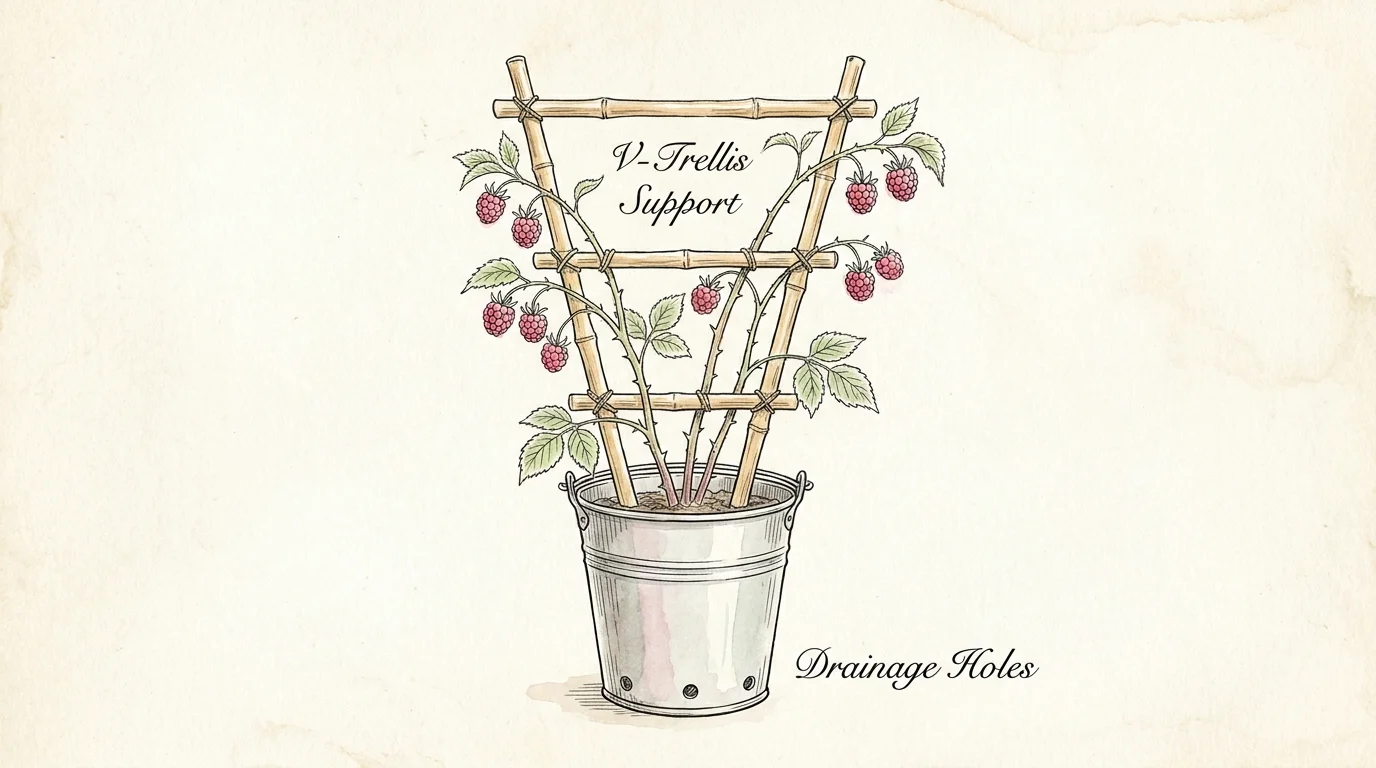
Traditional raspberries grow as aggressive brambles, sending underground runners in every direction and rapidly taking over garden beds. Growing them in a bucket contains their unruly roots, keeping your garden organized and safe from invasion. The key to success lies in choosing the right cultivar. Standard raspberry canes grow far too tall and floppy for containers. Instead, look for compact, thornless varieties specifically bred for pots, such as Raspberry Shortcake. These dwarf plants form a dense, tidy mound of foliage that rarely exceeds three feet tall and requires no trellising.
A five-gallon bucket serves as the perfect vessel for a dwarf raspberry bush. Ensure the bucket has plenty of drainage holes, and fill it with a rich, moisture-retentive potting mix. Raspberries require slightly acidic soil, so tossing a few handfuls of peat moss into the mix provides an excellent boost. Place the bucket in a spot that receives full sun for at least six hours a day. Because the plant features no thorns, you can easily place it near walkways or seating areas without fear of snagging your clothes.
Keep the soil consistently moist throughout the growing season. Raspberries suffer quickly if their shallow roots dry out. Apply a balanced organic fertilizer right as the green shoots emerge in the spring. Maintaining a dwarf raspberry bush requires minimal effort. Because varieties like Raspberry Shortcake produce fruit on new growth, you simply wait until late winter and cut all the old, dead canes down to the soil line. This clears the way for fresh, vigorous shoots to emerge when spring returns.
Putting It All Together: Enjoy Your Beautiful Garden
Growing your own fruit requires minimal space when you harness the flexibility of bucket gardening. By selecting the right dwarf cultivars and paying close attention to soil drainage, you can bypass the heavy labor of digging beds and tilling ground soil. The secret to massive container harvests always lies in your watering routine and feeding schedule. Because buckets wash nutrients away faster than ground soil, providing consistent moisture and regular applications of high-quality organic fertilizer will keep your plants thriving.
Do not hesitate to experiment with different locations around your patio. If a plant looks sluggish, try moving its bucket into a sunnier spot. As your trees and bushes grow, they will reward you with gorgeous spring blossoms, lush summer foliage, and the unmatched taste of fruit ripened just outside your door. Grab a few buckets, drill some holes, and start building your very own compact orchard today.
Frequently Asked Questions
How often should I water fruit plants in buckets?
Container plants dry out much faster than those planted in the ground. During the heat of summer, you should check your buckets daily. Insert your finger two inches into the potting mix; if it feels dry, water the plant deeply until moisture runs out the bottom drainage holes. Some heavy-drinking plants like figs may require watering twice a day during heat waves.
Do I absolutely need to drill drainage holes in my buckets?
Yes, drilling drainage holes is non-negotiable. Without holes, water pools at the bottom of the bucket, pushing out oxygen and creating a swampy environment. This causes root rot, which will quickly kill fruit trees and berry bushes. Use a half-inch drill bit and create at least five to eight holes evenly spaced around the bottom of each bucket.
Can I use topsoil from my yard in my containers?
Avoid using standard yard dirt or bags labeled as “topsoil” or “garden soil.” These soils are dense, heavy, and will compact into a hard brick inside a bucket. Always use a high-quality “potting mix” or “container mix.” These blends contain perlite, vermiculite, and peat moss to ensure proper aeration and fast water drainage, which potted plant roots desperately need to survive.
For region-specific advice, consult your local University Extension program (find yours via the USDA directory). For plant databases and inspiration, visit the Missouri Botanical Garden or the Royal Horticultural Society.
Disclaimer: This article provides general gardening advice. Always consider your specific climate, soil conditions, and local pests. Follow safety guidelines when using gardening tools and products.