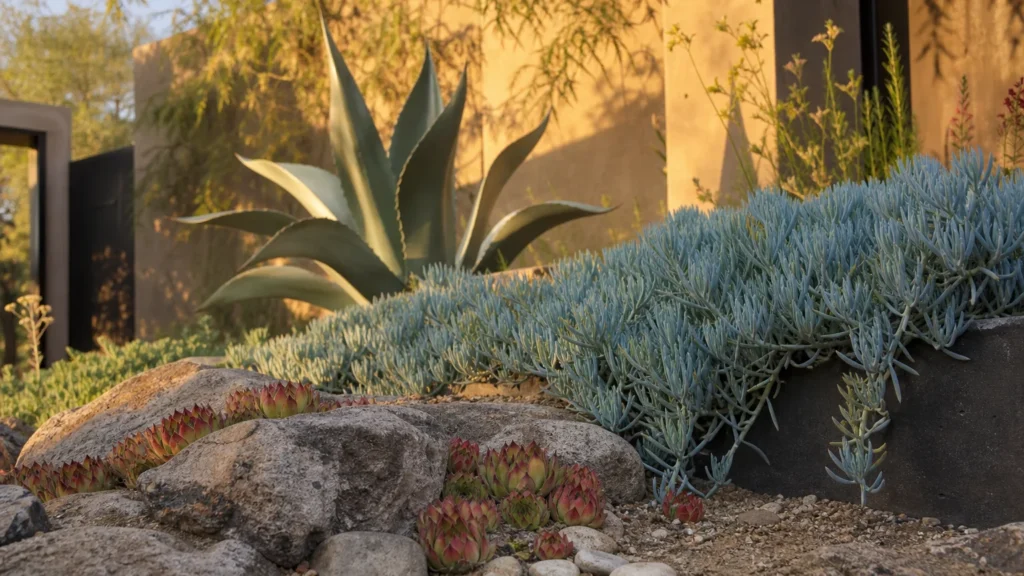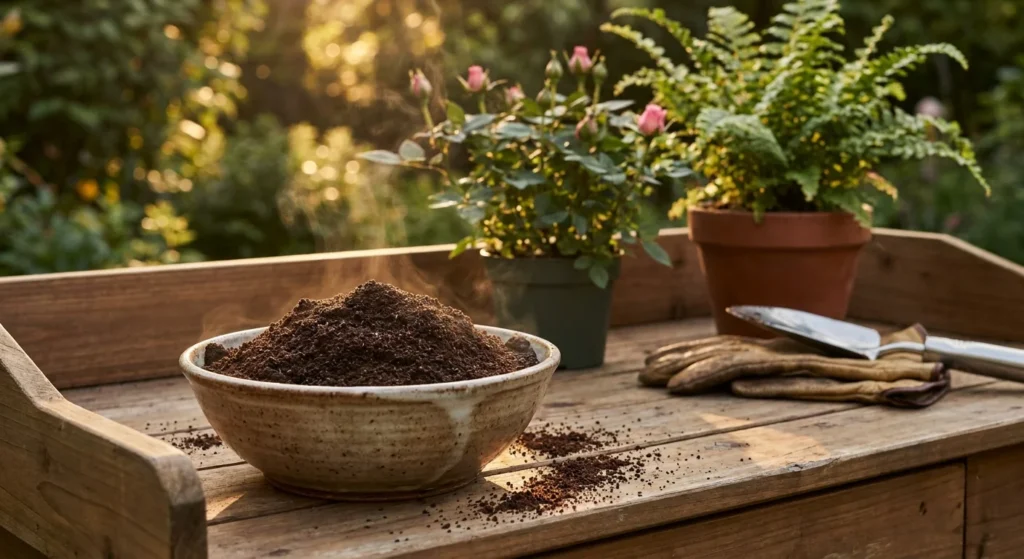
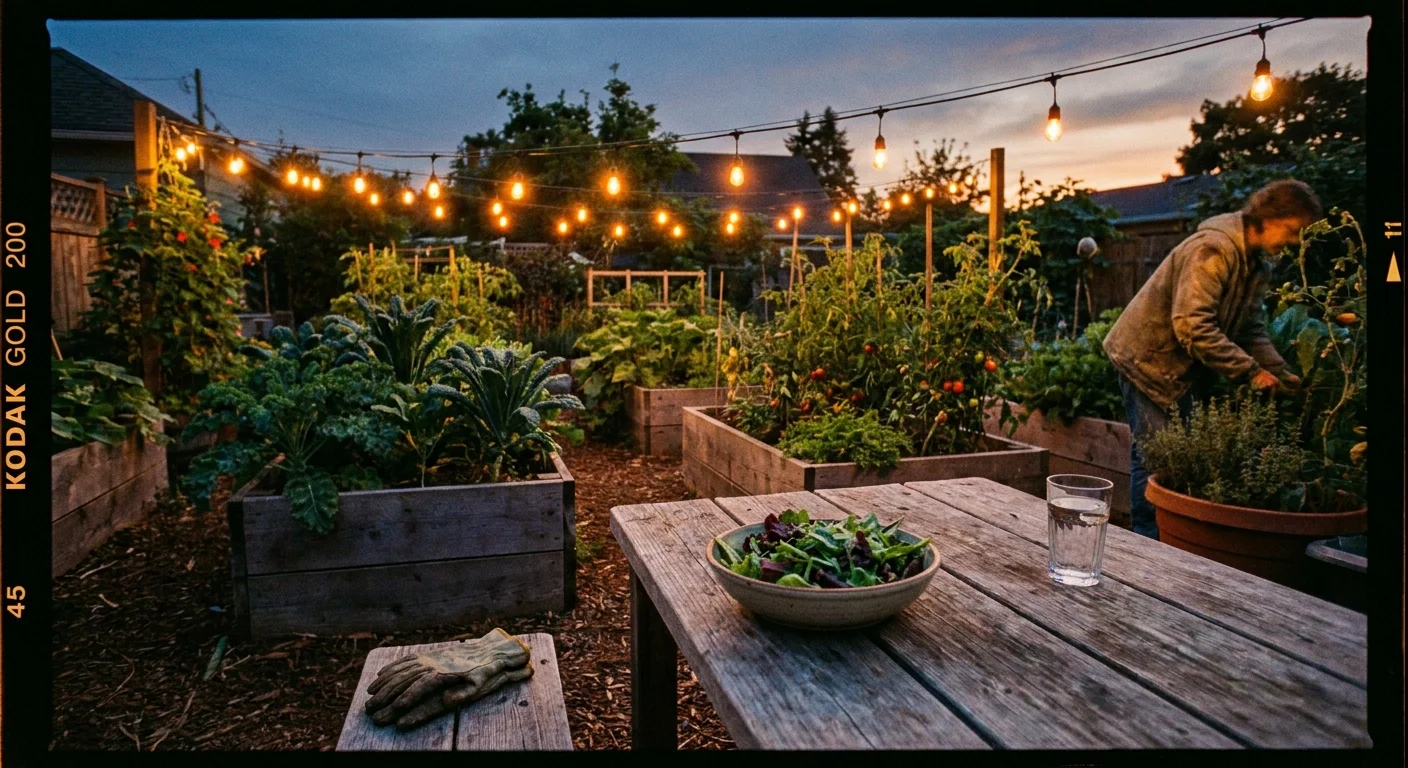
You can harvest your own fresh produce in under a month with fast growing vegetables perfectly suited for an everyday home garden. These resilient crops thrive with minimal intervention, making beginner gardening a rewarding and completely stress-free experience. Selecting the right varieties eliminates the traditional waiting game and dramatically reduces the risk of crop failure. Whether you are planting a few pots on a balcony or setting up raised beds for senior gardening accessibility, these reliable plants guarantee an abundant yield. Skip the frustration of finicky heirloom varieties and focus on these rapid-growing, easy vegetables that transform bare soil into a lush, edible landscape before the season even hits its peak.
Tip #1: Radishes
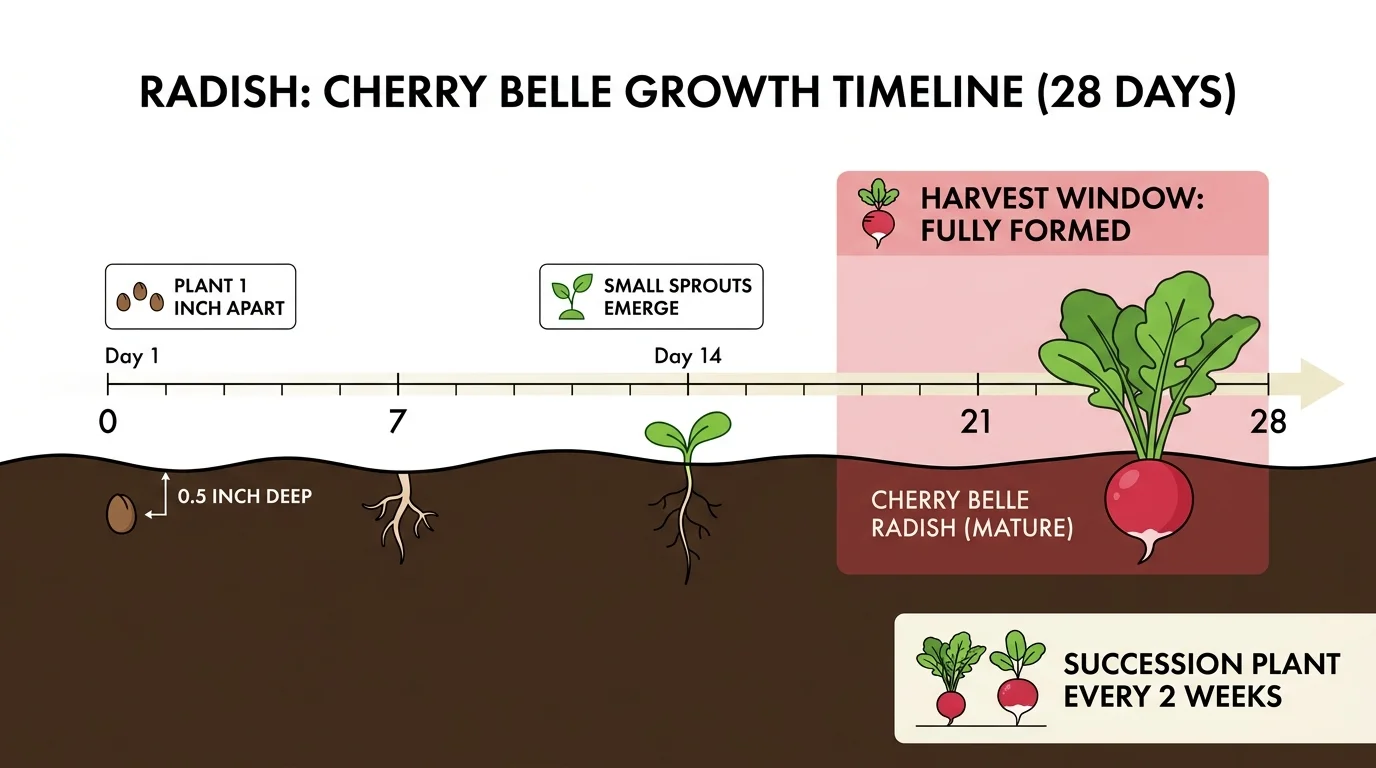
Radishes hold the undisputed title of the gardening world’s fastest sprinters. You push a tiny seed into the dirt, and a mere 21 to 28 days later, you pull up a crisp, brightly colored root ready for your salad bowl. This rapid turnaround offers incredible motivation when you are just learning the ropes of plant care. Radishes require nothing more than loose soil and regular watering to flourish. Because they grow so quickly, pests rarely have time to discover them before harvest day arrives.
When planting radishes, space the seeds about an inch apart and cover them with half an inch of soil. If your soil tends to be heavy clay, mix in some compost to help the roots expand easily without becoming distorted. Varieties like Cherry Belle or French Breakfast are virtually foolproof and deliver a mild, peppery crunch that revitalizes any meal. Since radishes mature rapidly, practice succession planting; sow a new short row every two weeks to maintain a continuous, fresh harvest throughout the spring and early summer. Pay close attention to the shoulders of the plant; if you notice the tops pushing out of the soil and showing color, they are ready to pull. Leaving them in the ground too long makes the internal texture pithy and woody, while the flavor becomes overly spicy.
Tip #2: Leaf Lettuce
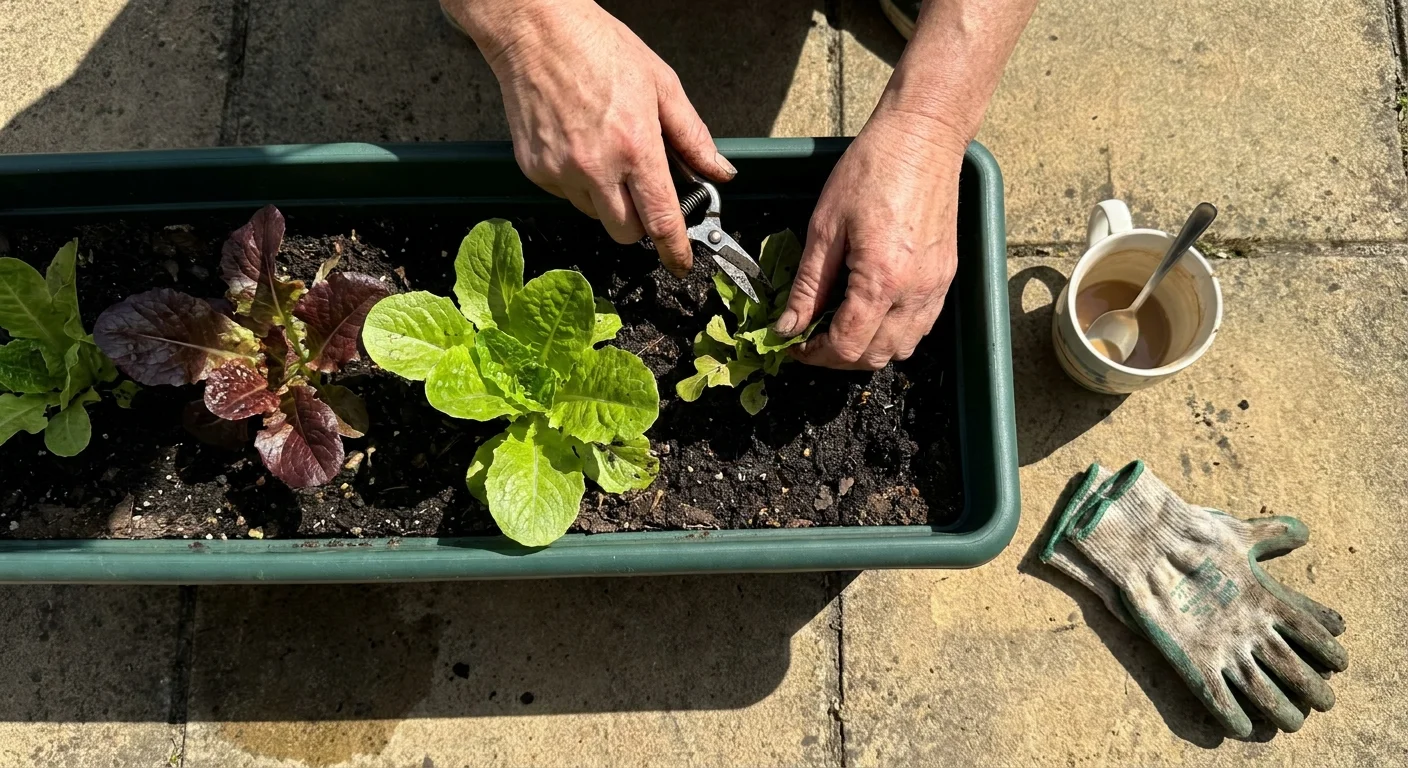
Leaf lettuce transforms your home garden into a customized salad bar in just three to four weeks. Unlike dense iceberg or romaine that require a long growing season to form tight heads, loose-leaf varieties allow you to harvest individual leaves as they grow. This efficient cut-and-come-again method means a single planting provides continuous fresh greens for months at a time. Leaf lettuce thrives in cooler weather, making it an ideal candidate for spring and early fall cultivation when the sun is less intense.
Sprinkle the tiny seeds over prepared soil and lightly press them into the surface, as they require sunlight to properly germinate. Keep the soil bed consistently moist until the delicate green shoots appear. Thin the young seedlings to give each plant about four inches of breathing room. You do not have to waste the thinned out sprouts; they make excellent, nutrient-dense microgreens for sandwiches and wraps. Black-Seeded Simpson and Red Sails represent two incredibly reliable, easy vegetables that resist bolting when temperatures inevitably begin to climb. Because lettuce possesses a relatively shallow root system, it adapts perfectly to container gardening. A simple window box or a shallow patio pot yields a surprising volume of tender, flavorful leaves with minimal physical effort.
Tip #3: Green Beans
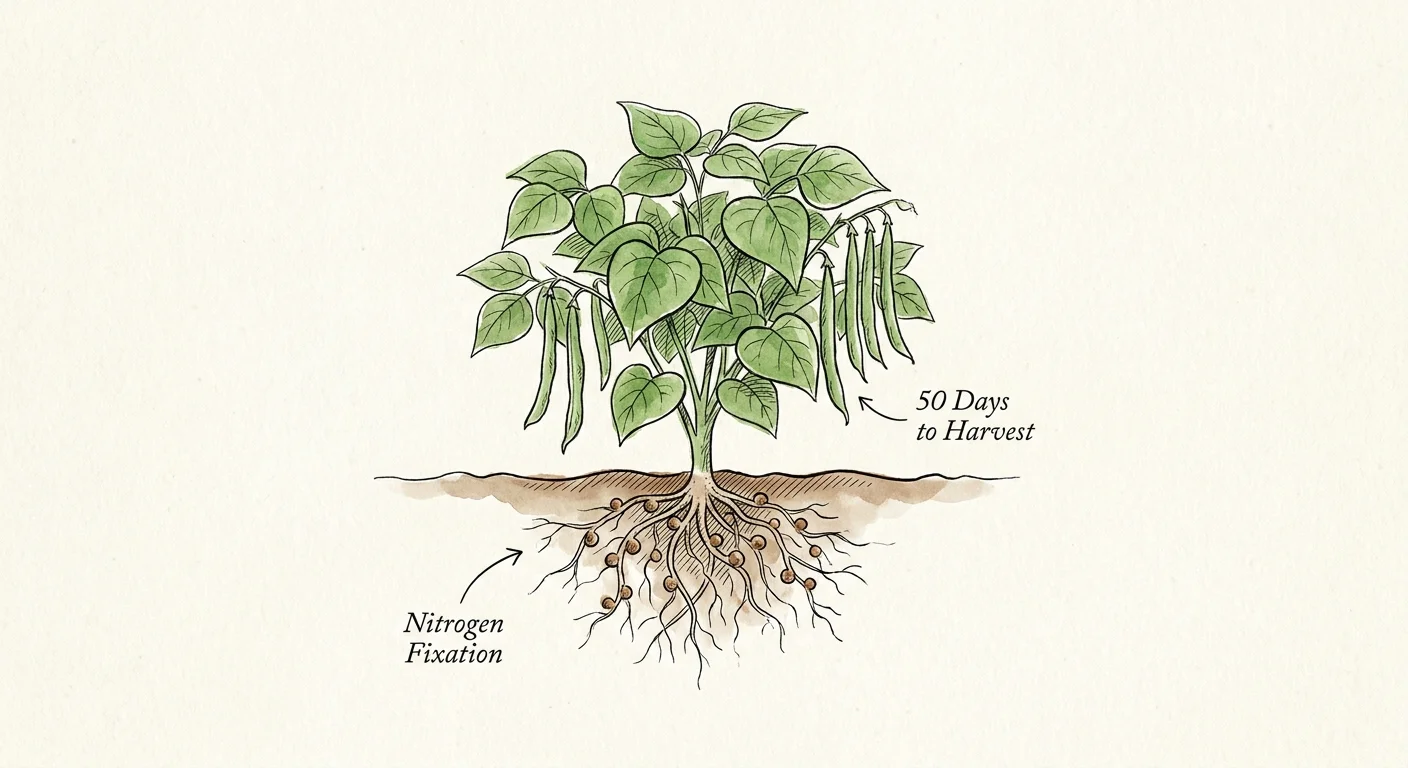
Bush beans deliver substantial harvests without the complicated trellises, stakes, and vertical supports required by traditional pole beans. You can expect to pick your first crisp pods about 50 days after placing the seeds directly into the warm soil. These robust, energetic plants establish themselves quickly and shade the surrounding earth, which naturally suppresses aggressive weed growth and retains valuable moisture. Beans also perform a magical biological trick called nitrogen fixation; they draw vital nitrogen from the air and store it in their root nodules, actively improving the soil health for future crops in your rotation.
Plant bush bean seeds one inch deep and three inches apart directly in your garden beds after the danger of the last spring frost has officially passed. They strongly despise having their fragile roots disturbed, so always sow them exactly where you want them to grow rather than starting them in transplant trays indoors. Keep the soil evenly moist but never completely waterlogged, as overly soggy conditions quickly lead to seed rot. Provider and Blue Lake 274 stand out as exceptionally heavy yielders that consistently produce tender, stringless pods. Once the plants begin producing, harvest the beans every two to three days. Frequent picking actively signals the plant to produce even more flowers, extending your abundant bounty well into the summer season.
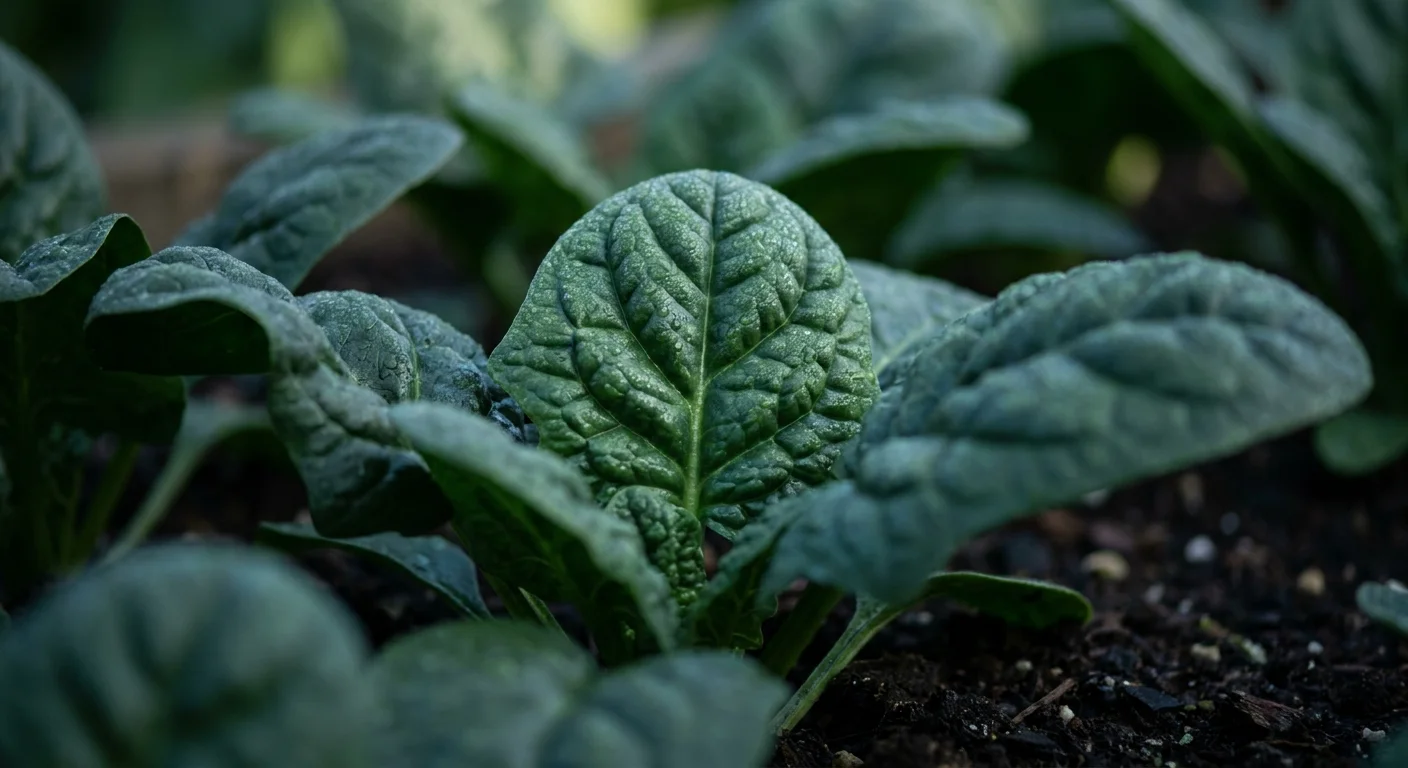
Tip #4: Spinach
Spinach ranks among the most nutrient-dense greens you can cultivate, and it grows vigorously during the brisk, cooler days of spring and autumn. You can begin snipping delicate baby spinach leaves just 30 days from germination. This remarkable cold hardiness means you can often sow seeds as soon as the ground thaws, getting a massive head start on your overall growing season. Spinach represents an absolute staple in beginner gardening because it handles light overnight frosts with ease—a gentle chill often sweetens the leaves by converting the plant’s starches into natural sugars.
Sow spinach seeds about half an inch deep in rich, well-draining soil. Because the seeds possess a notoriously tough outer shell, soaking them in a shallow bowl of water overnight before planting dramatically speeds up the germination process. Maintain consistent soil moisture throughout the growing period, as excessively dry conditions combined with heat cause the plant to bolt, rapidly sending up a tall flower stalk and immediately turning the lower leaves bitter. Space your young plants about three inches apart to ensure adequate airflow and prevent devastating mildew. Varieties like Bloomsdale Long Standing offer heavily crinkled, dark green leaves with an earthy, robust flavor that blows watery grocery store spinach completely out of the water. Simply harvest the large outer leaves first, allowing the protected center rosette to continue pushing out vibrant new growth.
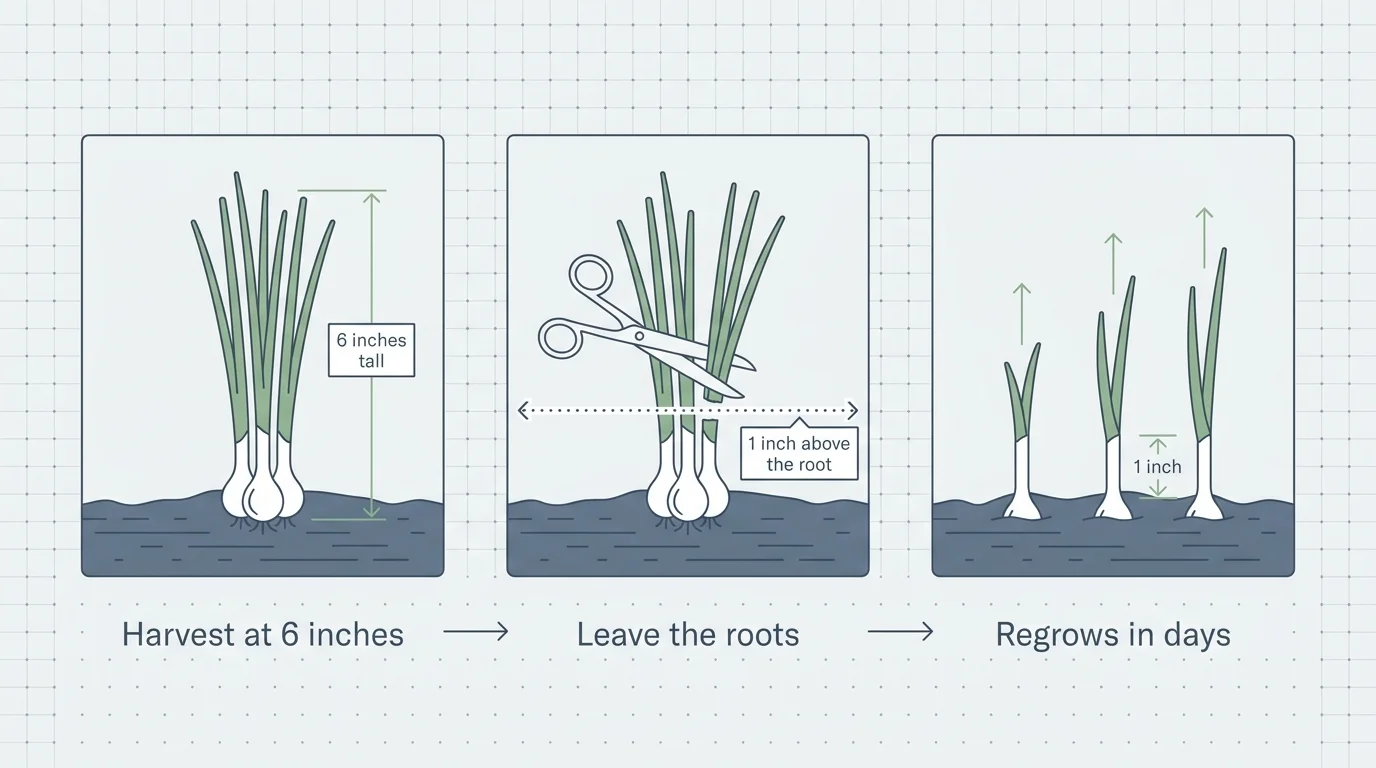
Tip #5: Green Onions (Scallions)
Green onions, frequently called scallions, offer an incredibly fast path to flavorful garnishes and savory additions to your home-cooked meals. When you plant onion sets—which are dormant, miniature onion bulbs—you can harvest robust green onions in just three to four weeks. These resilient, adaptable alliums demand very little physical space, making them perfect for tucking into the empty corners of your raised beds or growing alongside other sprawling vegetables. Their strong, pungent scent also acts as a highly effective natural pest deterrent, confusing and repelling insects that might otherwise feast on your vulnerable leafy greens.
Press the dry onion sets about an inch into the soil, leaving the pointy tip slightly exposed to the warming sun. Space them just an inch or two apart, as you will harvest them long before they ever form large, mature bulbs below the surface. Green onions tolerate a wide range of soil conditions, though they heavily prefer a spot with excellent drainage and plenty of direct sunlight. You can even harvest them by simply snipping the green tops with scissors and leaving the white root base securely in the soil; the plant will miraculously regenerate a brand new set of leaves in just a few short days. This remarkable regenerative property makes them a top-tier, economical choice for any low-maintenance home garden setup.
Tip #6: Arugula
Arugula brings a gourmet, peppery bite to your dining table at lightning speed. This zesty green races from a tiny seed to a full harvest in as little as 30 to 40 days. Many novice gardeners mistakenly believe that specialty greens require advanced horticultural skills or climate-controlled greenhouses, but arugula practically grows itself in standard outdoor conditions. It thrives beautifully in cool weather and easily tolerates partial shade, making it a highly versatile option if your available growing space does not receive full, blazing sun all day long.
Scatter the tiny seeds directly over the prepared soil and lightly cover them with a mere dusting of fine earth. Keep the seedbed consistently moist, and you will typically see germination in roughly five days. Arugula roots remain quite shallow, so consistent, gentle watering is absolutely crucial to keep the leaves tender and prevent them from developing an overly sharp, overwhelmingly bitter flavor profile. Harvest the leaves when they are about two to three inches long for the mildest, most delicate taste. If you accidentally allow the plant to flower as temperatures rise, do not pull it immediately; the small white and purple blossoms are entirely edible and look visually spectacular when scattered over a fresh summer salad. Roquette is a classic, deeply dependable variety that consistently produces vigorous, flavorful foliage with minimal effort.
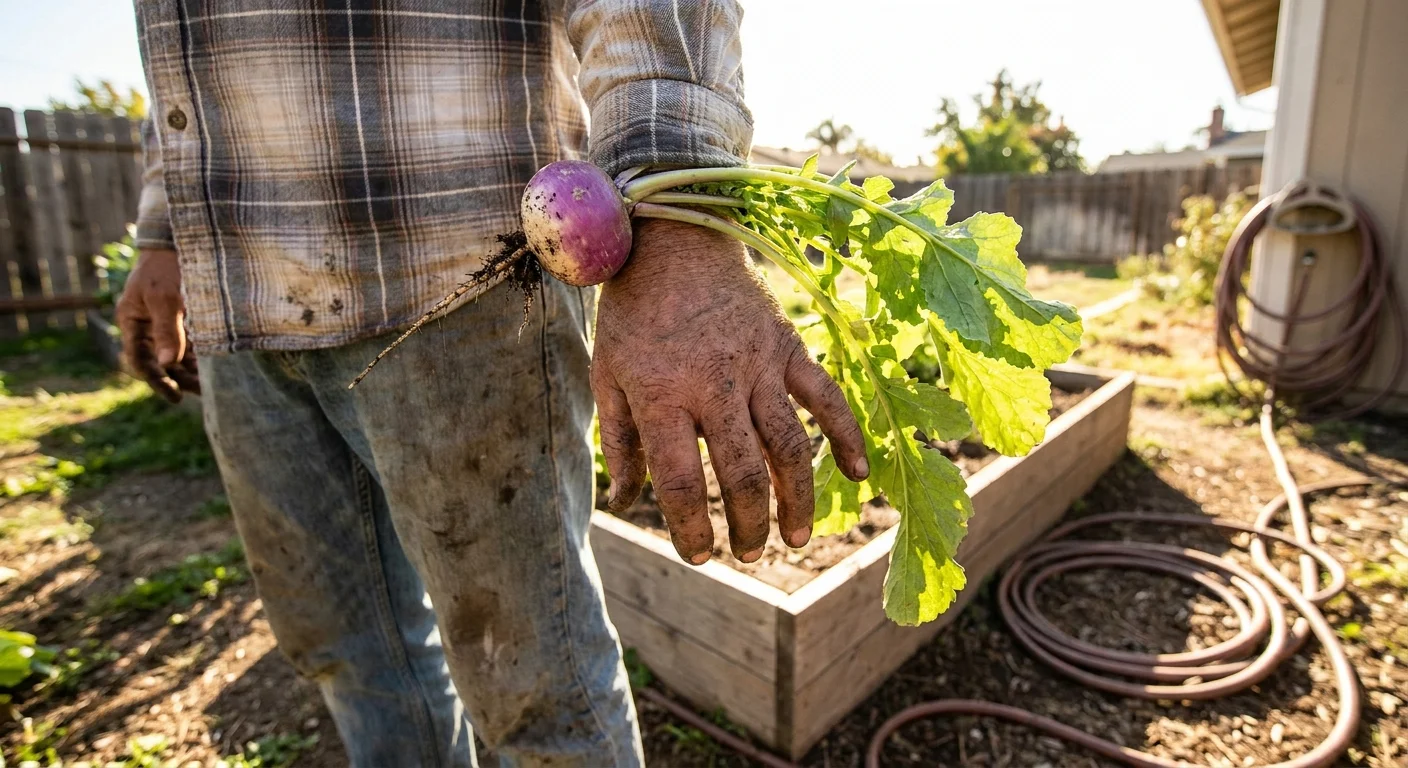
Tip #7: Turnips
Turnips provide a brilliant two-for-one harvest that maximizes your garden’s overall productivity in a remarkably short timeframe. You can harvest the spicy, highly nutritious leafy green tops in just 30 days, while the sweet, tender roots reach full maturity in about 45 to 50 days. This incredible dual utility makes turnips exceedingly rewarding for anyone actively trying to get the absolute most yield out of a small backyard plot. Modern cultivated varieties boast a mild, buttery flavor that bears absolutely no resemblance to the tough, aggressively bitter root vegetables of the past.
Plant your turnip seeds directly in the garden soil, spacing them roughly two inches apart in neat rows. As they sprout and establish themselves, thin the seedlings to give the remaining roots a full four inches of horizontal space to swell without restriction. Do not discard those freshly thinned seedlings; toss them directly into your evening stir-fry or fresh salad bowl. Turnips strongly prefer loose, well-amended soil that allows their taproots to expand downward without hitting compacted clay or hidden rocks. Purple Top White Globe remains a universally beloved heirloom variety, but for lightning-fast growth and unbeatable reliability, Tokyo Cross hybrid turnips stand far above the rest. They quickly produce pure white, golf-ball-sized roots that require zero peeling and offer a satisfying, crisp texture reminiscent of a fresh apple.
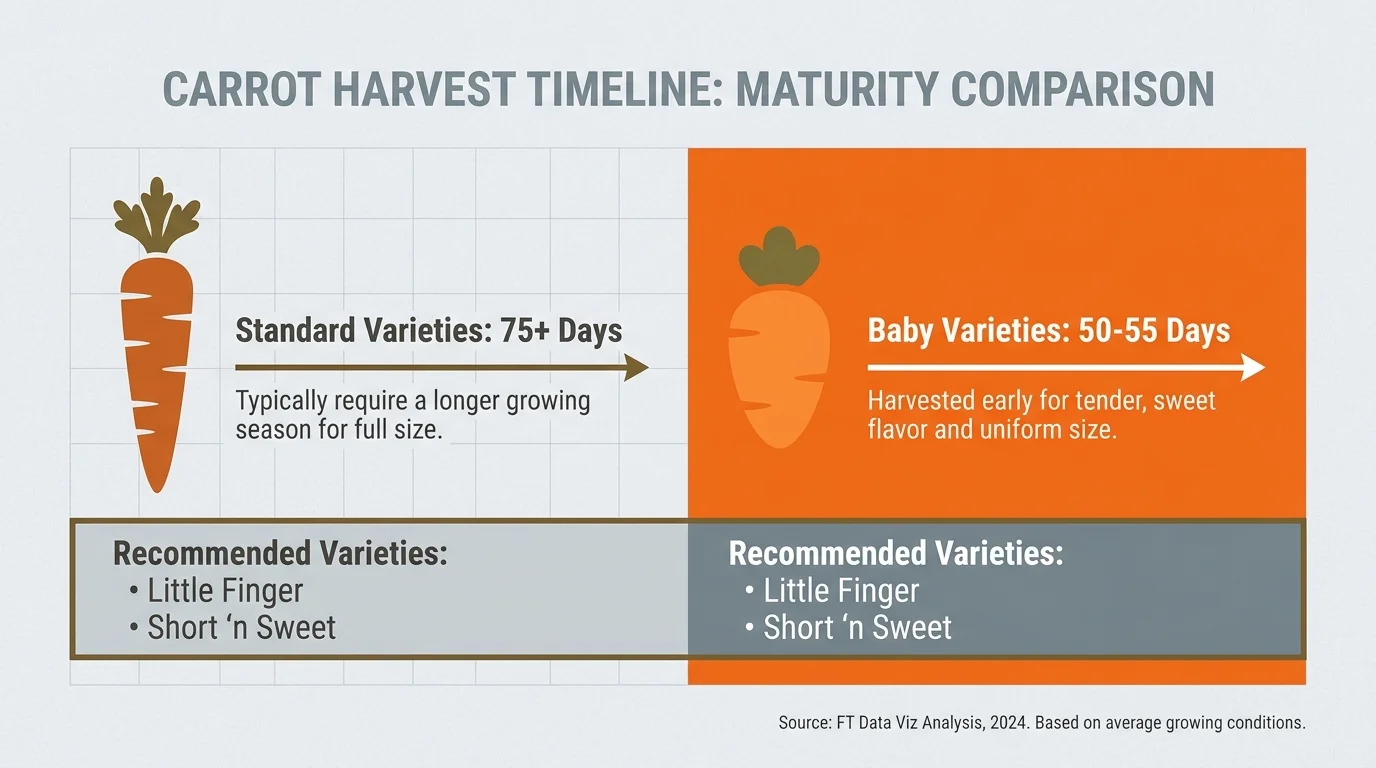
Tip #8: Baby Carrots
While standard grocery store carrots often require up to three full months to mature, specialized baby carrot varieties race to the harvest finish line in just 50 to 60 days. These miniature root vegetables pack all the sweet, earthy flavor of their full-sized counterparts into a highly compact, fast-growing package. Their significantly shorter roots mean they are far less demanding of perfectly deep, loose soil conditions. This forgiving trait makes them an excellent, accessible choice for senior gardening, as they thrive beautifully in elevated raised beds or large patio pots that require zero painful bending or kneeling to properly tend.
Carrot seeds are notoriously slow to germinate, often taking up to two agonizing weeks to finally sprout. To reliably speed up this process, you must keep the soil surface continuously damp until the feathery green tops appear. Covering the newly seeded area with a light wooden board or a piece of damp cardboard for the first few days naturally helps retain that necessary surface moisture. Once the plants establish themselves, they require deep, infrequent watering to encourage the taproots to reach deeply downward. Varieties like Little Finger or Paris Market—which actually produce adorable, completely round carrots—completely bypass the heavy clay soil problems that typically cause larger traditional carrots to fork, twist, and deform.
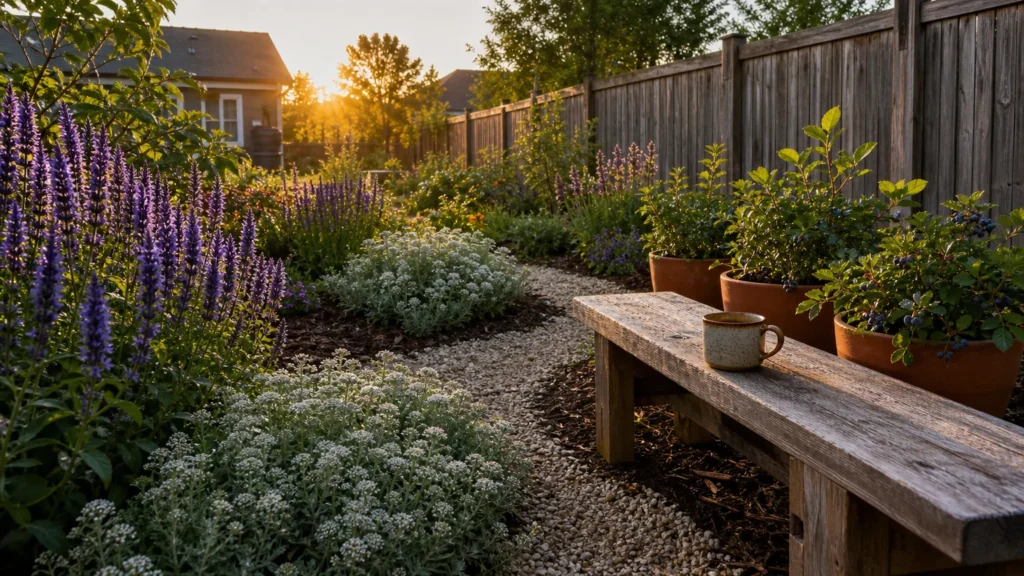
Putting It All Together: Enjoy Your Beautiful Garden
Transforming a patch of bare soil or a collection of empty patio pots into a thriving source of fresh food feels like a genuine, profound accomplishment. By focusing your early efforts on these rapid-growing crops, you easily bypass the steep learning curves and frustratingly long waiting periods that frequently discourage first-time growers from sticking with the hobby. You gain immediate, positive feedback, rewarding your dedicated watering and weeding efforts with a tangible, delicious harvest in a matter of weeks.
Start your new hobby small by selecting just two or three of these fast-maturing vegetables to plant during this upcoming season. Take the time to properly prepare your soil, follow the exact spacing guidelines printed on your seed packets, and dedicate a few peaceful minutes each day to checking soil moisture and observing plant growth. As you snip your first fresh lettuce leaves or pull up that very first brightly colored radish from the earth, you will finally understand the deep, quiet satisfaction that comes from tending your own crops. Gardening is a lifelong, continuous learning process, but with these speedy, reliable plants beautifully anchoring your garden beds, your initial foray into growing your own food will undoubtedly yield brilliant, delicious results.
For region-specific advice, consult your local University Extension program (find yours via the USDA directory). For plant databases and inspiration, visit the Missouri Botanical Garden or the Royal Horticultural Society.
Frequently Asked Questions
Do fast-growing vegetables need heavy fertilizer to grow quickly?
Because they reach maturity so rapidly, fast-growing vegetables typically require very little supplemental fertilizer compared to long-season crops like tomatoes or pumpkins. If you begin your gardening journey with high-quality, well-draining soil heavily enriched with rich organic compost, your plants will have all the essential nutrients necessary to complete their short, energetic life cycles. A light, single application of a balanced, water-soluble organic fertilizer halfway through their vegetative growth phase can provide a highly helpful nutritional boost if the leaves appear uncharacteristically pale or yellow.
Can I grow these rapid-harvest vegetables indoors during the winter?
Yes, many of these rapid-growing crops adapt beautifully to indoor environments, making them perfect for year-round cultivation. Leaf lettuce, spicy arugula, and green onions are particularly successful when grown in sunny, south-facing window sills or positioned under standard LED full-spectrum grow lights. Ensure your chosen indoor pots feature adequate bottom drainage holes to prevent root rot, and actively keep the ambient room temperature reasonably cool to effectively replicate their heavily preferred outdoor spring growing conditions.
How do I stop common garden pests from eating my delicate seedlings?
Young, exceptionally tender vegetable seedlings frequently attract hungry pests like slugs, snails, and aphids looking for an easy meal. You can highly effectively protect your vulnerable new plants by utilizing floating row covers immediately after sowing your seeds into the dirt. These specialized, lightweight agricultural fabrics allow essential sunlight and rain water to reach the soil while successfully forming an impenetrable physical barrier against damaging insects. Additionally, hand-picking larger pests in the early morning dew and applying organic neem oil can safely and swiftly manage minor garden infestations.
Disclaimer: This article provides general gardening advice. Always consider your specific climate, soil conditions, and local pests. Follow safety guidelines when using gardening tools and products.